")
")


A knowledge base is a valuable online resource that can help users instantly find answers to their questions and problems. It usually covers DIY guides so people can troubleshoot most of the common problems themselves without having to depend on the support team. This can remarkably reduce support tickets and enhance customer satisfaction.
By organizing information in one place, businesses can empower users to stay engaged with their products and services. While a single knowledge base is helpful, creating multiple knowledge bases becomes mandatory when a business creates and offers various products and services.
Each one can be designed and fed with information separately for specific products, teams, languages, or user groups. If you are looking for a way to create multiple knowledge bases on your WordPress site for free, you must read this article. We’ll cover a guide on how to create multiple knowledge bases on WordPress.
Why You May Need to Create Multiple Knowledge Bases
Before jumping into the how-to part, have a few more minutes to take a quick look at why you may need to create multiple knowledge bases. Keep reading!
a. Support Multiple Products or Services
If your business offers more than one product or service, a single knowledge base can become so congested. Creating separate knowledge bases can help your content focus separately on each offering. For example, weDevs is a renowned plugin developer.
They are managing multiple knowledge bases on the same website using the weDocs plugin and serving over 600,000+ users. We will use the weDocs plugin in the following tutorial.
b. Serve Different Customer Segments
Different user groups may have unique needs, such as beginners, advanced users, or enterprise clients. Dedicated knowledge bases can allow you to write content for each audience group, improving clarity and usability.
c. Organize Content by Department or Team
Companies often need internal knowledge. Creating multiple knowledge bases can help you organize this information separately for various teams, like HR, Sales, Finance, Developers, Support, etc.
d. Manage Multilingual Support
Often, you may want to cover the same knowledge base in various languages to serve global audiences. Creating multiple knowledge bases can help you a lot in this regard. This can ensure smooth navigation and user experience.
e. Separate Public and Private Information
Some knowledge base posts might be for public users, and some for internal team members. If you face such a situation, creating multiple knowledge bases can be a good option.
How to Create Multiple Knowledge Bases on WordPress for Free
weDocs is a promising knowledge base plugin with 5,000+ active users. Using it, you can create and manage documentation or knowledge base sections on your website. It offers a simple and user-friendly interface to organize content into a three-nested hierarchical structure.
weDocs has a free and premium version. With the free version, you can create and manage unlimited knowledge bases. By upgrading to the premium version, you can enjoy more advanced features, like enabling chatbot, assistant widget, knowledge base permission management, etc. Explore weDocs vs weDocs Pro.
Let’s now for the tutorial, explore how to create multiple knowledge bases on WordPress for free using the light version of the weDocs plugin.
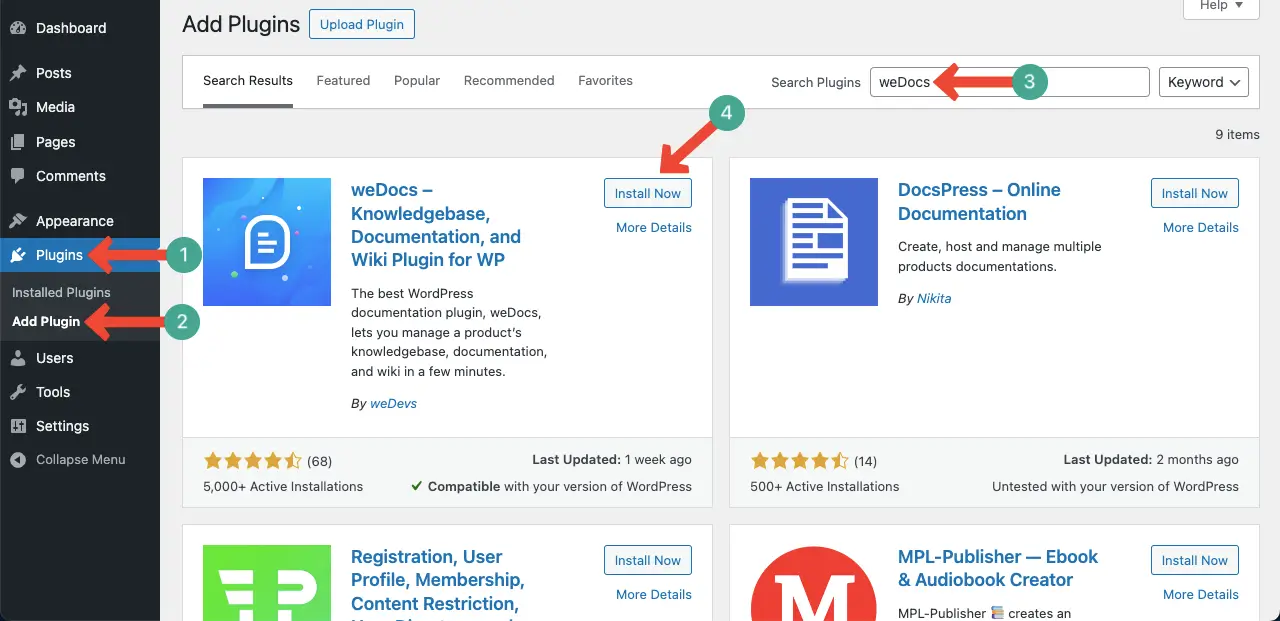
Step 01: Install weDocs on Your Site
Go to the WordPress dashboard. Then, navigate to Plugins > Add Plugin. Type weDocs in the search bar on the top-right corner. Once the plugin appears, install and activate it.
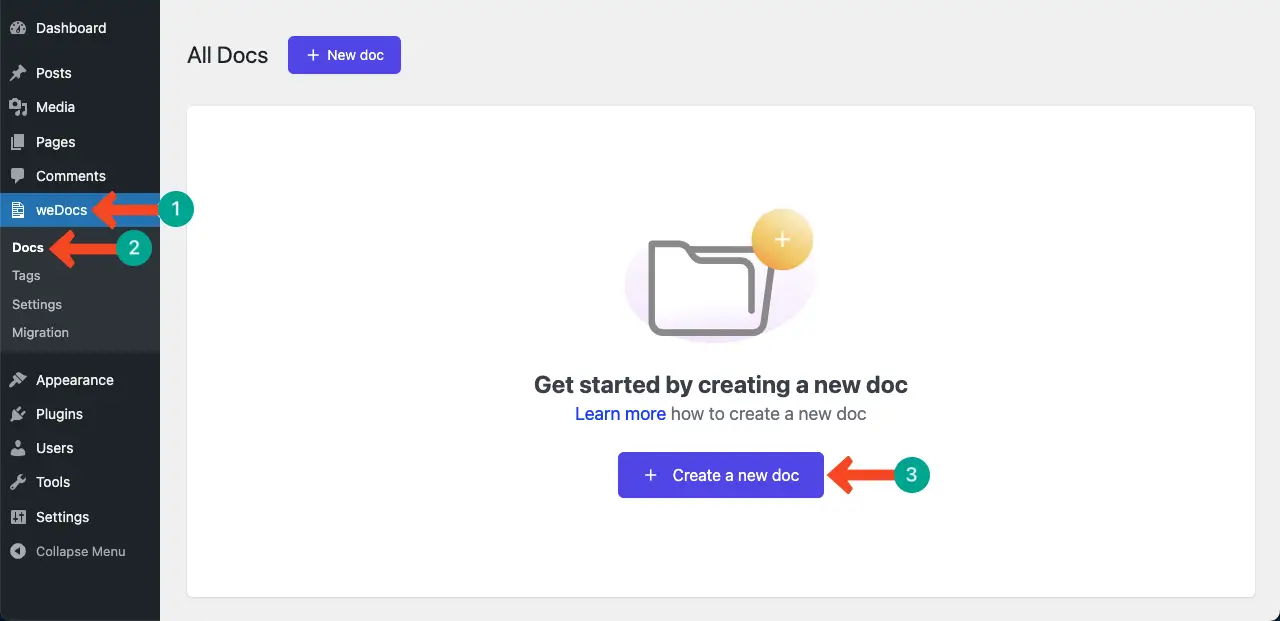
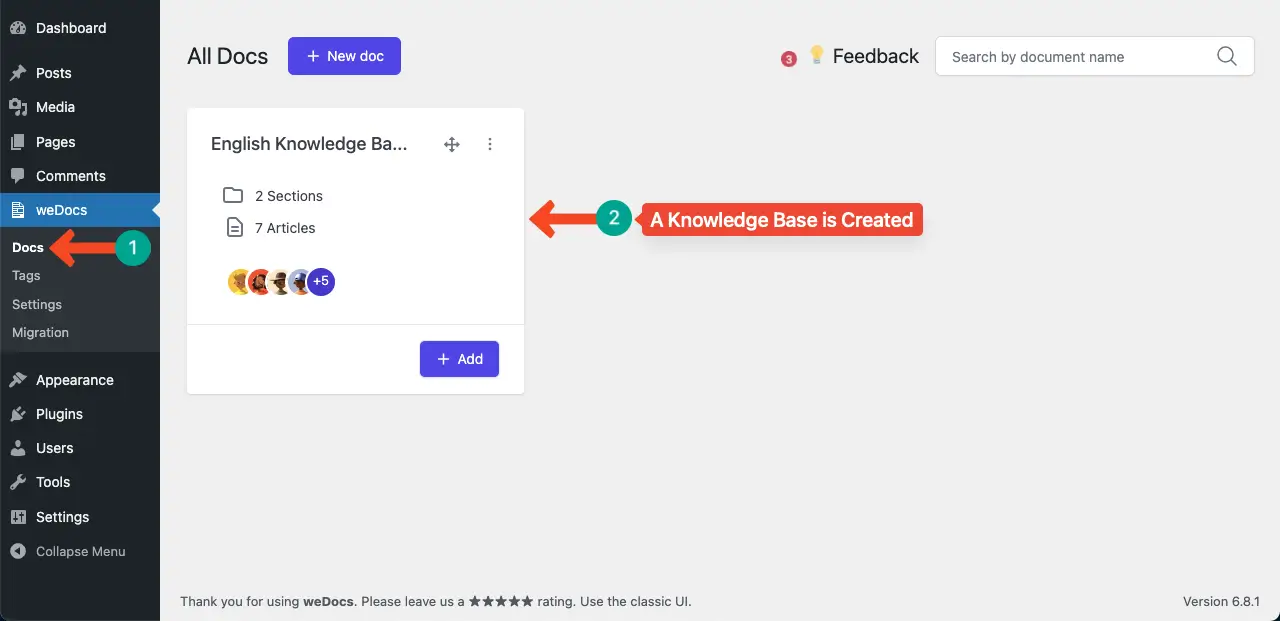
Step 02: Create a Knowledge Base
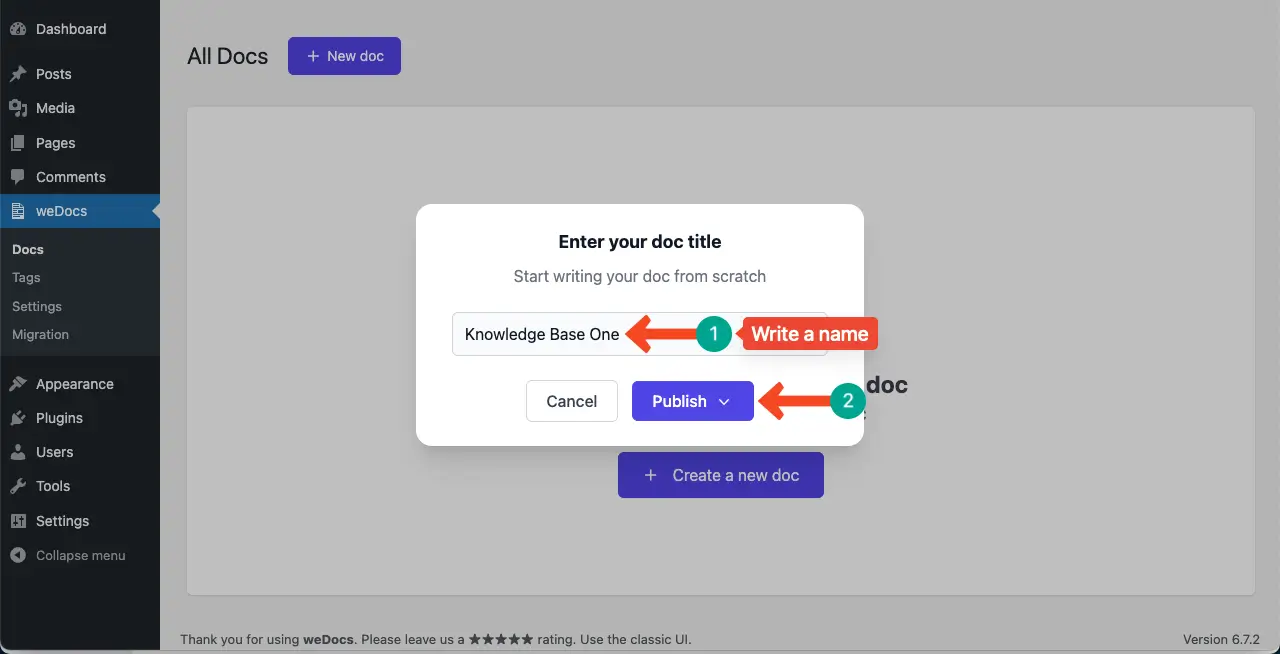
Now, go to weDocs > Docs. You’ll come to the doc creation page. Click the + Create a new doc button.
A popup will open. Write a name for the knowledge base. You may instantly publish the knowledge base by clicking the Publish button.
Note: You may save the knowledge base in the draft. To do this, just hover your cursor over the Publish button. You’ll get the draft option. But for the tutorial, we’re selecting the publish button.
# Add New Section for the Knowledge Base
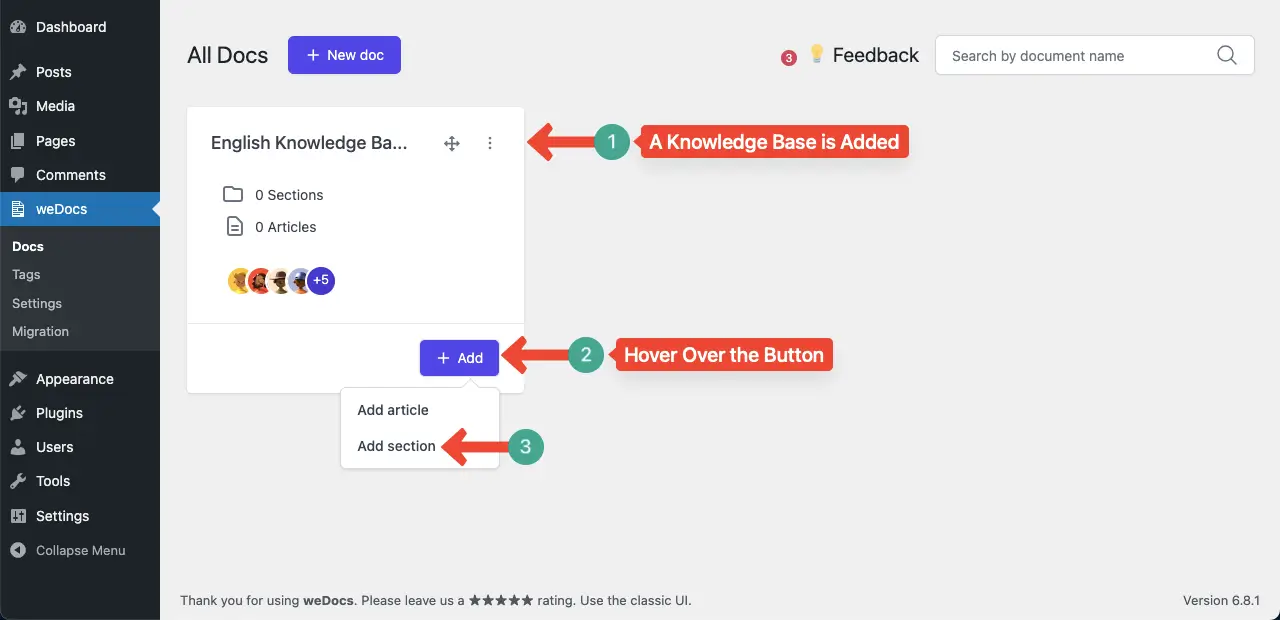
You’ll see that a knowledge base has been added. Now, hover over the + Add button. You’ll see two options have appeared – Add article and Add section. Click on the Add section option.
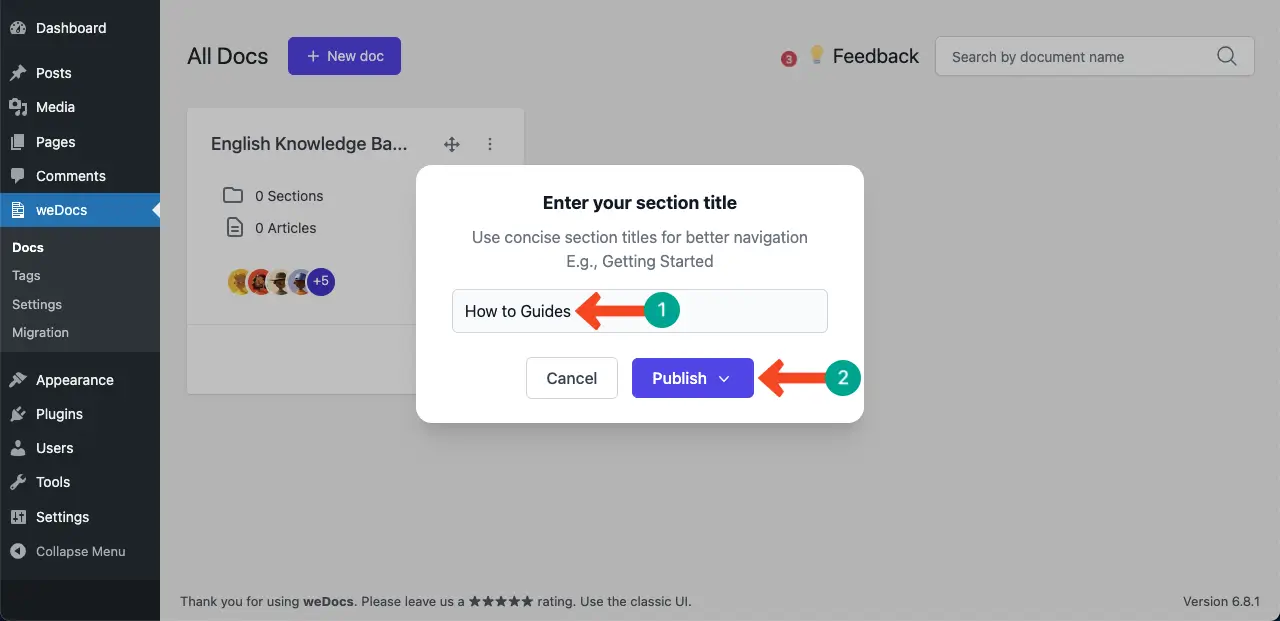
In the same way, a popup will open. Write a name in the box and click the publish button. This will be saved as the name for the section.
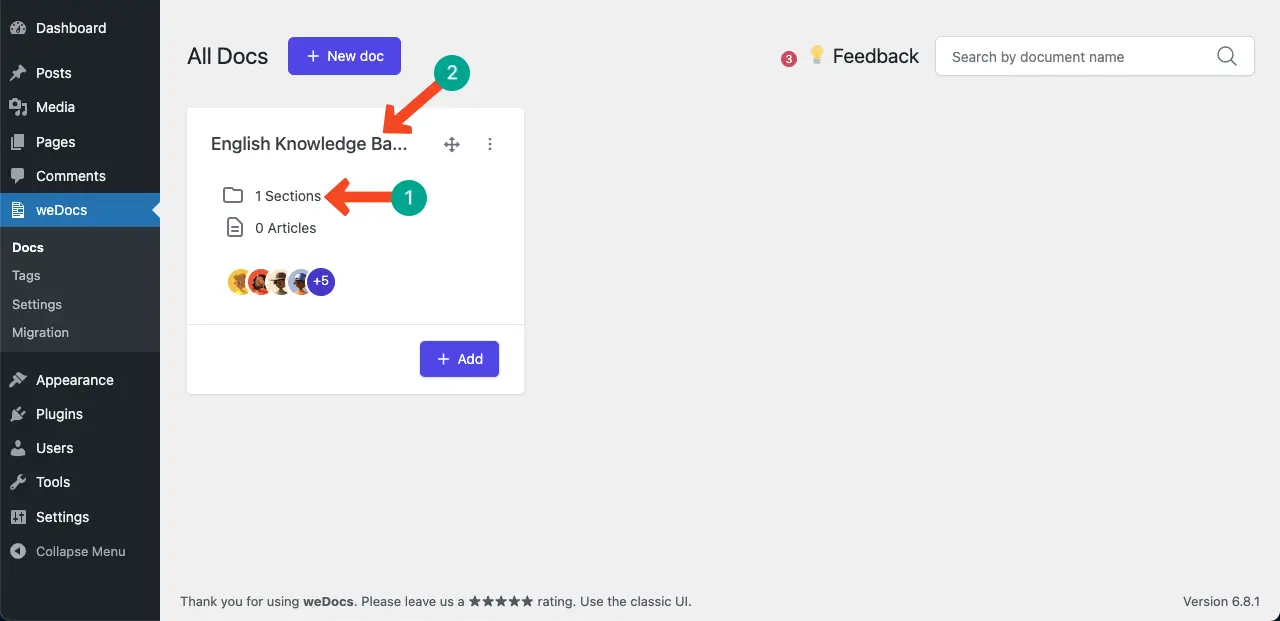
You’ll see the section has been added to the knowledge base. Now, open the knowledge base by clicking on its name.
# Add Articles to the Knowledge Base
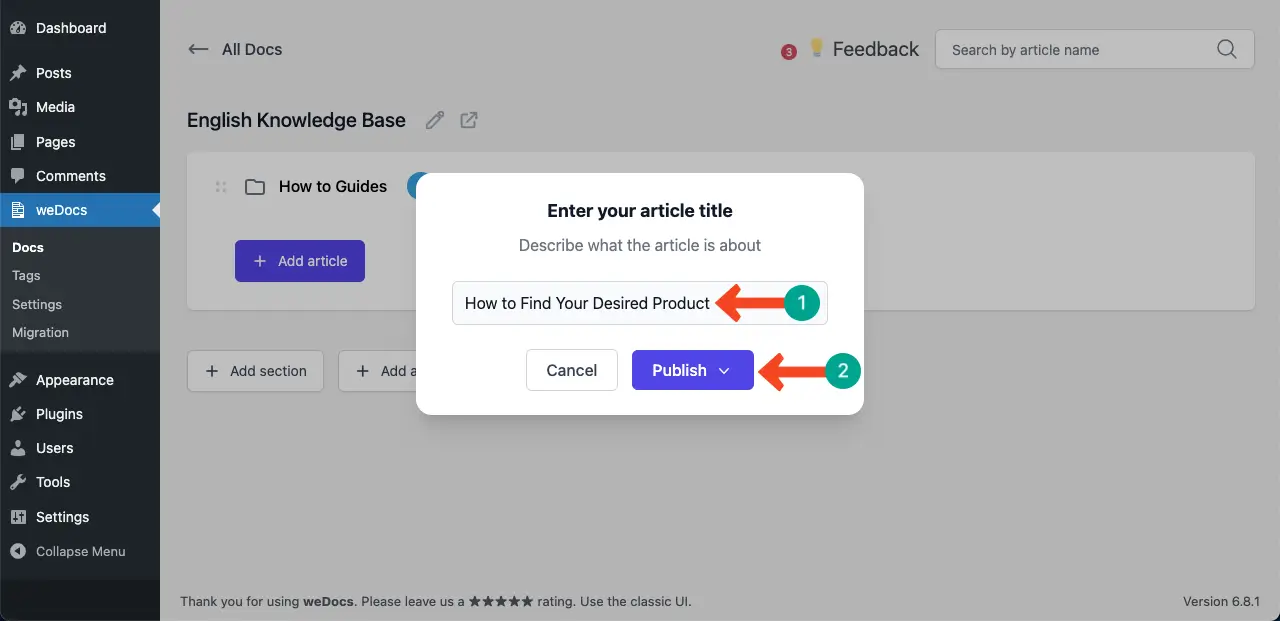
It’s now time to add posts to the knowledge base. Click the + Add article button.

In the same way again, a popup will open. Write your article’s name in the box and publish it.
# Add Content to the Knowledge Base Post
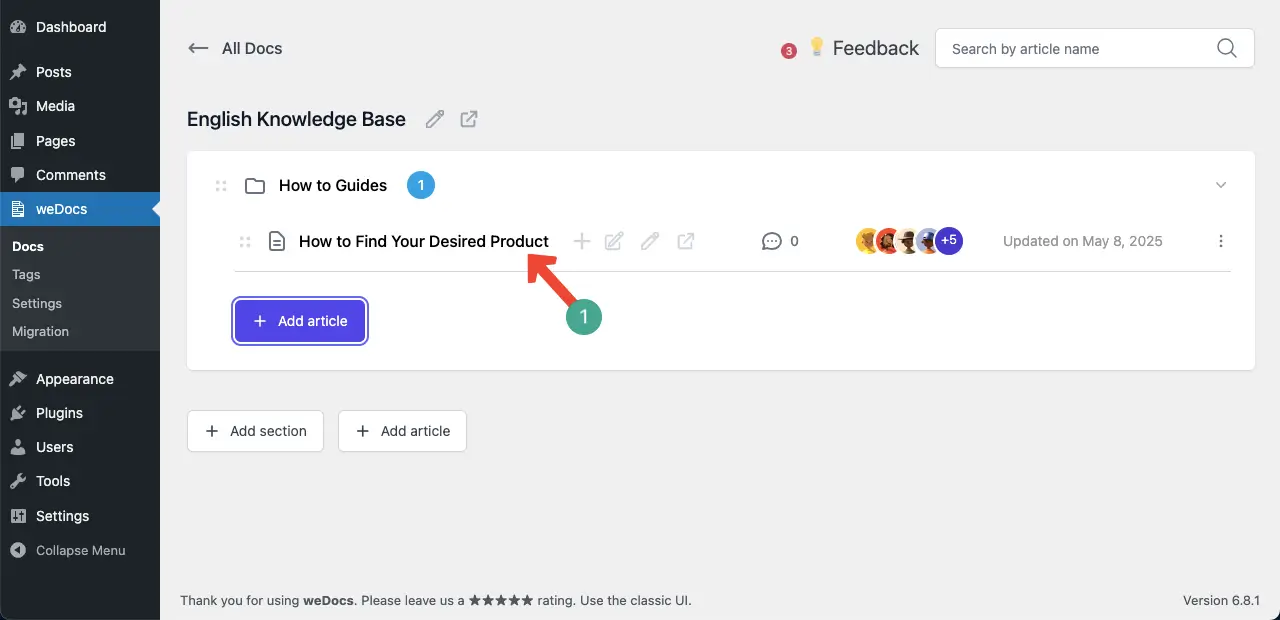
You can see that the article has been added to the knowledge base. Click on the article’s title.
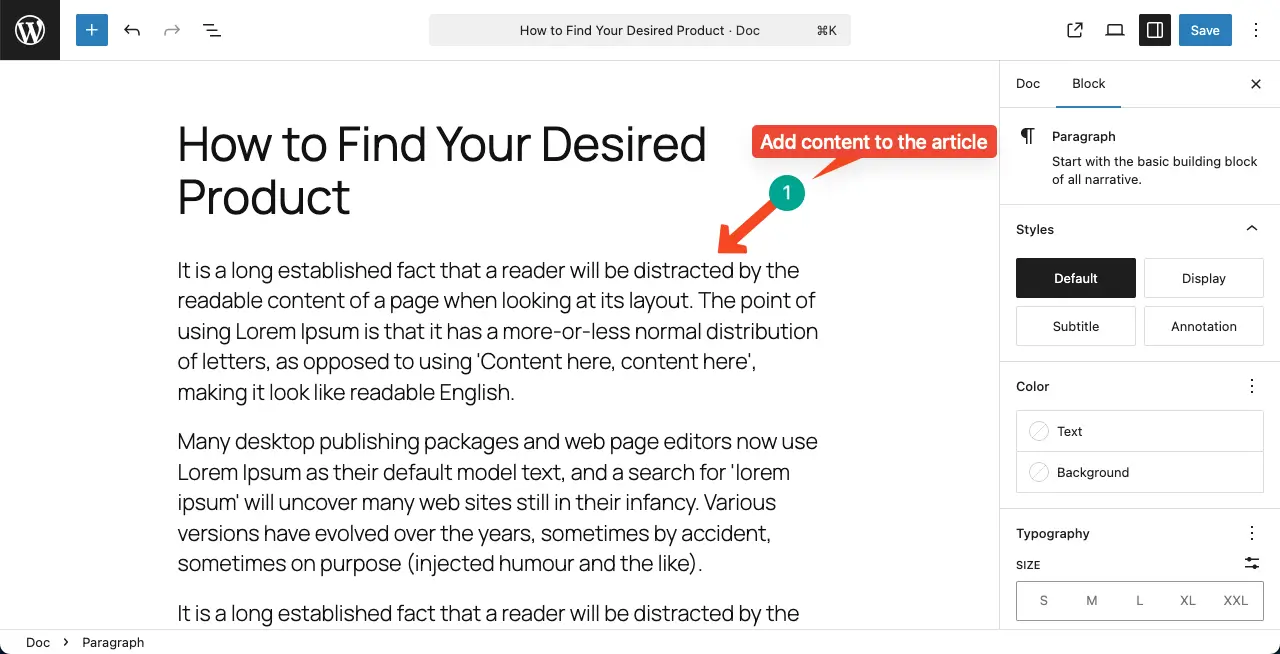
You’ll come to the editor. Add content to the editor and save this once it’s done. This will be saved as the knowledge or documentation post.
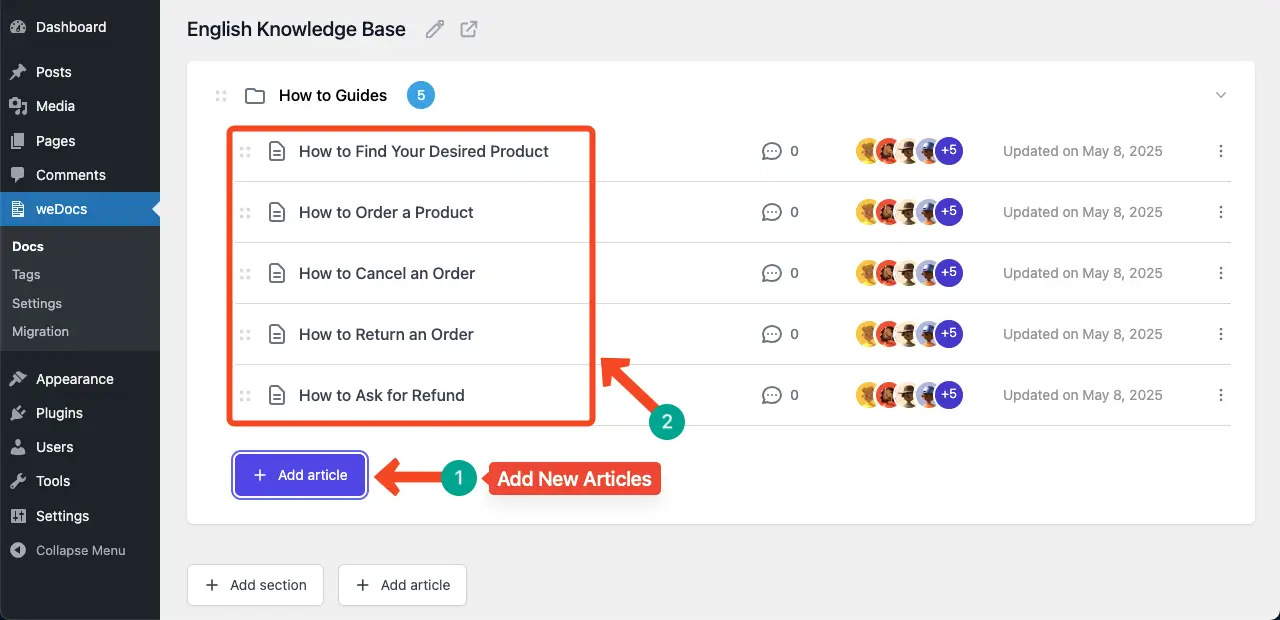
By clicking the + Add article button, add as many articles as you want under the section of the knowledge base.
# Add Multiple Sections to the Knowledge Base
You can even add multiple sections and assign new articles separately to them using the weDocs plugin. To do this, click the + Add Section button. Then, create new articles by clicking the + Add article button. You’ll get an option to choose the section you want for the new articles.
Hope you can do it yourself.

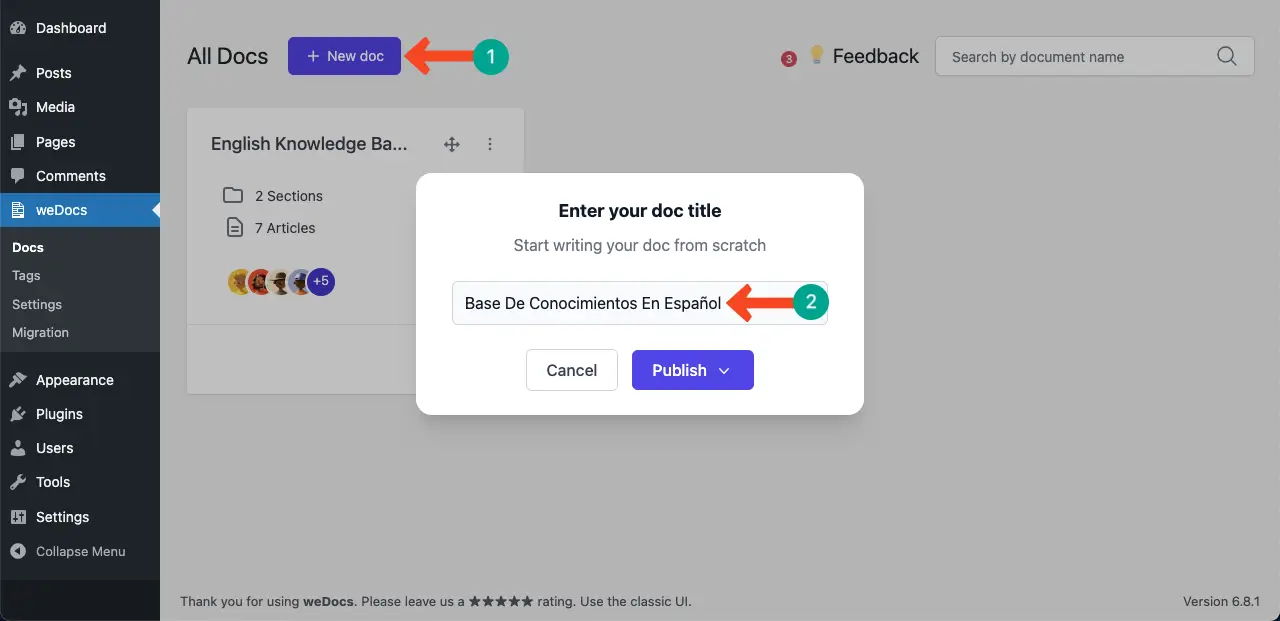
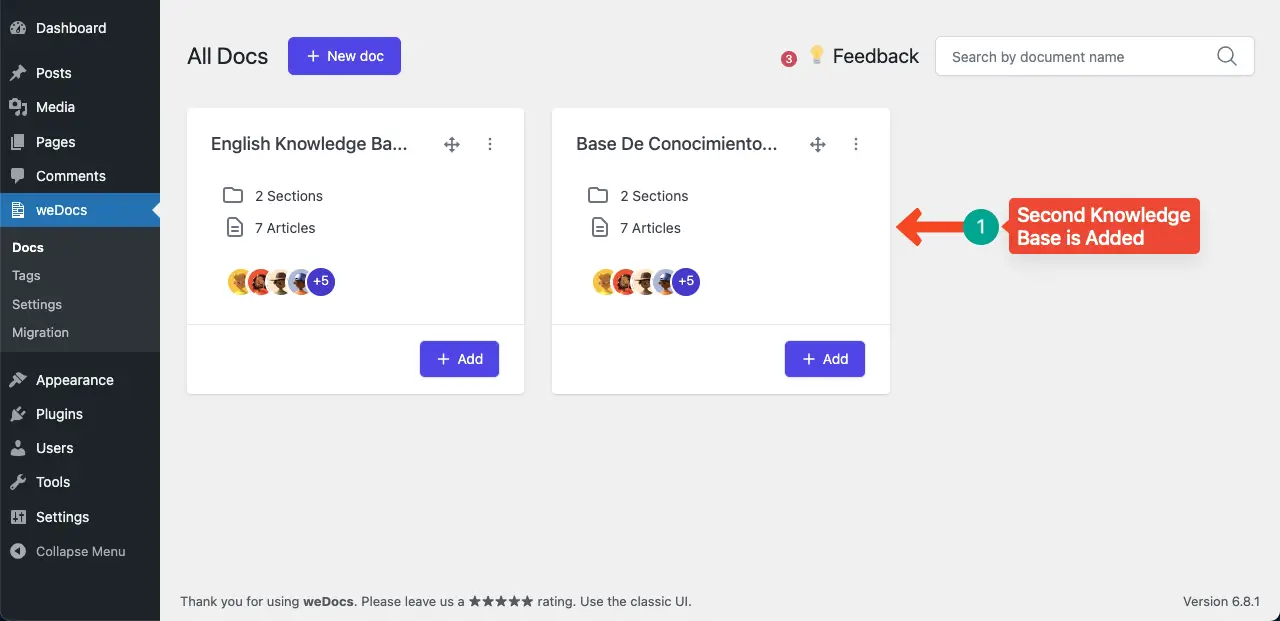
Step 03: Add Multiple Knowledge Bases
Come to the Docs tab on the admin menu bar. You’ll see the knowledge base that you have created just a while ago.
Now, to create the second knowledge base, click the + New doc button on top. Write a name for the new knowledge base.
For the tutorial, we’ll create the new knowledge base in the Spanish language. After the title is added, hit the Publish button.
In the same way, add sections and articles to the new knowledge base as described above. Hope you can do it following the step-by-step guide covered above.
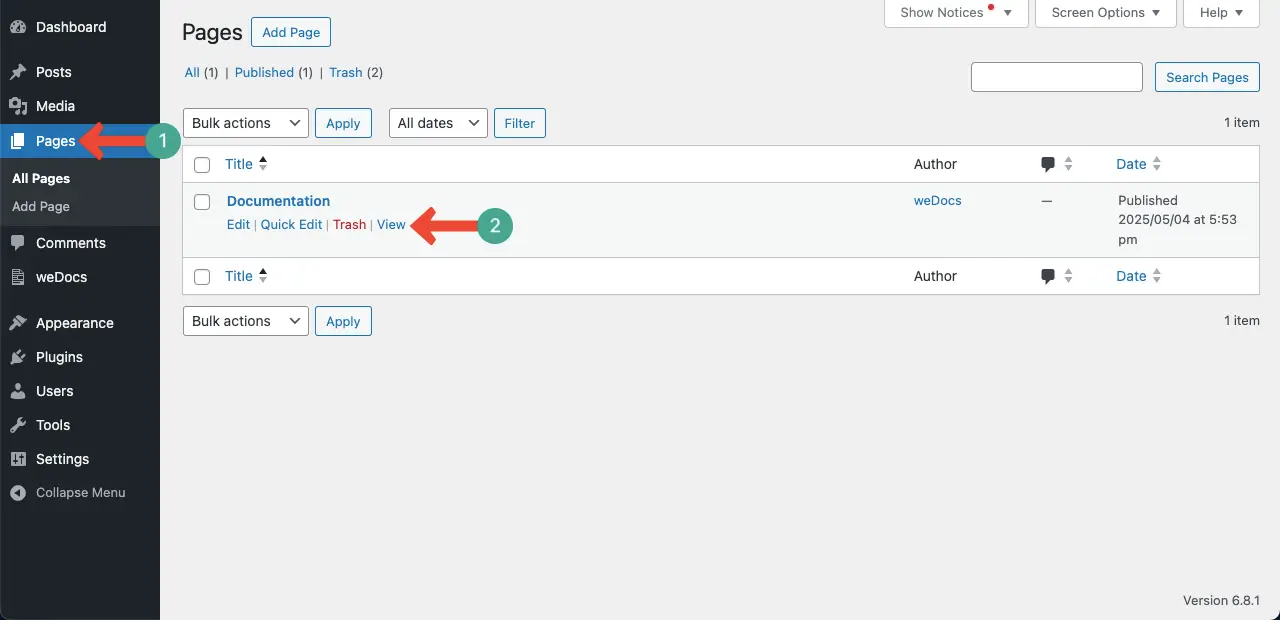
Step 04: Preview the Knowledge Base
To preview how the knowledge base looks on the frontend, go to Pages. Now, click the View option of the Documentation page.
You’ll preview the knowledge base on the frontend. The design and layout don’t look good, right? You have to optimize its layout so it looks good on the forntend.
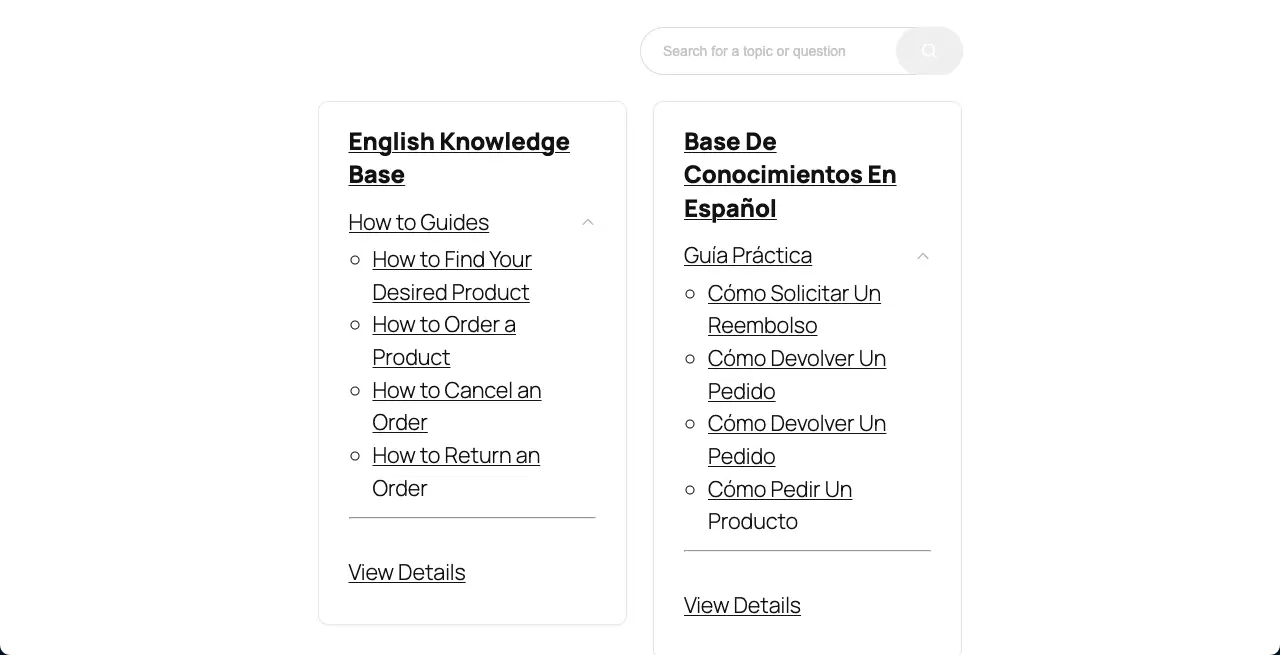
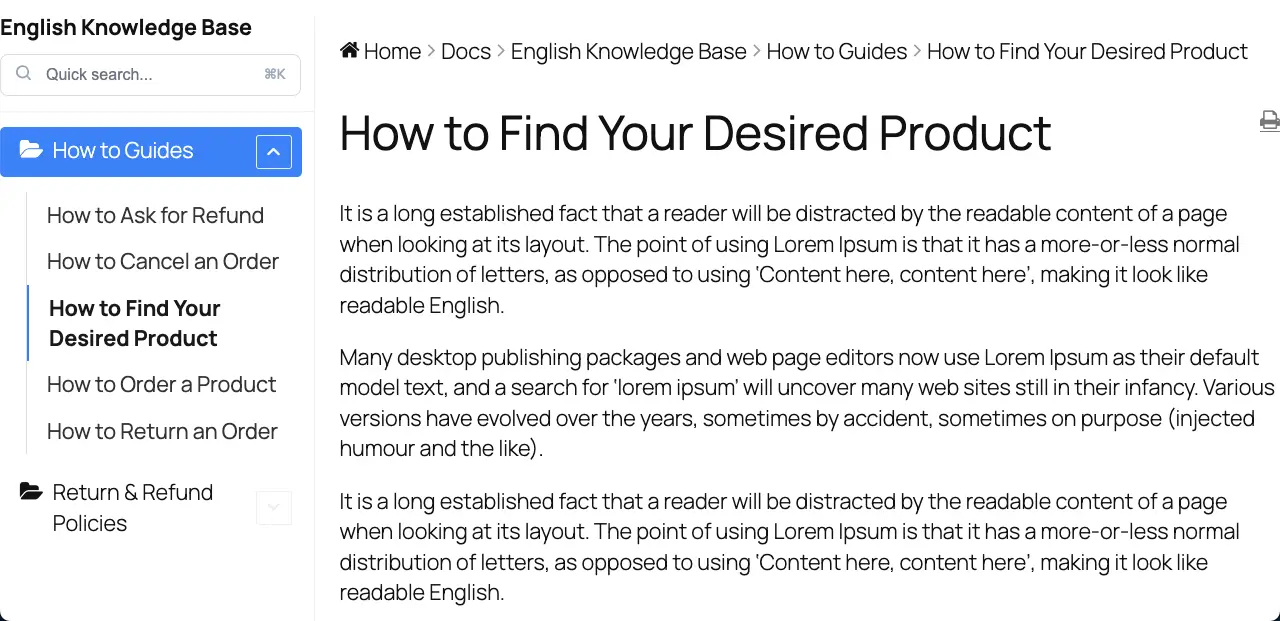
Open a knowledge base post to check how it looks. This one also looks odd, isn’t it?
Step 05: Optimize the Knowledge Base Appearance
There are two ways you can optimize the appearance of your knowledge base.
- Changing the WordPress theme
- Using the Layout & Styles option of weDocs
# Changing the WordPress Theme
Each WordPress theme comes with its own set of font styles, typography, line spacing, page content box width, etc. So, the theme you choose will surely affect the appearance of your knowledge base.
This is why you should use a suitable theme that offers more options to let you customize the typography, font family, sidebar, and content layout.
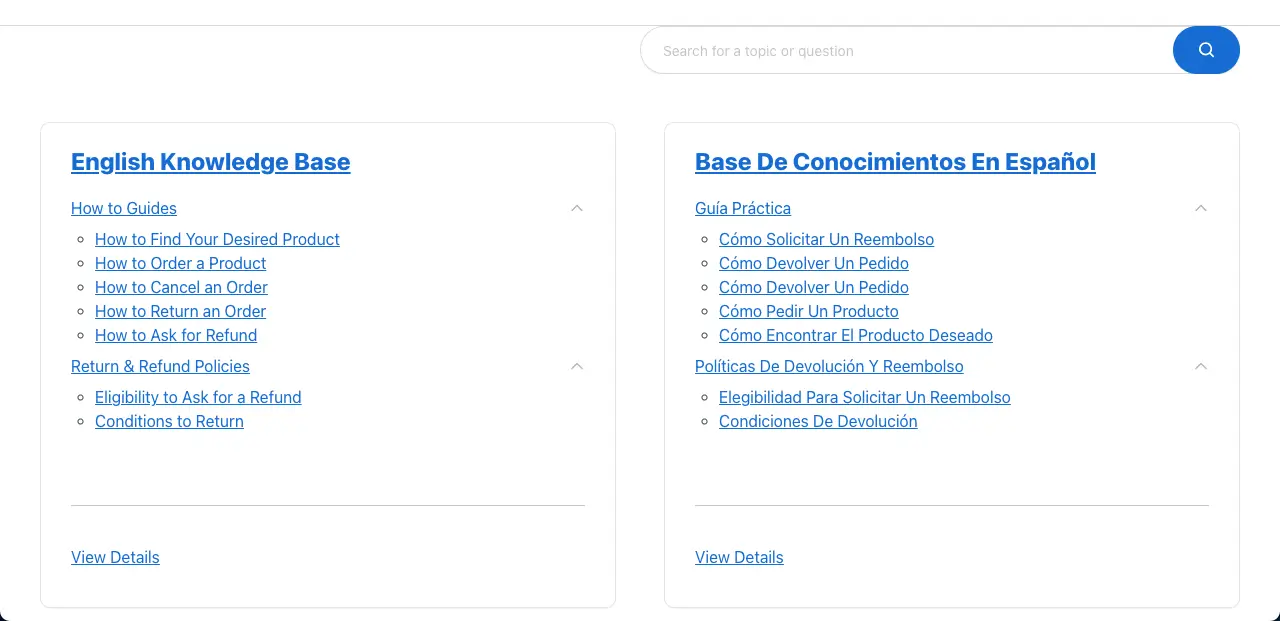
The theme we used for the above part of the tutorial was the default WordPress Twenty Twenty Five. Let’s now change it to Astra. Come to the frontend of the knowledge base. You’ll see a better layout, isn’t it?
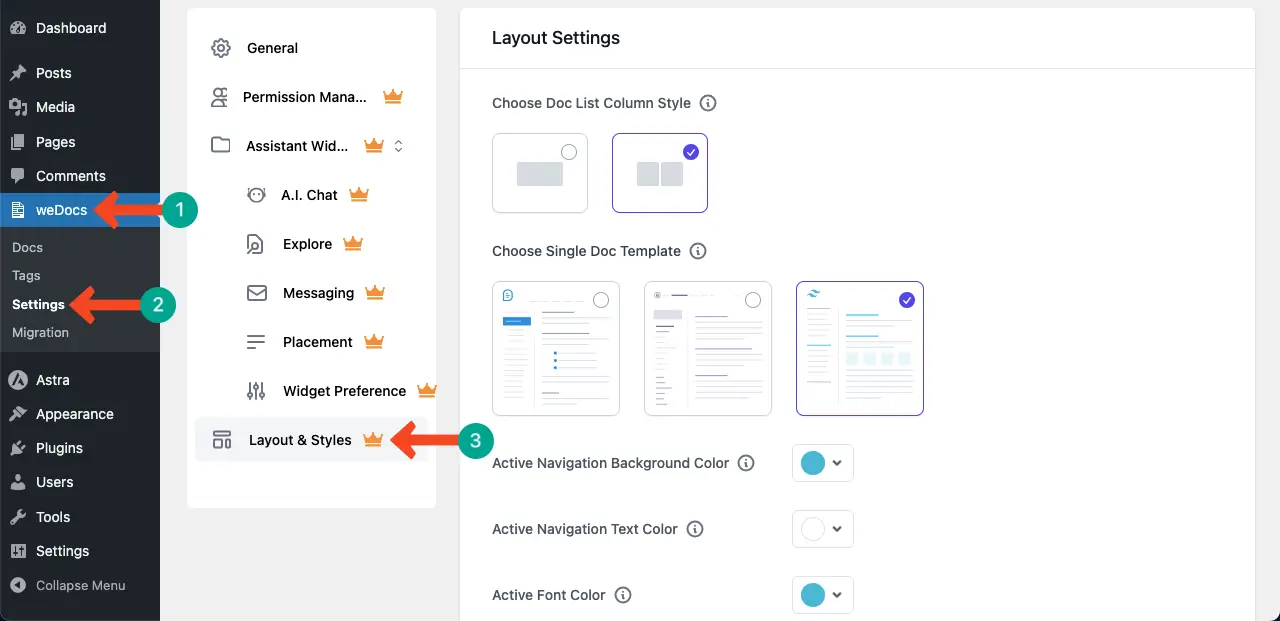
# Using the Layout & Styles option of weDocs
After the theme configuration is done, you can take the knowledge base appearance one step further using the native Layout & Styles option of the weDocs plugin.
But this Layout & Styles is a premium feature of the plugin. You need to install and activate the following to get access to this feature.
Check how to use weDocs for offering 24/7 eCommerce customer support.
How to Create a Wonderful Knowledge Base Page
Do you want to create a stunning, eye-catching knowledge base page like the one below? In this section, we’ll show you how to do this. Even if you are a no code user, you can do this easily.
You will need some web design tools. With Elementor and HappyAddons you can do it. Because both of them have a free and a premium version. You can create such a stunning page for your knowledge base using the free versions of the plugin. Follow the guide explained below.
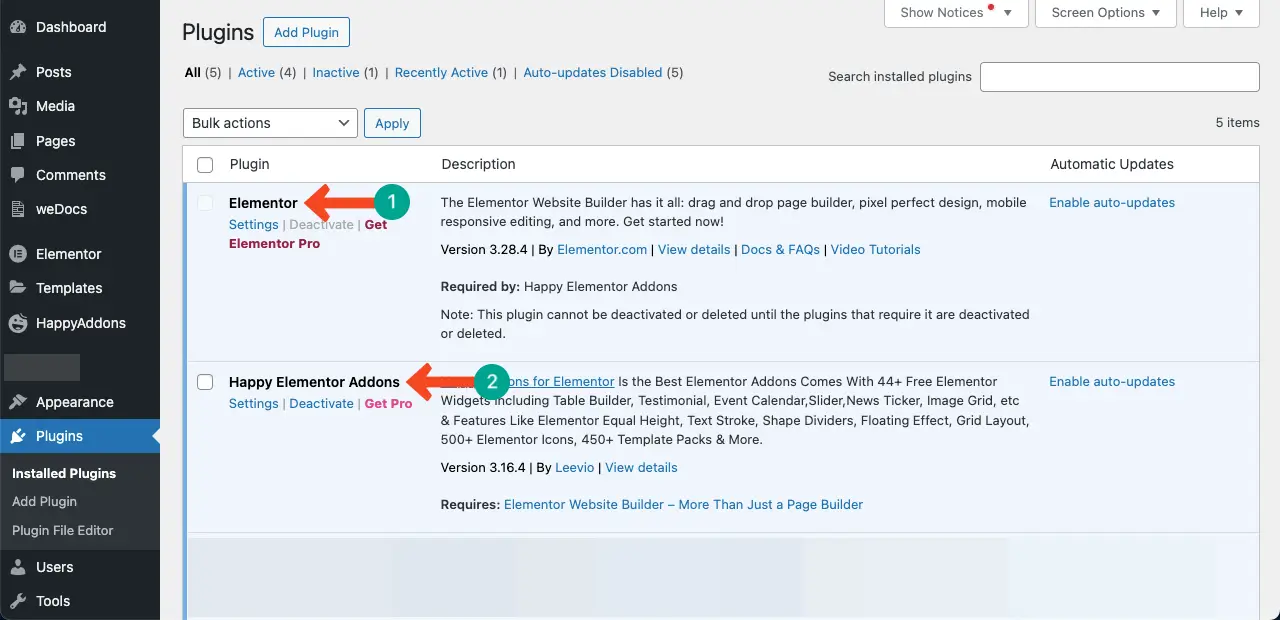
Step 01: Install Elementor and HappyAddons Free Plugins
As already said, install and activate the Elementor and HappyAddons plugins on your site.
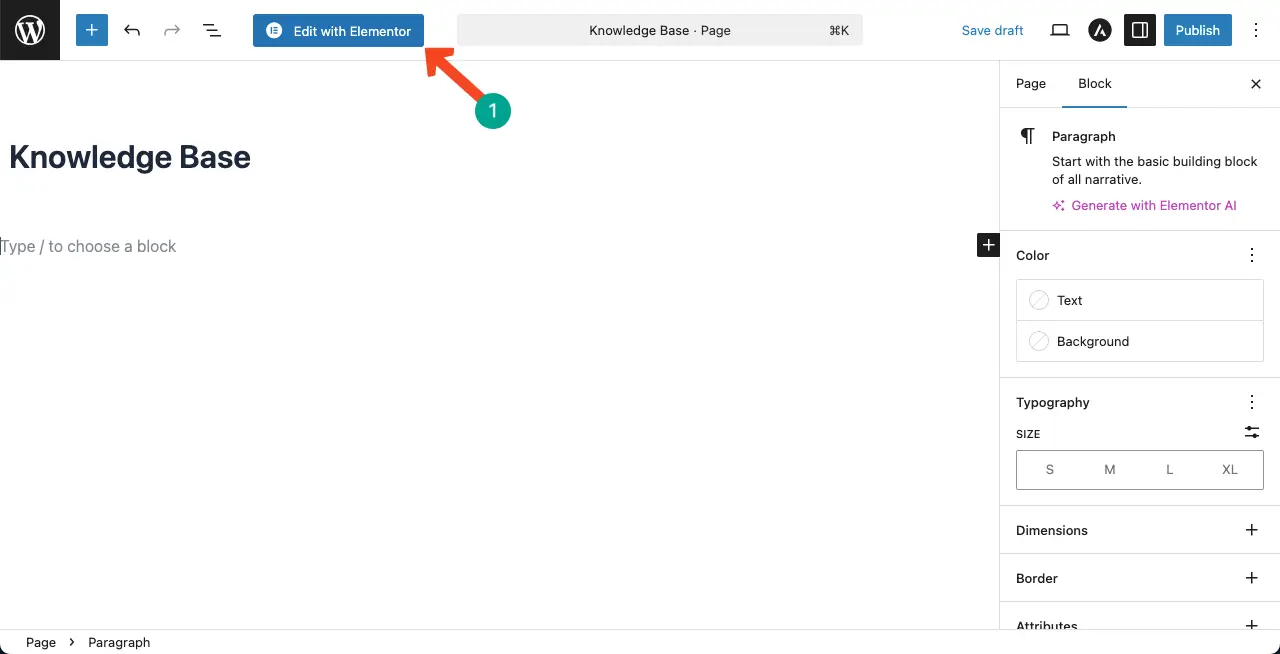
Step 02: Open a Page with Elementor Canvas
Open a new page with Elementor Canvas.
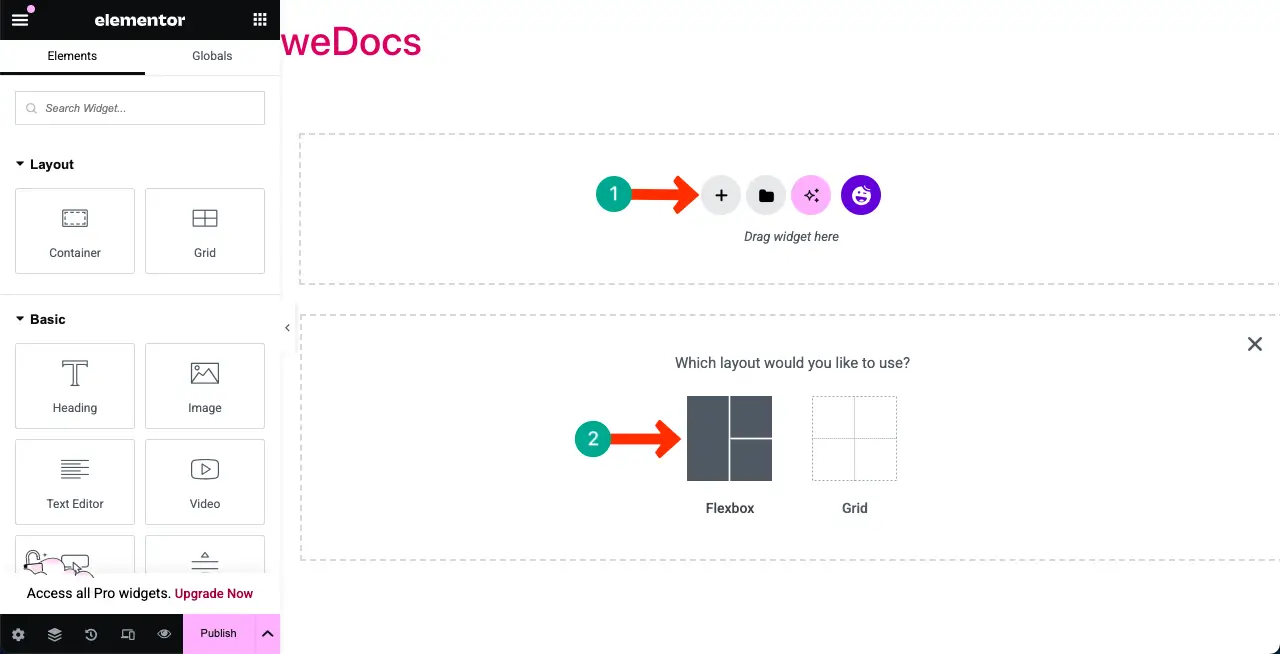
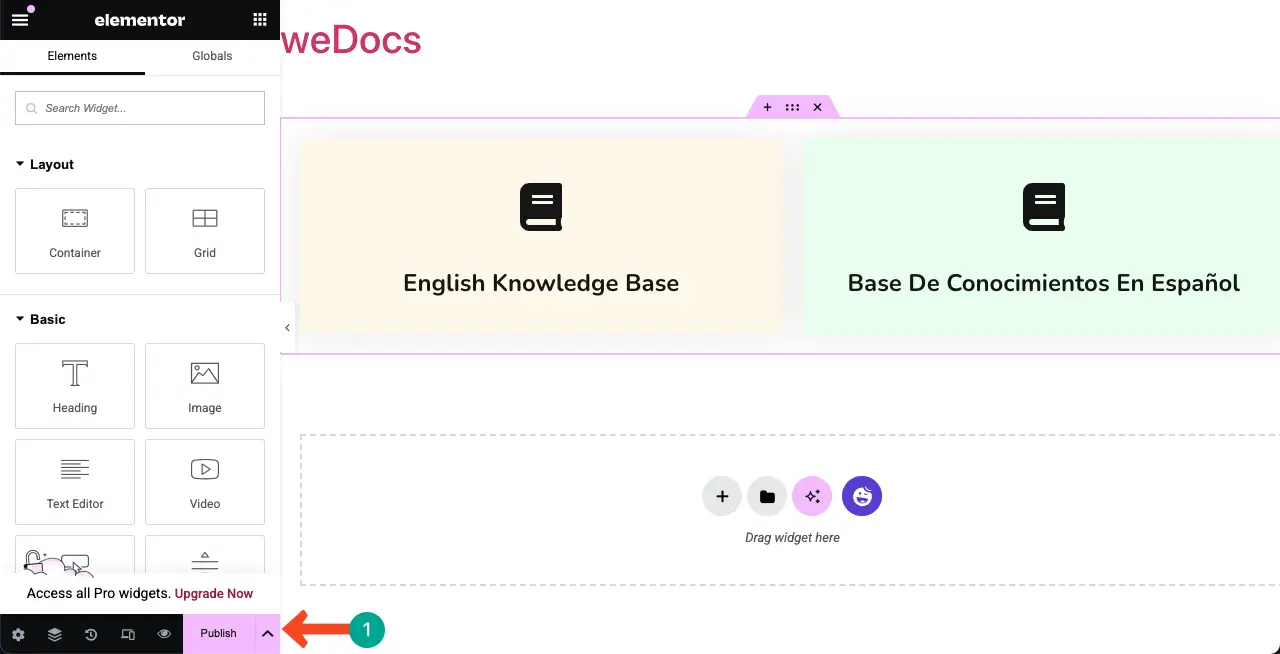
Step 03: Create a Section
You need to create a container/section where you should create the design. Click the plus (+) icon. It will show you two options – Flexbox and Grid. Choose the Flexbox option.
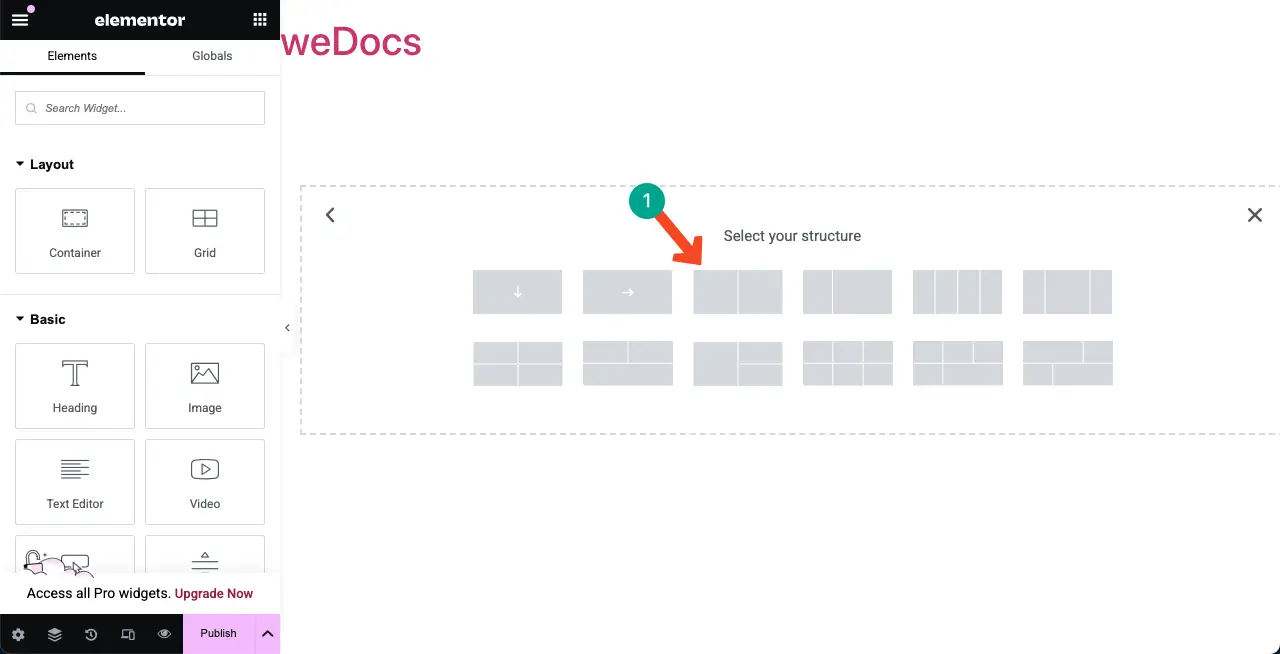
Select the column structure you want. As we currently have two knowledge bases, we are selecting the two-column structure. You can select anyone as your requirements.
Step 04: Add the Icon Box to the Container
Find the Icon Box on the Elementor Panel. Drag and drop it into the flexbox container.
You’ll see the Icon Box widget has been added to the canvas.
Step 05: Optimize and Stylize the Icon Box
Change the icon that matches your knowledge base. You can change the icon from the Icon Type option. Write the name of your knowledge base in the Title section. Centrally align the wiget.
Come to the Style tab. From this tab, you can customize the Icon Size, Padding, Bottom Spacing, Typography, Font Family, Icon Color, and various other options. Hope you do it easily.
To set a background color for the Icon Box widget, go to the Advanced Tab. Expand the Background section. Choose a color you want to set for the widget’s background.
Step 06: Link Your Knowledge Base to the Icon Box Widget
Go to your knowledge base and copy the link.
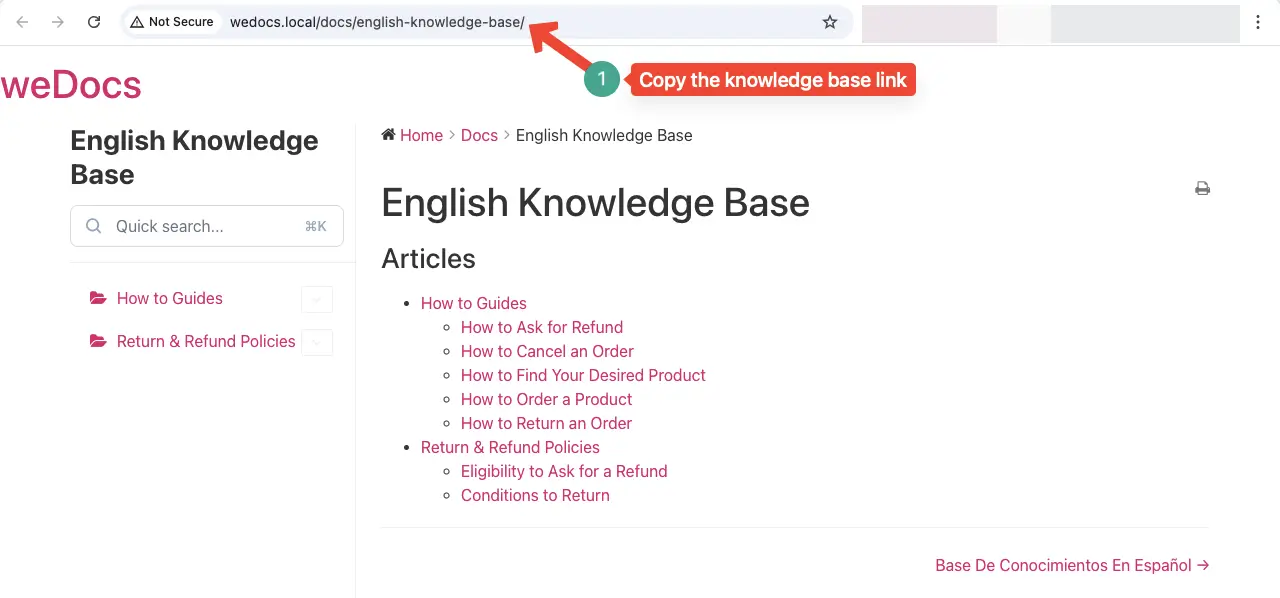
Go to the Content tab. Expand the Wrapper Link section. Paste the link you have copied into the box.
In the same way, add and design the other knowledge bases using the widget’s styling and customization options.
Once done, publish the design.
Step 07: Preview the Knowledge Base Page
Now, go to the frontend of the page and click on a knowledge base. You’ll be taken to the respective knowledge base.
As we have briefly covered the tutorial, we didn’t give more time to customizing the Icon Box for stylizing the knowledge base. Kindly visit the Icon Box page to get more ideas on the types of designs you can create with it.
Closing Up!
Creating multiple knowledge bases isn’t just about organizing content. It’s about empowering your users with clarity, confidence, and control. When customers can easily find the answers they need, they feel more connected to your brand and are more likely to stick around.
Whether you’re managing several products, supporting teams internally, or serving a global audience, multiple knowledge bases can transform the way you deliver help and value. With the right tools in place, like weDocs, you can scale your support and create a smoother, smarter user experience.
However, by upgrading to the premium version of the plugin, you can enable various exciting widgets and make it a valuable tool for your support team.
Subscribe to
weDocs blog
We send weekly newsletters,
no spam for sure!