
Most users don’t read documentation from top to bottom. They scan. They search. Then they leave.
Studies show that over 60% of users abandon a help page if they don’t find a relevant answer within the first few seconds. Another common pattern is even more telling. Users often leave documentation to search on Google or open a support ticket, even when the answer already exists in the knowledge base.
This creates three problems at once. Higher support load. Poor product adoption. Frustrated users.
The Assistant Widget in weDocs is designed to fix this gap.
Instead of asking users to navigate complex menus or rely only on search, the widget brings help directly into the documentation experience. It guides users, highlights useful content, and offers a direct way to ask questions without leaving the page.
The goal is simple. Help users find answers faster, with less effort.
How the Assistant Widget Enriches Your Knowledge Base and Improves Customer Experience
The Assistant Widget does more than sit on the page. It actively improves how users interact with your documentation.
Here’s how it makes a real impact.
- Improves content discovery: The Explore tab surfaces helpful or selected articles right away. Users don’t need to guess where to start. Popular or important docs appear first, which reduces search time and confusion.
- Reduces support dependency: When users can quickly find relevant articles, they are less likely to open support tickets. This helps support teams focus on real issues instead of repeated questions.
- Adds a direct communication layer: The Messaging option lets users reach out from inside the documentation. No need to hunt for a contact page or support form. This lowers friction and increases the chance that users will actually ask for help instead of leaving.
- Keeps users inside the knowledge base: A guided experience means users stay on your site longer. This improves engagement, lowers bounce rates, and builds trust in your documentation as a reliable resource.
- Creates a smoother customer experience: Faster answers lead to better product understanding. Better understanding leads to higher adoption. Over time, this results in happier users and fewer support issues.
In practice, the Assistant Widget turns documentation into an interactive experience. Not just a place to read articles, but a place where users feel guided, supported, and confident.
Step to Add the Floating Contact Form/Assistant Widget in Your Knowledgebase
Adding the assistant widget or the floating contact form feature in weDocs is very easy. We will show you-
The weDocs assistant widget has three major parts:
- Explore
- Messaging
- Appearance
Let’s check out them one by one!
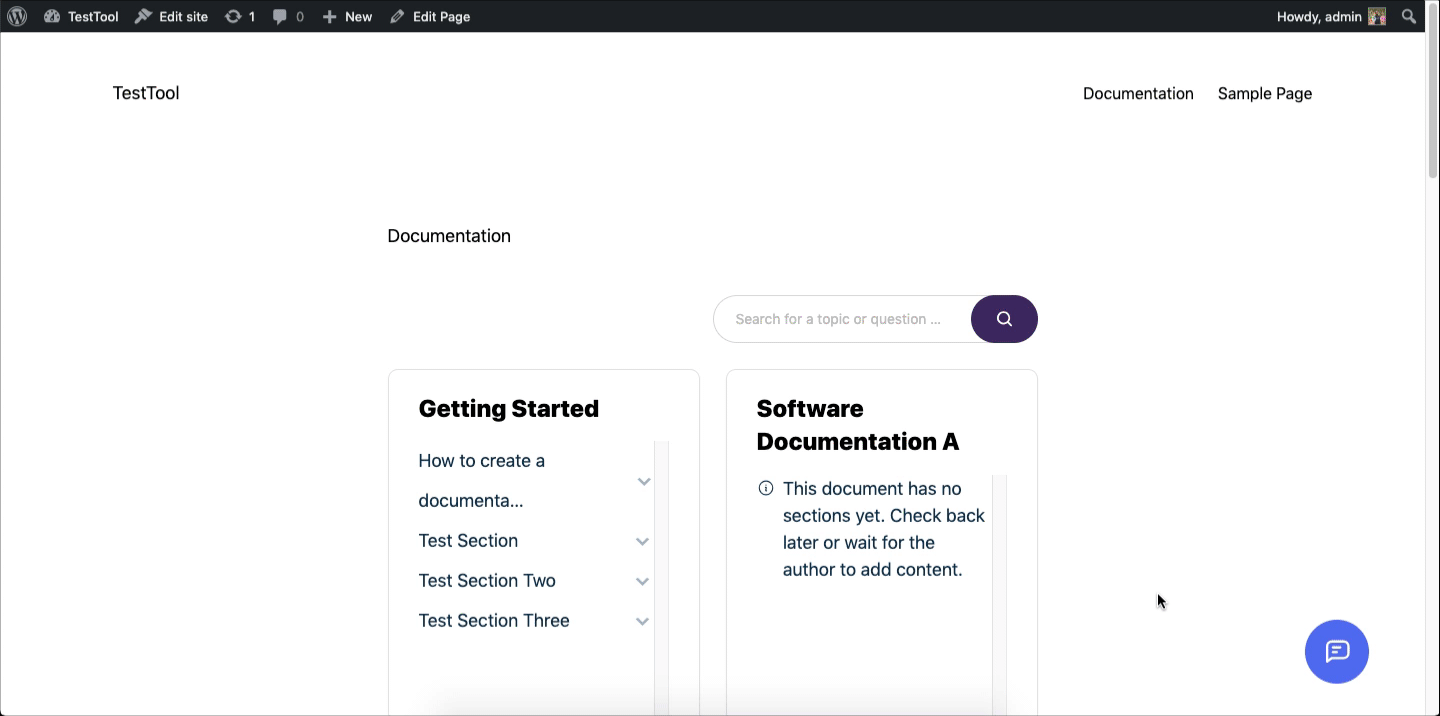
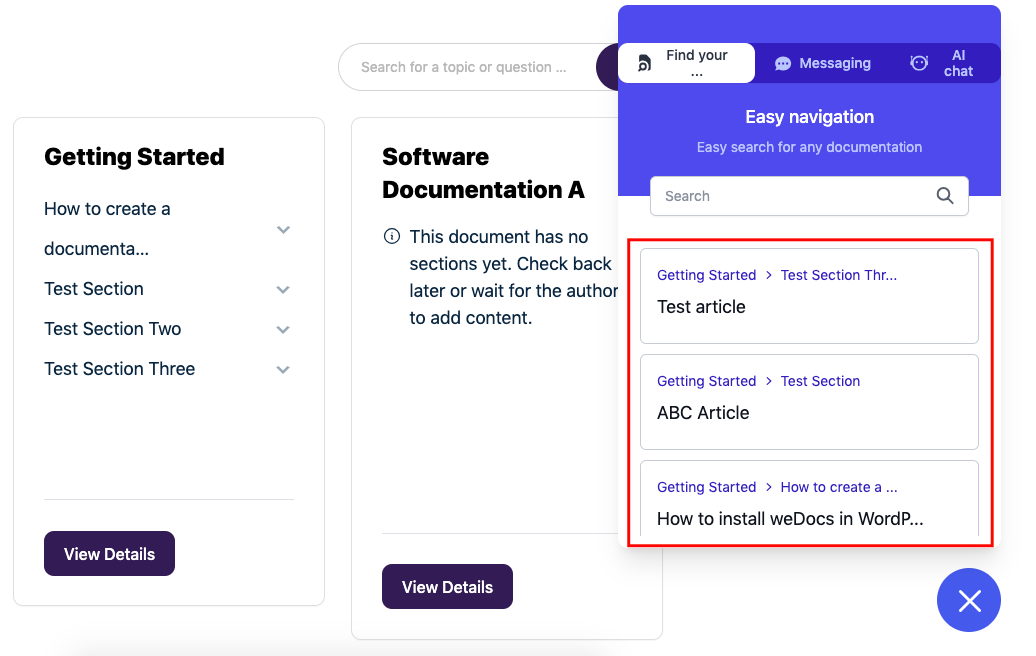
How to customize the Assistant Widget of WordPress documentation
Here’s the front overview of the assistant widget!
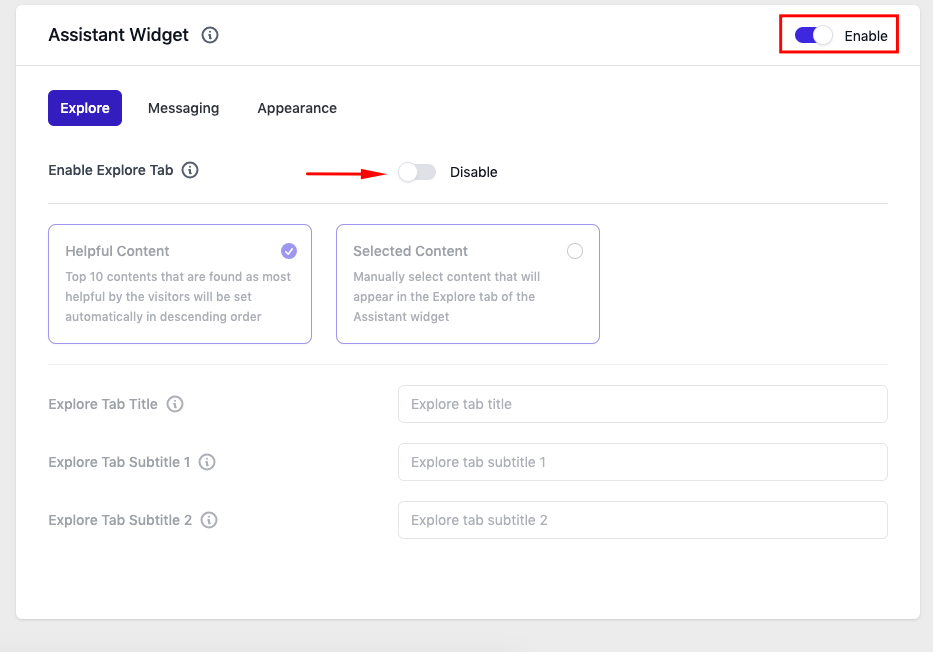
Activating/deactivating the assistant widget
You can turn the assistant widget on or off directly from this setting. Simply toggle the switch to enable or disable it. If it’s turned off, the widget won’t appear on your documentation pages. Make sure to save your changes after updating any option.
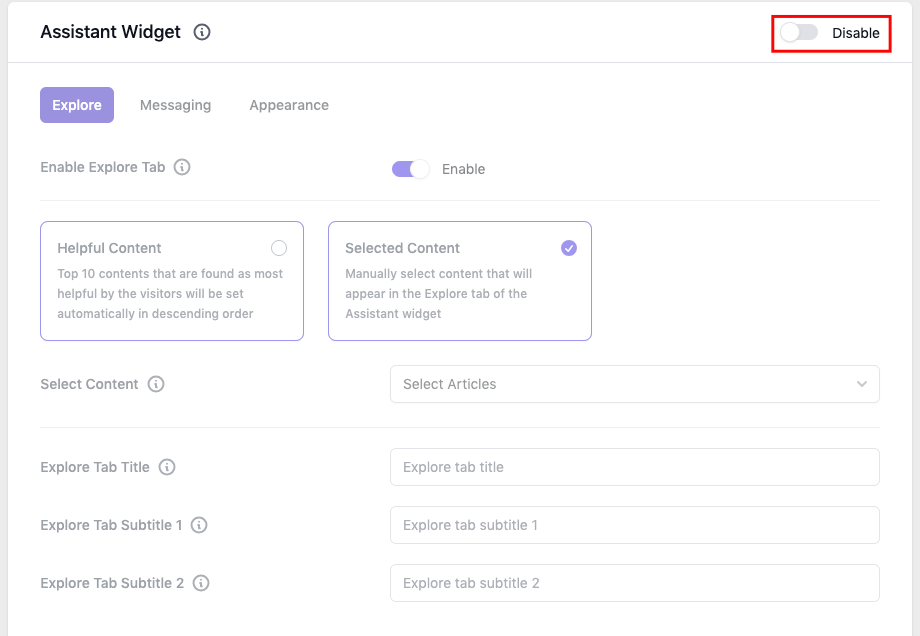
Also, you can individually turn off each section. Here we have disabled the “explore.” tab.
Now let’s see how it will appear on site. Here you can see the “explore” tab is not appearing.
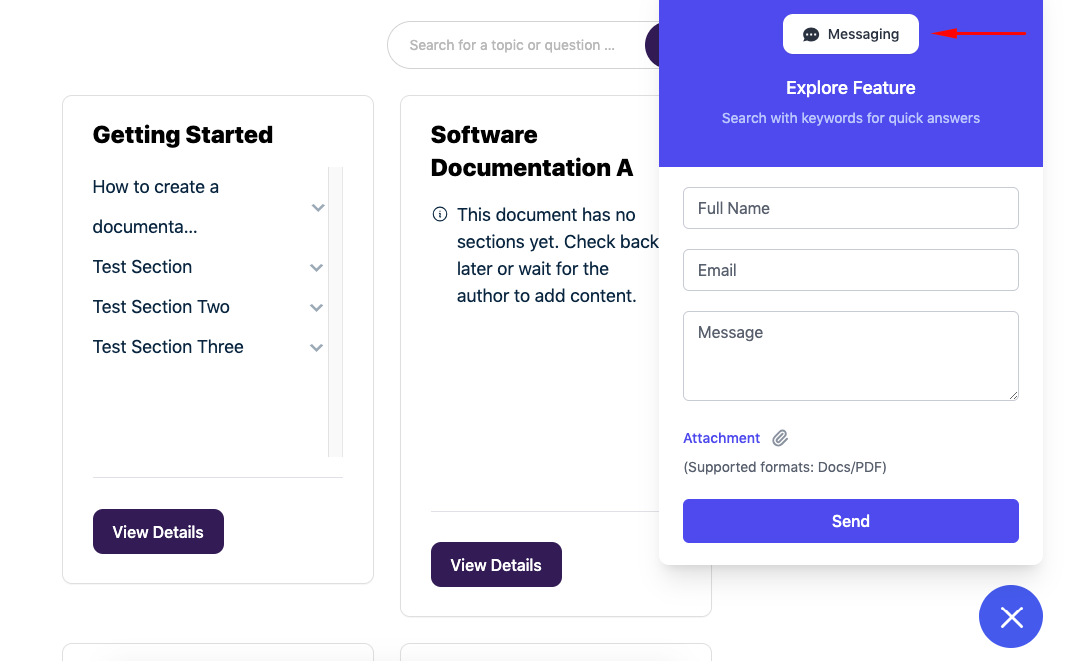
Please note: This setting is similar to the messaging option. Just disable the messaging option; it will show only the “explore” tab instead of messaging.
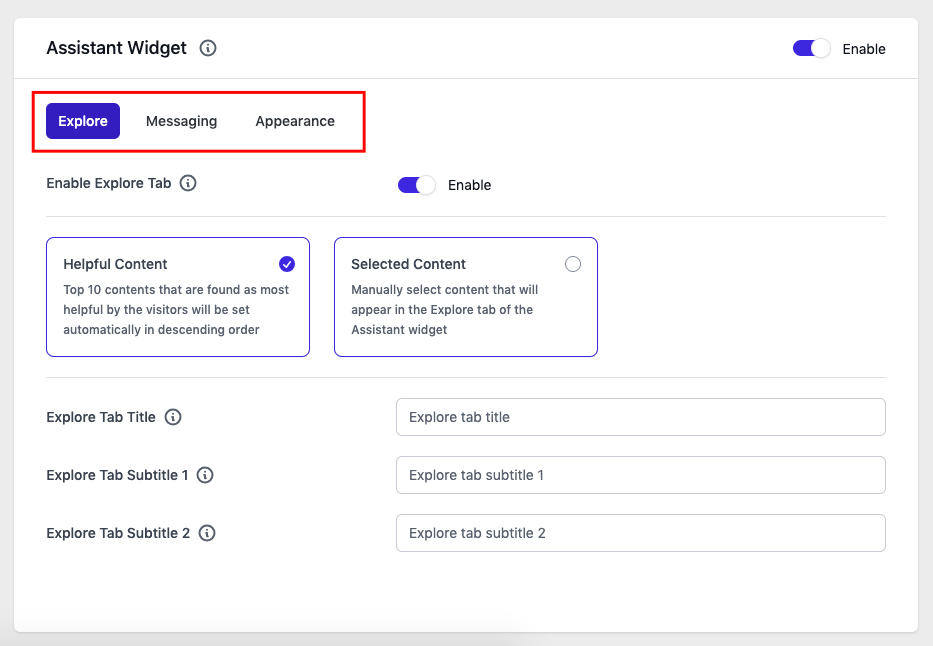
How to Customize the Explore Tab
On the upper section of the “explore tab” settings, you’ll find two options.
- Helpful content: Depending on which articles the visitors deem to be the most useful, the Explore Tab will display the top 10 articles. It will be set automatically in descending order.
- Selected content: Or, you can manually select which content will appear in the Explore Tab of the Assistant widget
- Explore tab title: Title of the explore tab
- Explore tab subtitle: Subtitle of the explore tab
- Explore tab subtitle 2: Second title of the explore tab
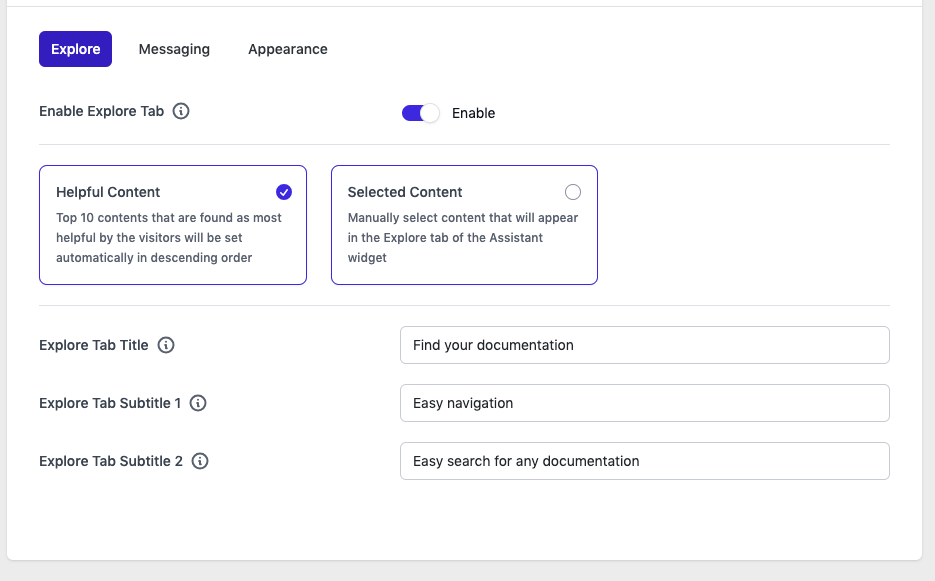
Let’s see if you enable the first option. Don’t forget to save things once you’re done.
You can see the details in the “Explore Tab“. Also, you can see the documentation selected or liked by the users.
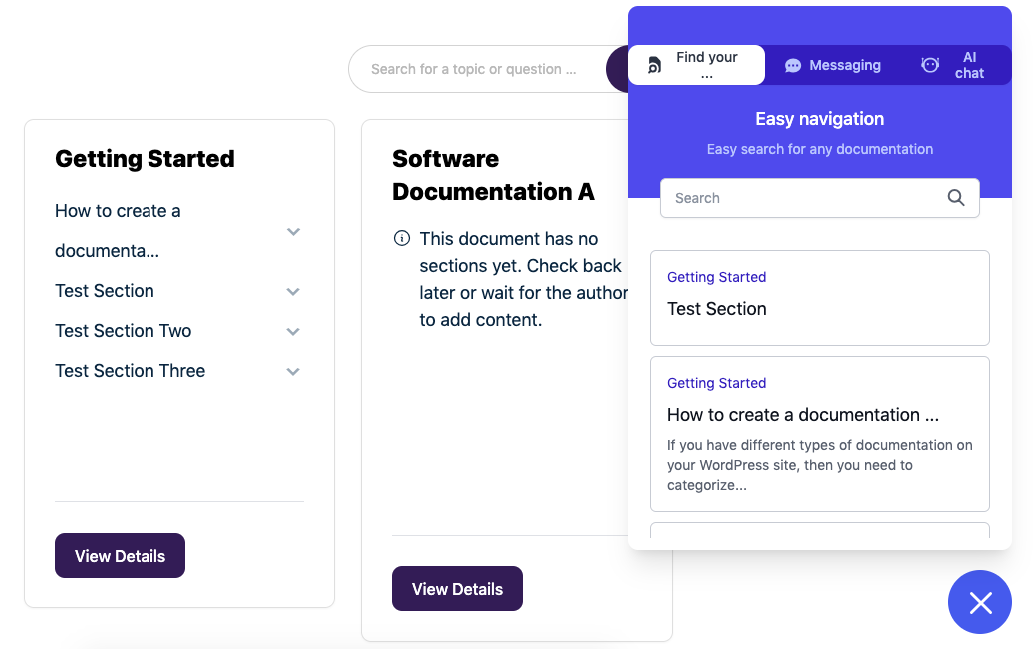
If you preview it, you can see the selected content displayed on the “Explore Tab“.
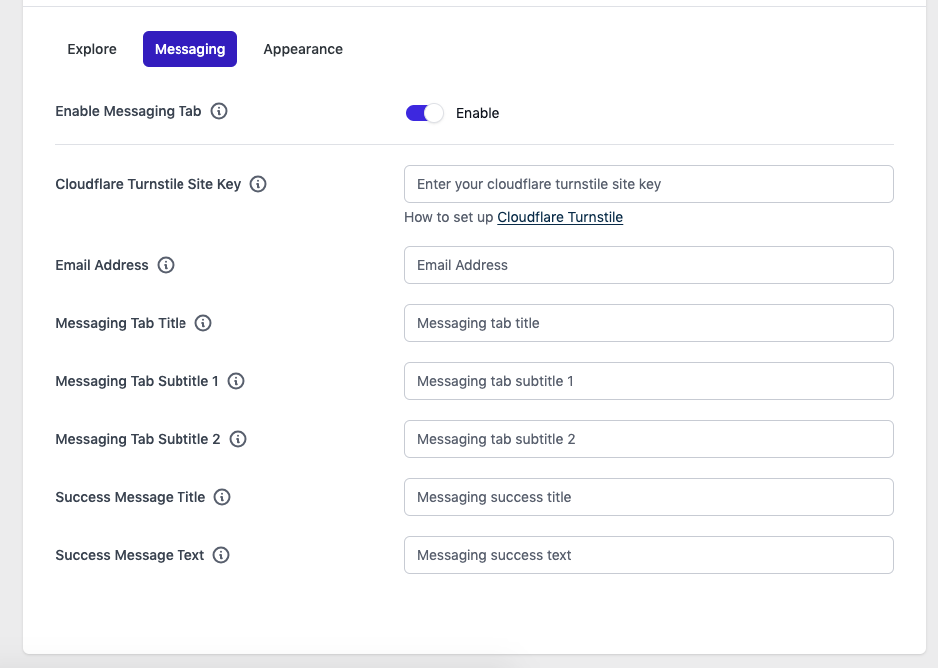
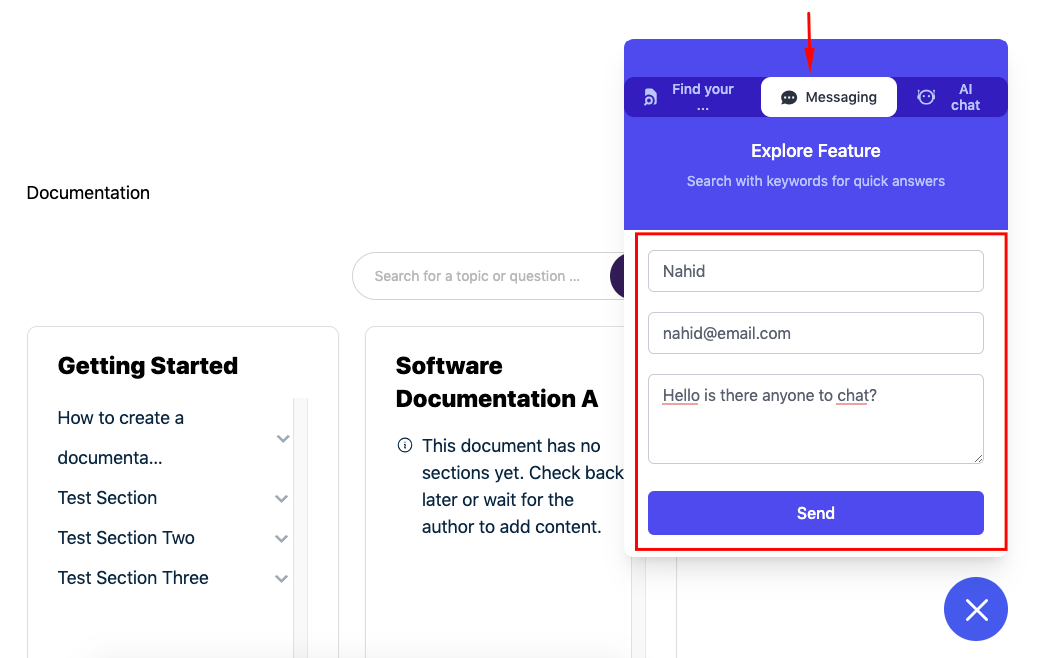
Customizing the Messaging Tab
Let’s now customize the Messaging tab like the “Explore Tab“. Tap on it, and you’ll get the options!
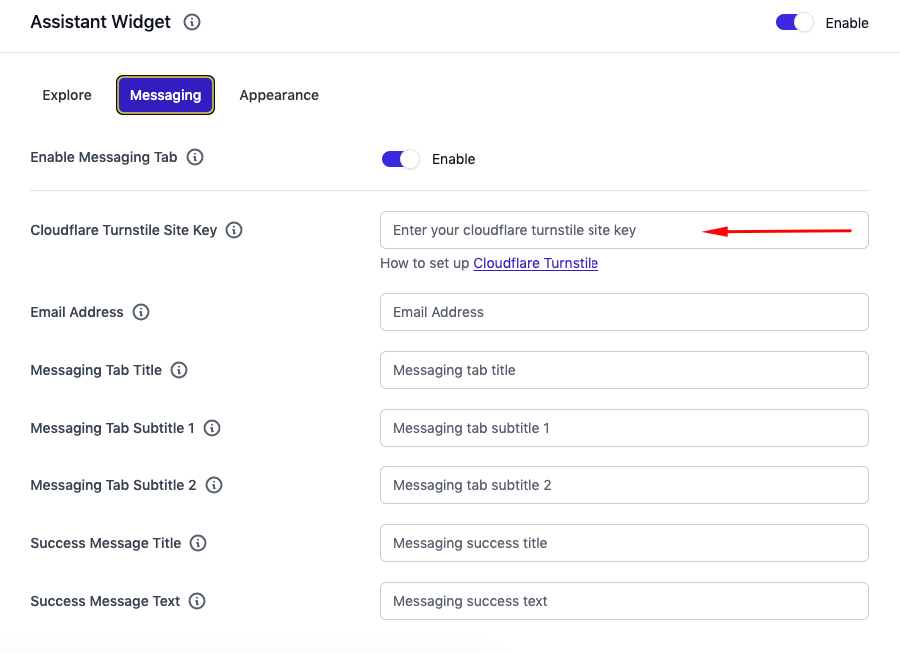
- Cloudflare turnstile site key: To enable the messaging option, you need to connect your site with CloudFare. And you’ll get a key to use here.
- Email address: Email address name
- Messaging tab title: Title of the messaging tab title
- Messaging tab subtitle 1: Subtitle of the messaging tab title
- Messaging tab subtitle 2: Second subtitle of the messaging tab title
- Success message title: Set the success message title
- Success message title 2: Set the second success message title
Now visit this link to set up your Turnstile account keys. Once you enter the account, you’ll need to add your site here.
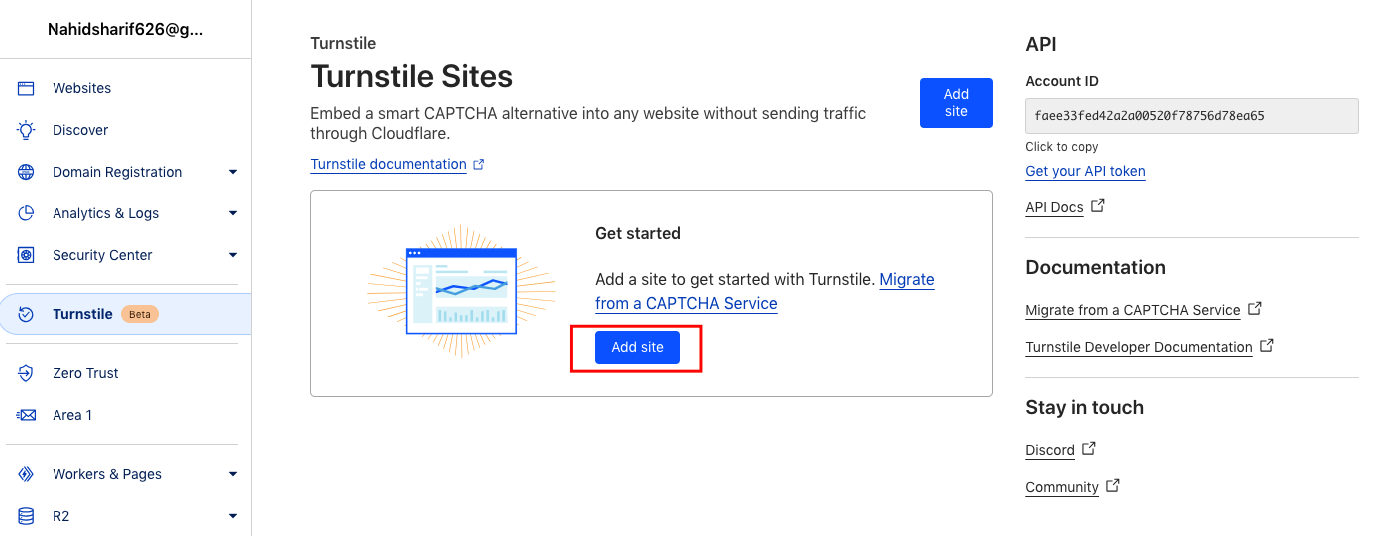
Once you’re done, you’ll get site keys. Just enter here!
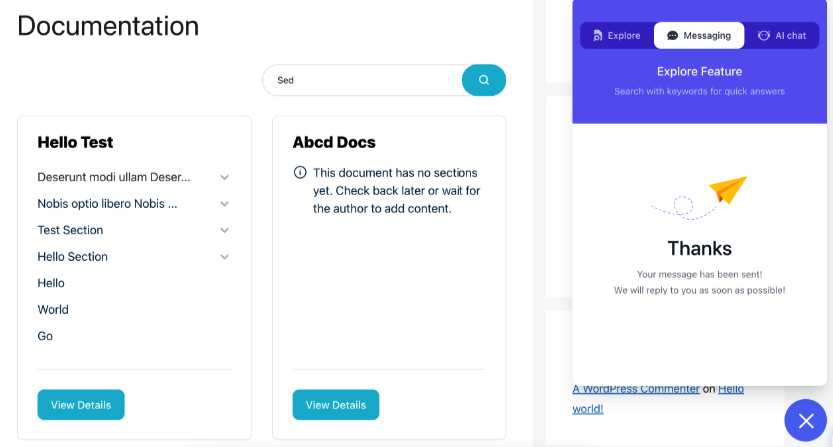
If you preview it on your website, you can see the messaging option. Now add your name, email, and message. After that, hit the send button.
So now your users are ready to send messages!
This is not all.
You can also customize the assistant widgets’ appearance and change the color palettes.
Read: How to Enhance the Assistant Widget Link
Final Thoughts
Documentation should reduce effort, not add more steps.
When users struggle to find answers, even the best-written articles lose their value. The Assistant Widget helps close that gap by guiding users, highlighting useful content, and offering help at the exact moment it’s needed.
Instead of forcing visitors to rely only on search or navigation, the widget creates a more natural support flow. Users explore. They ask questions. They stay engaged.
For teams, this means fewer repetitive support requests. For users, it means faster answers and a better overall experience.
In the long run, small improvements like this make a big difference. A more accessible knowledge base leads to better product adoption, stronger customer trust, and a support system that actually scales.
Subscribe to
weDocs blog
We send weekly newsletters,
no spam for sure!