
Internal linking is a common practice to guide users to relevant documentation posts. However, this requires users to navigate away from their current posts to explore the linked content in a new tab. Some users may not prefer this method and would rather stay on their current post until they finish reading it.
WeDocs is a helpful tool that can assist you in solving your problem. With its Assistant Widget feature, you can easily access information on linked documentation without leaving the current post. This means you can explore multiple documentation posts on a single document, making your work more efficient and productive.
Here, we’ll show you a step-by-step guide on how to use and enable the weDocs Assistant Widget. Take a look.
How to Use and Enable the weDocs Assistant Widget
Navigate to WordPress Dashboard > weDocs. Open any post where you want to internally link one or more documentation posts.
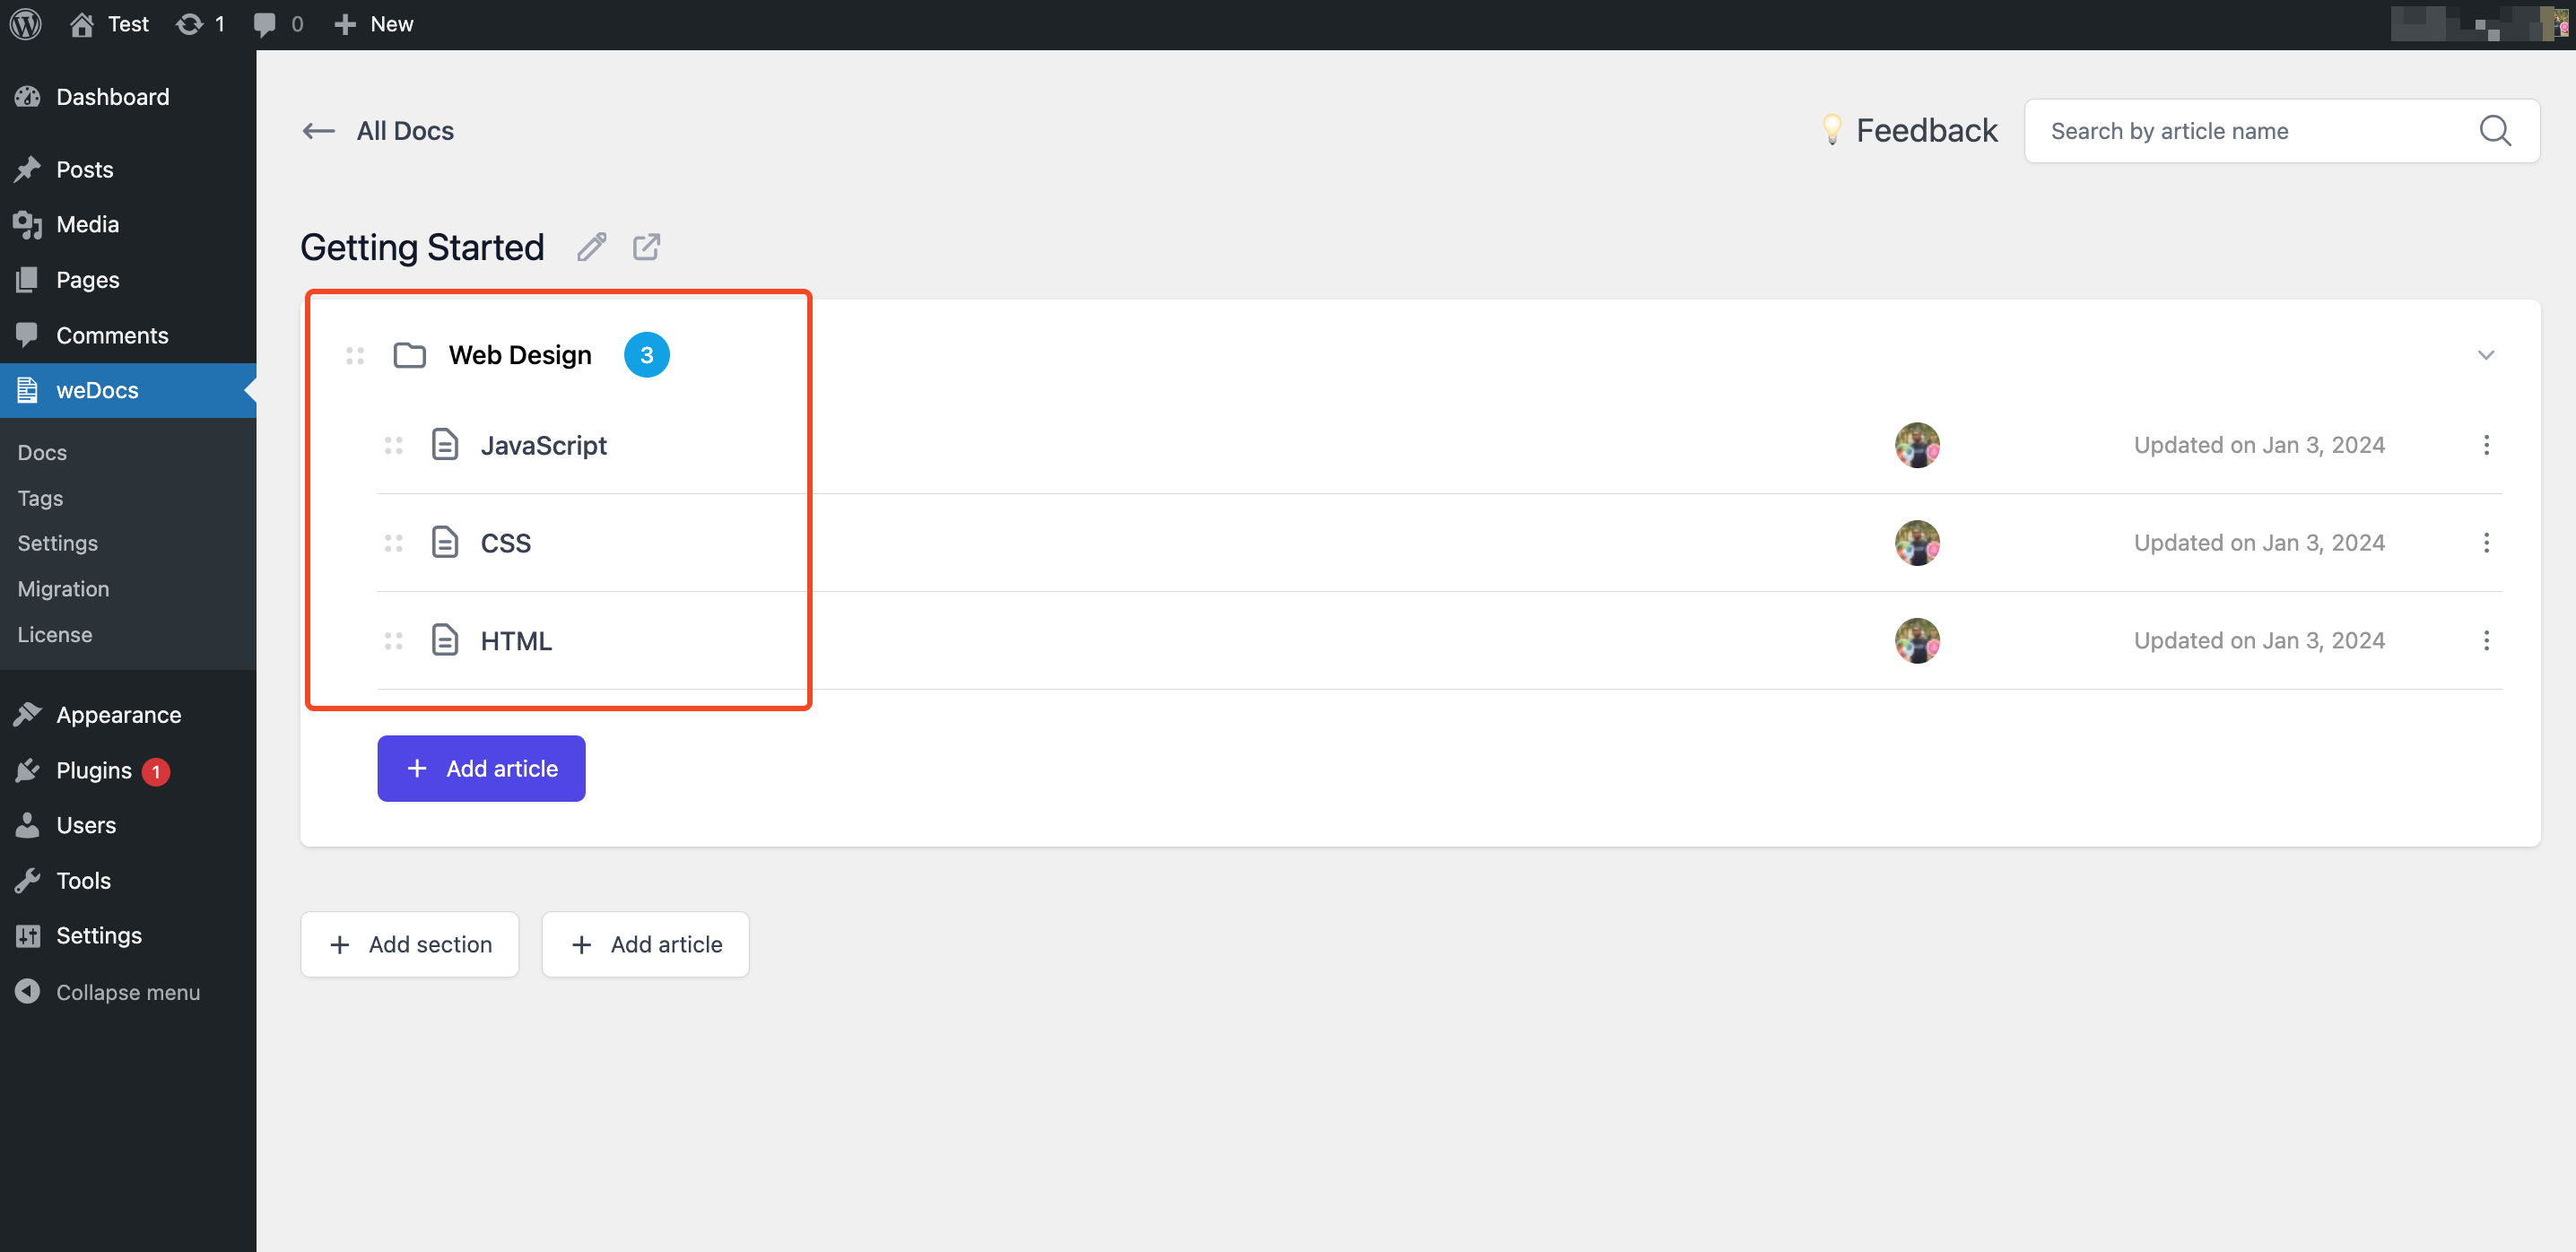
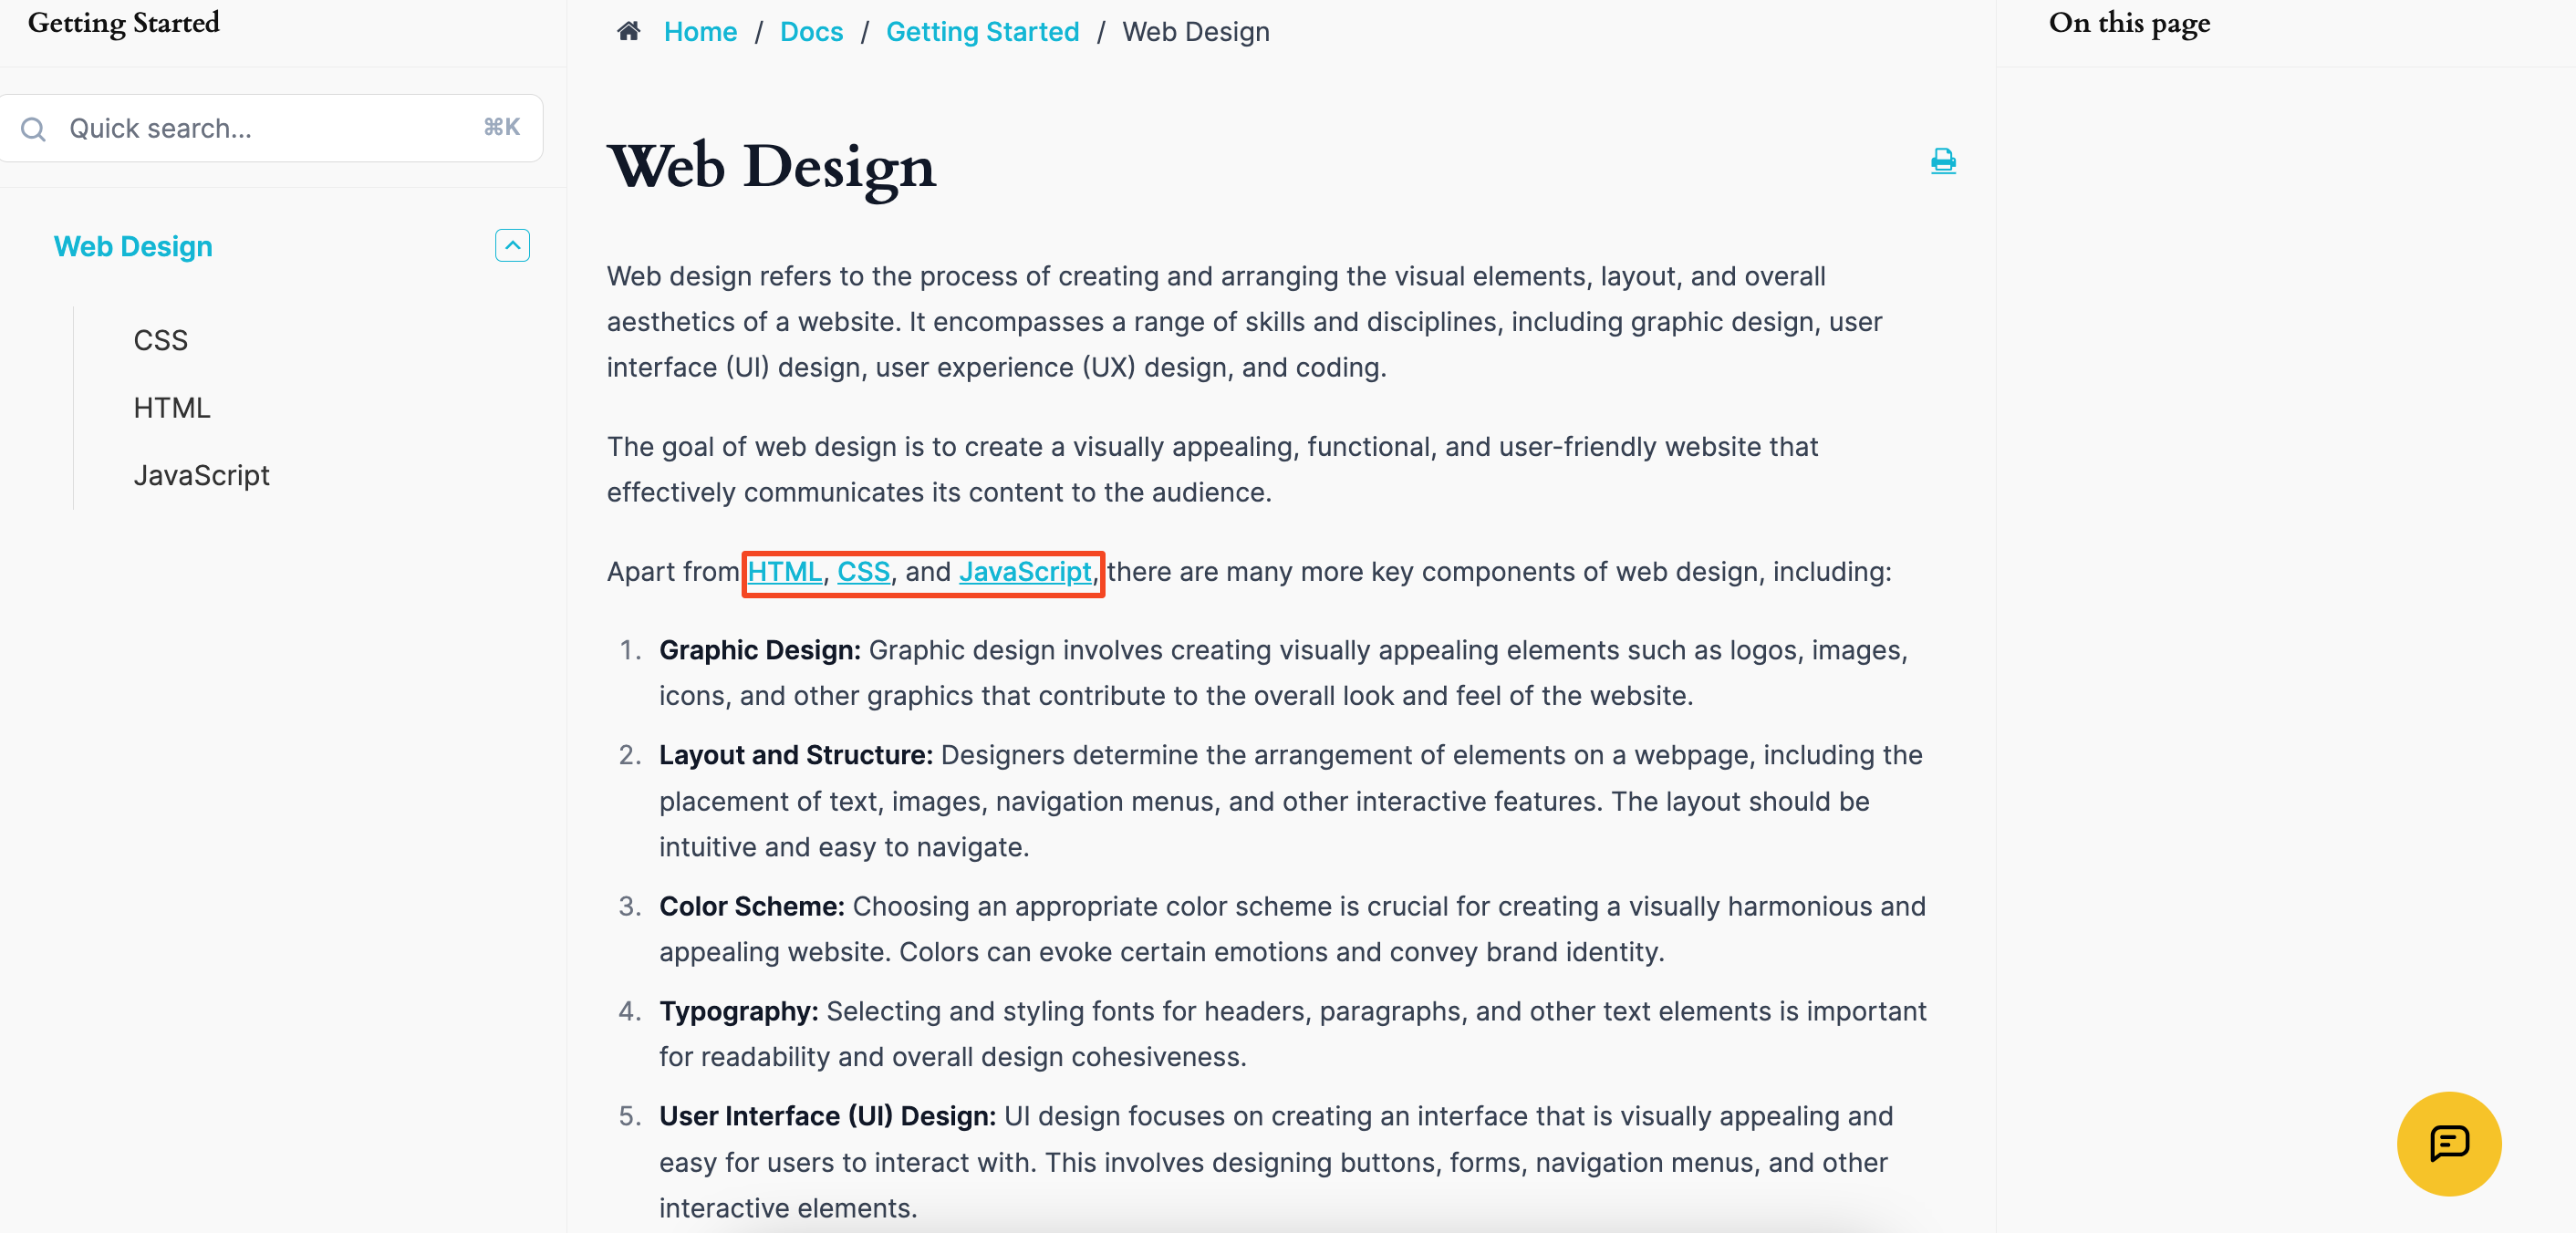
Let’s create a scenario. We would like to add an internal link to the main documentation page, “Web Design.”
Now see how to do it. Open the main documentation and find the anchor text that you want to link to it.
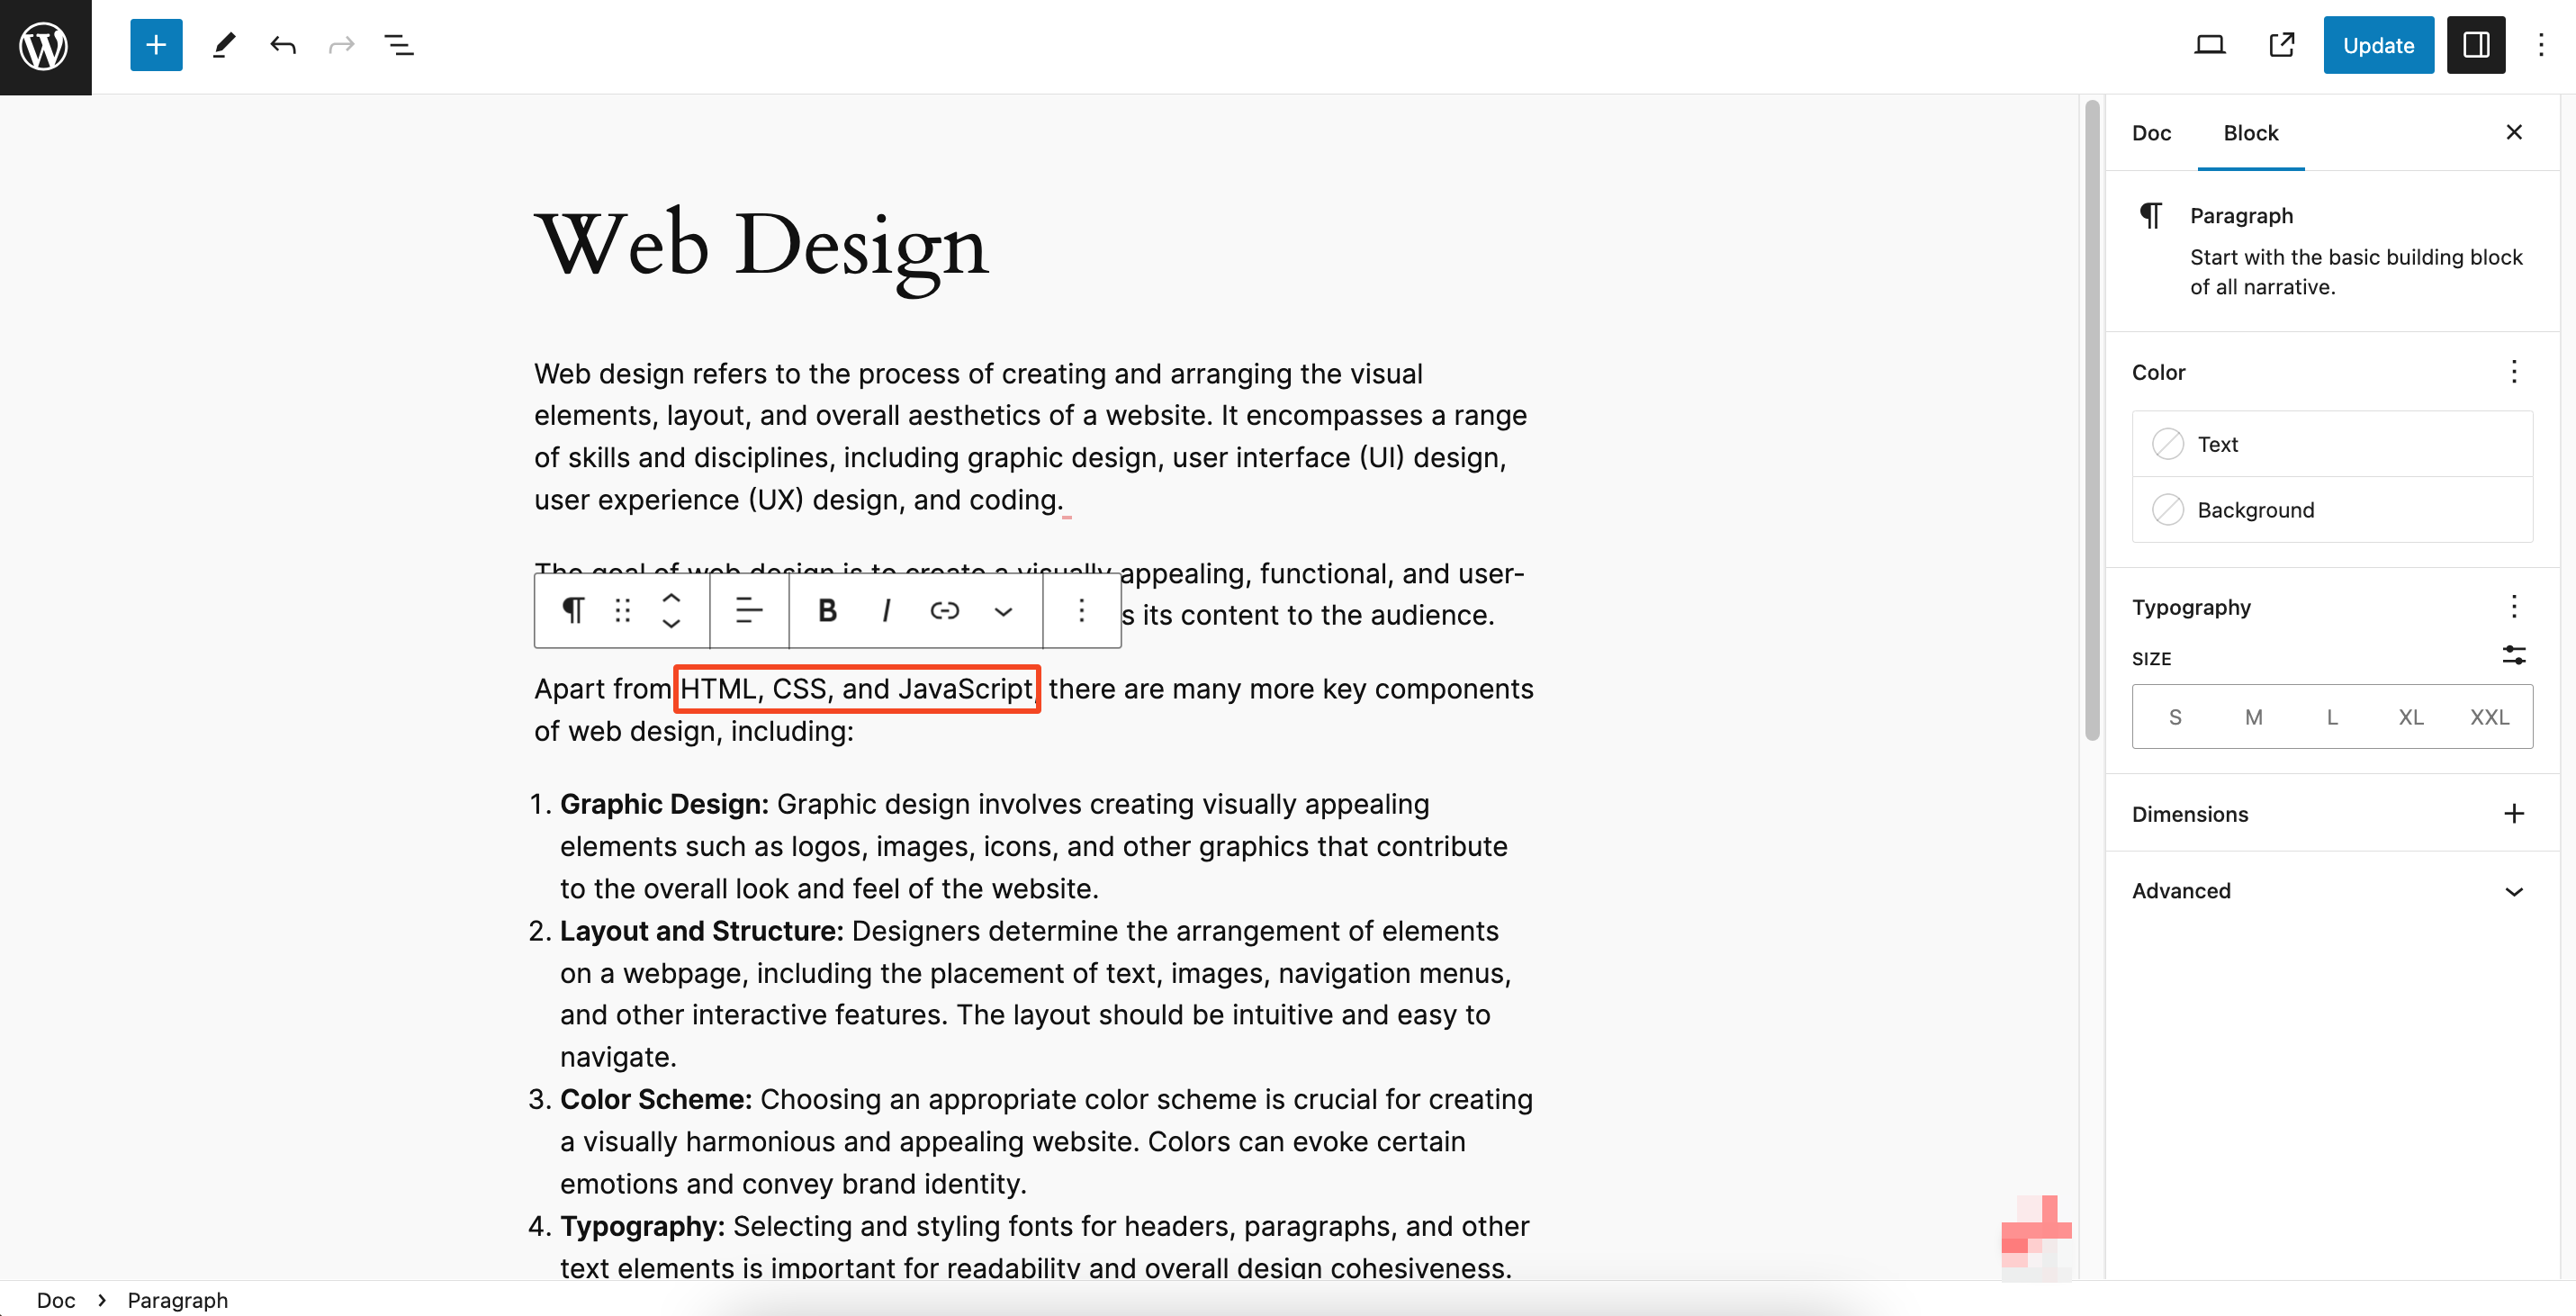
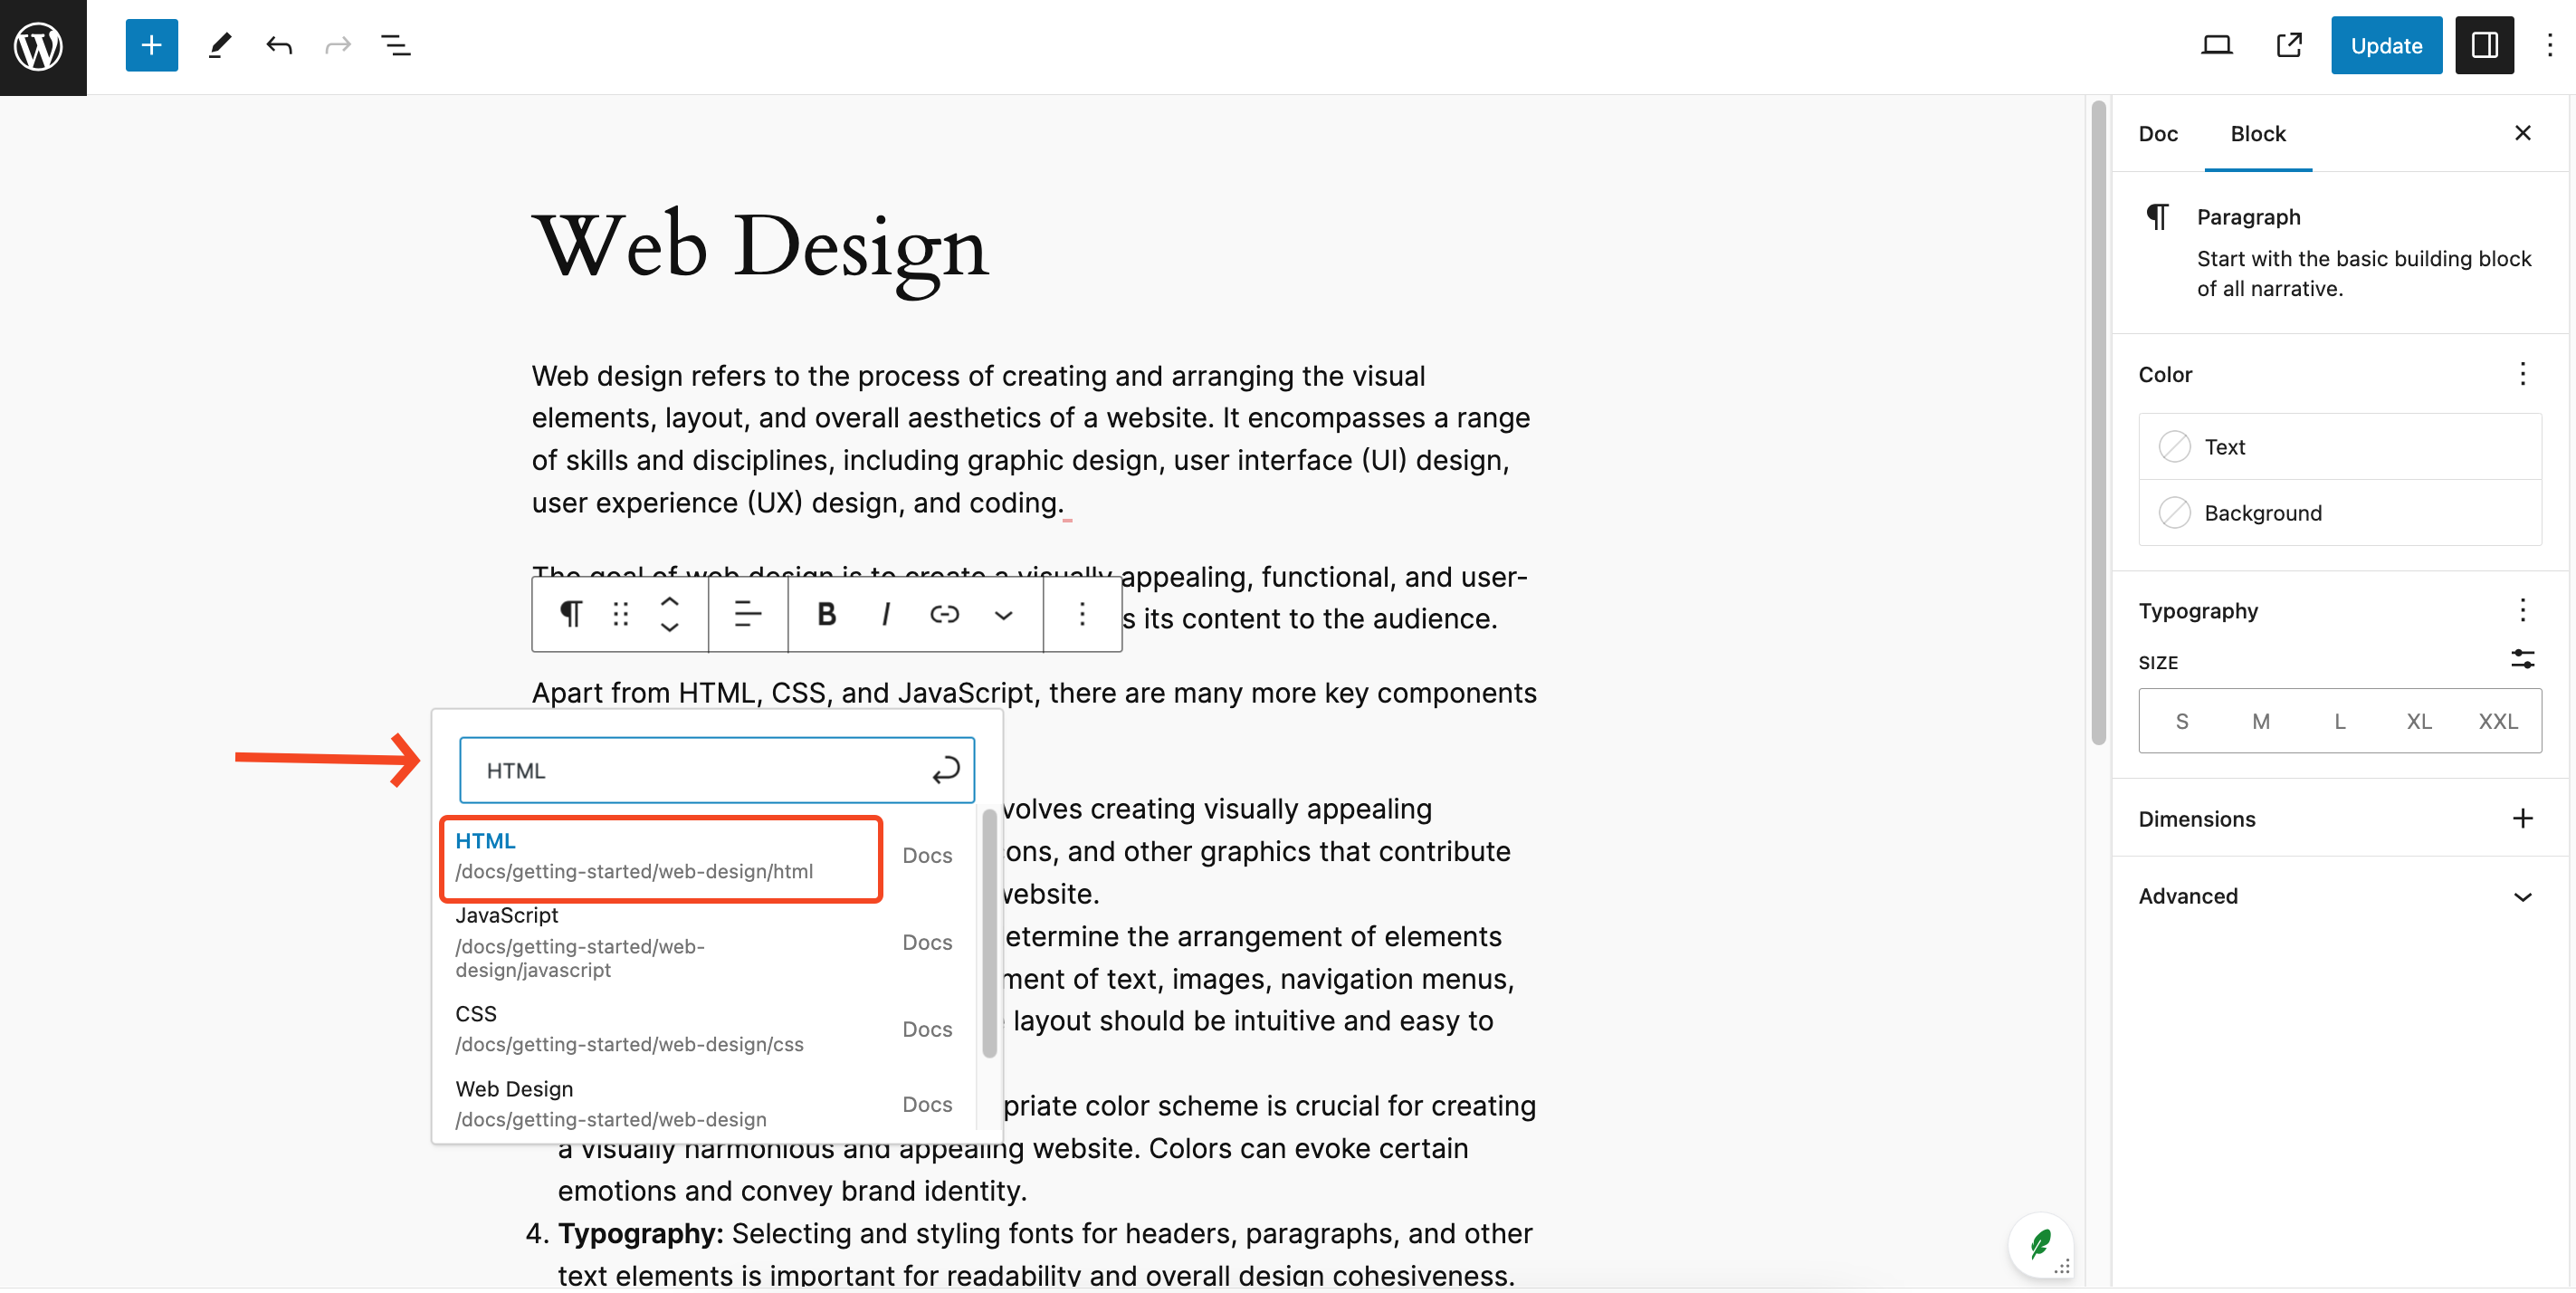
Find the related link inside the link-searching option. Once you find it, click on it.
Note: Only posts/docs created with weDocs will appear on the search list.
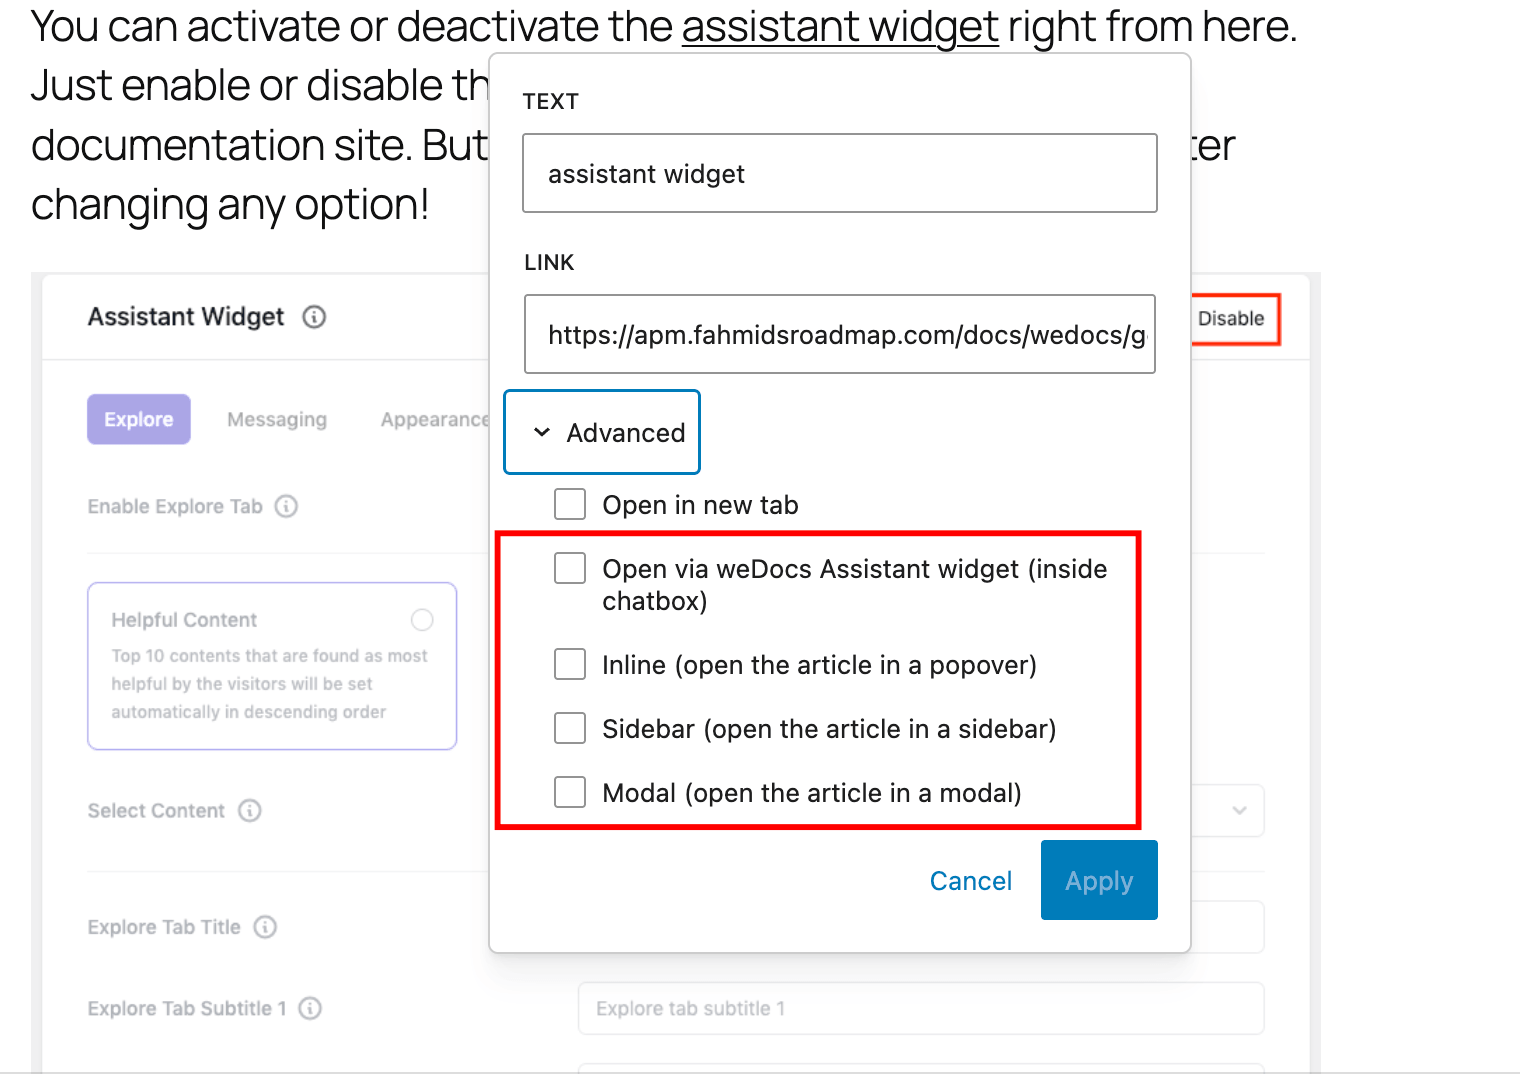
Then tick the mark “open via weDocs Assistant Widget.“. After that, save and update the post.
Next, preview the post after you’re done adding the links to your preferred anchor text.
Now, after you click on the link, a pop-up window will appear next to the link-
1. In Chat-
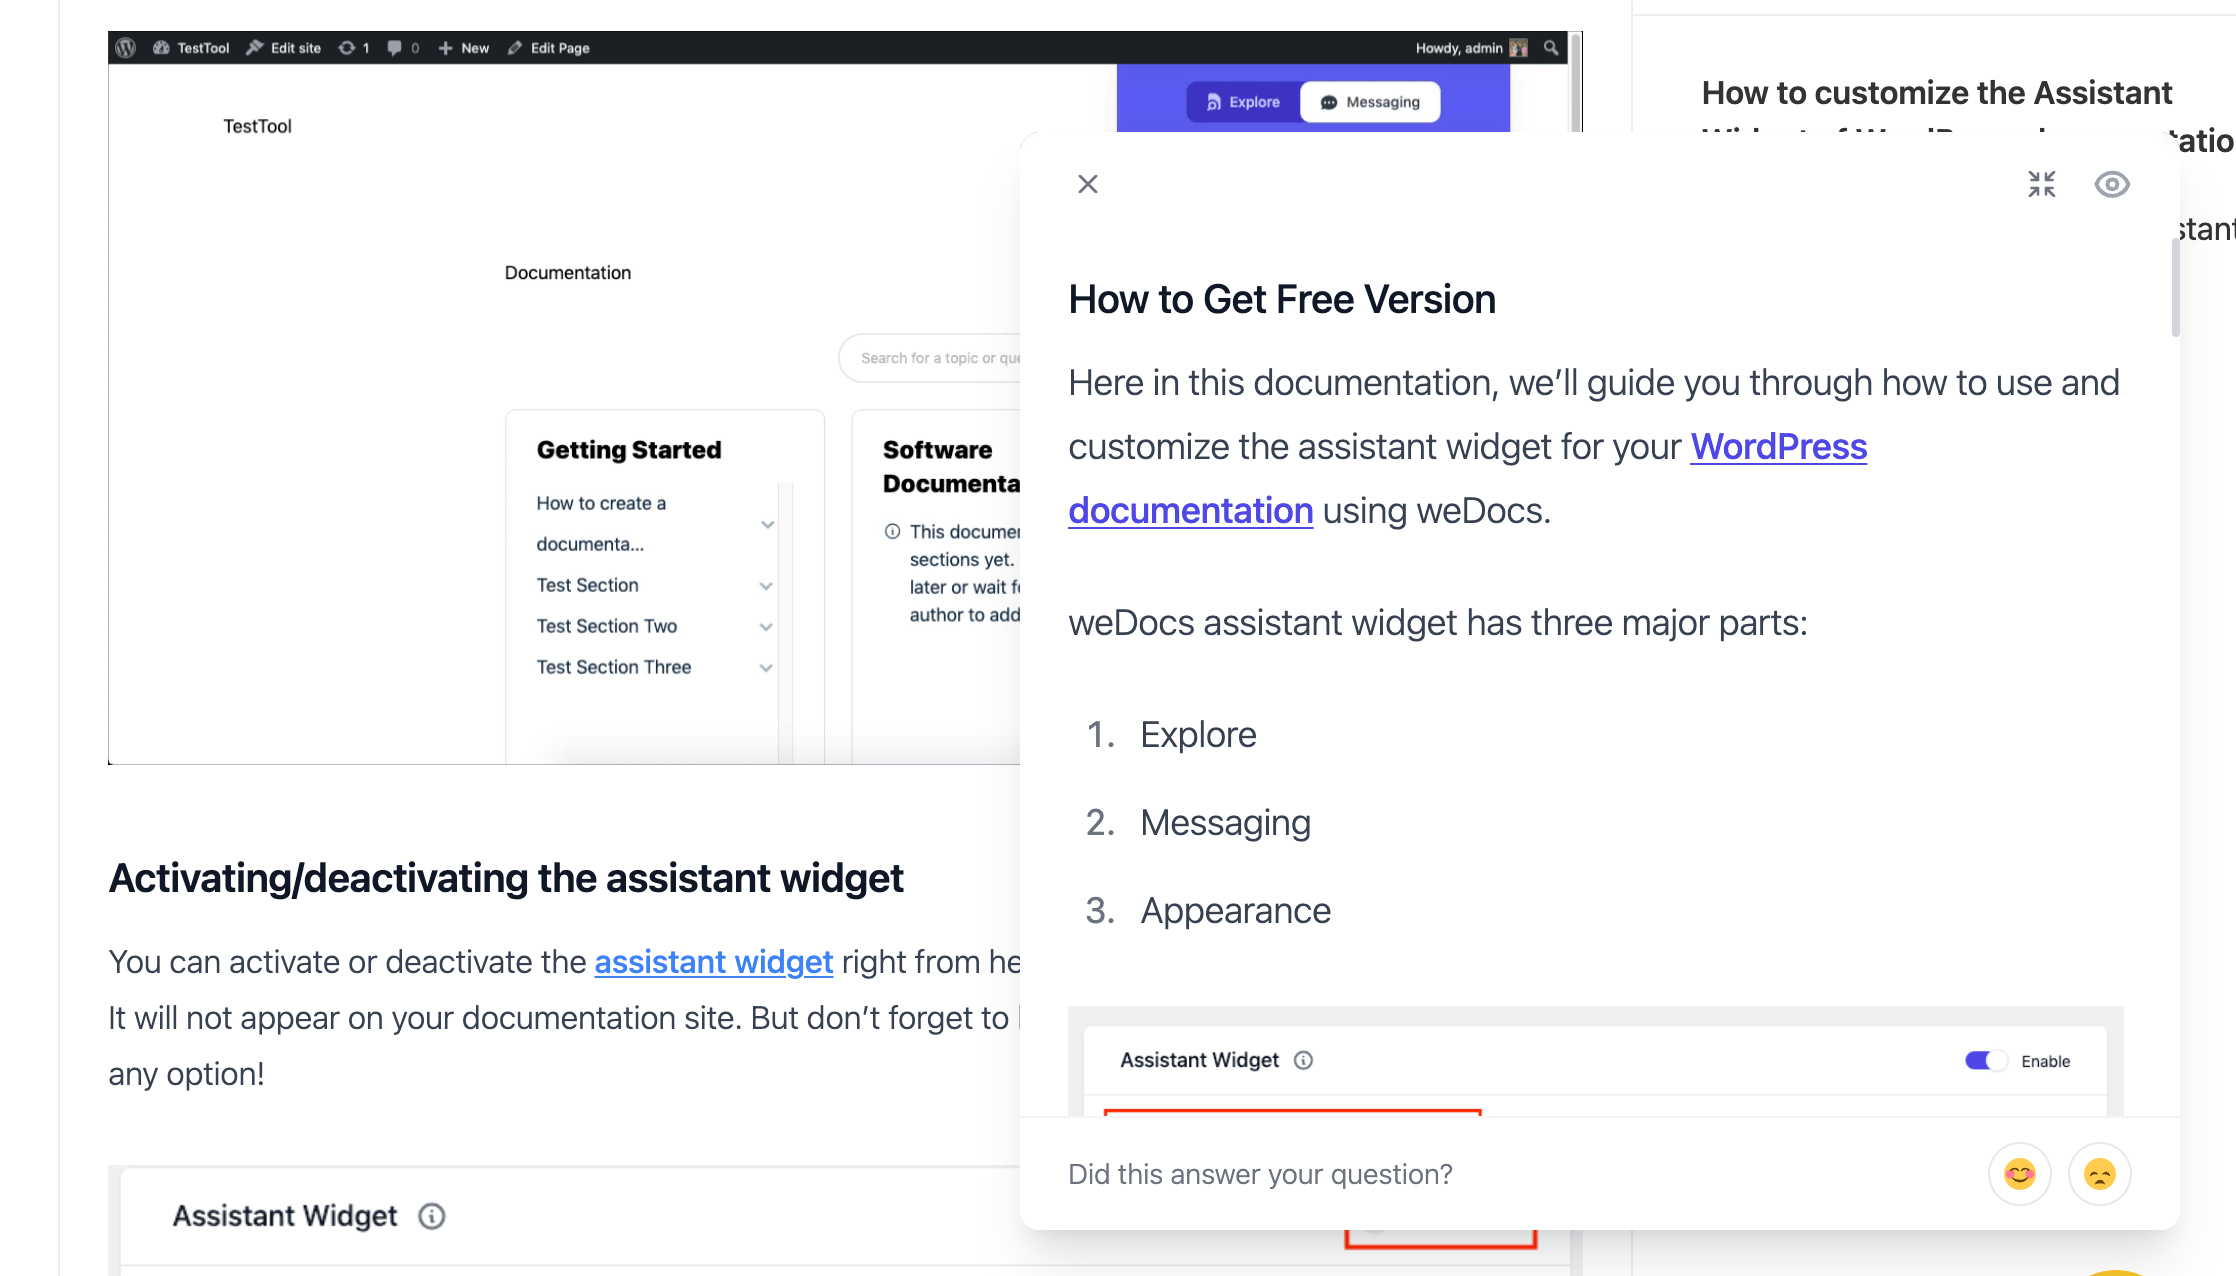
2. Inline
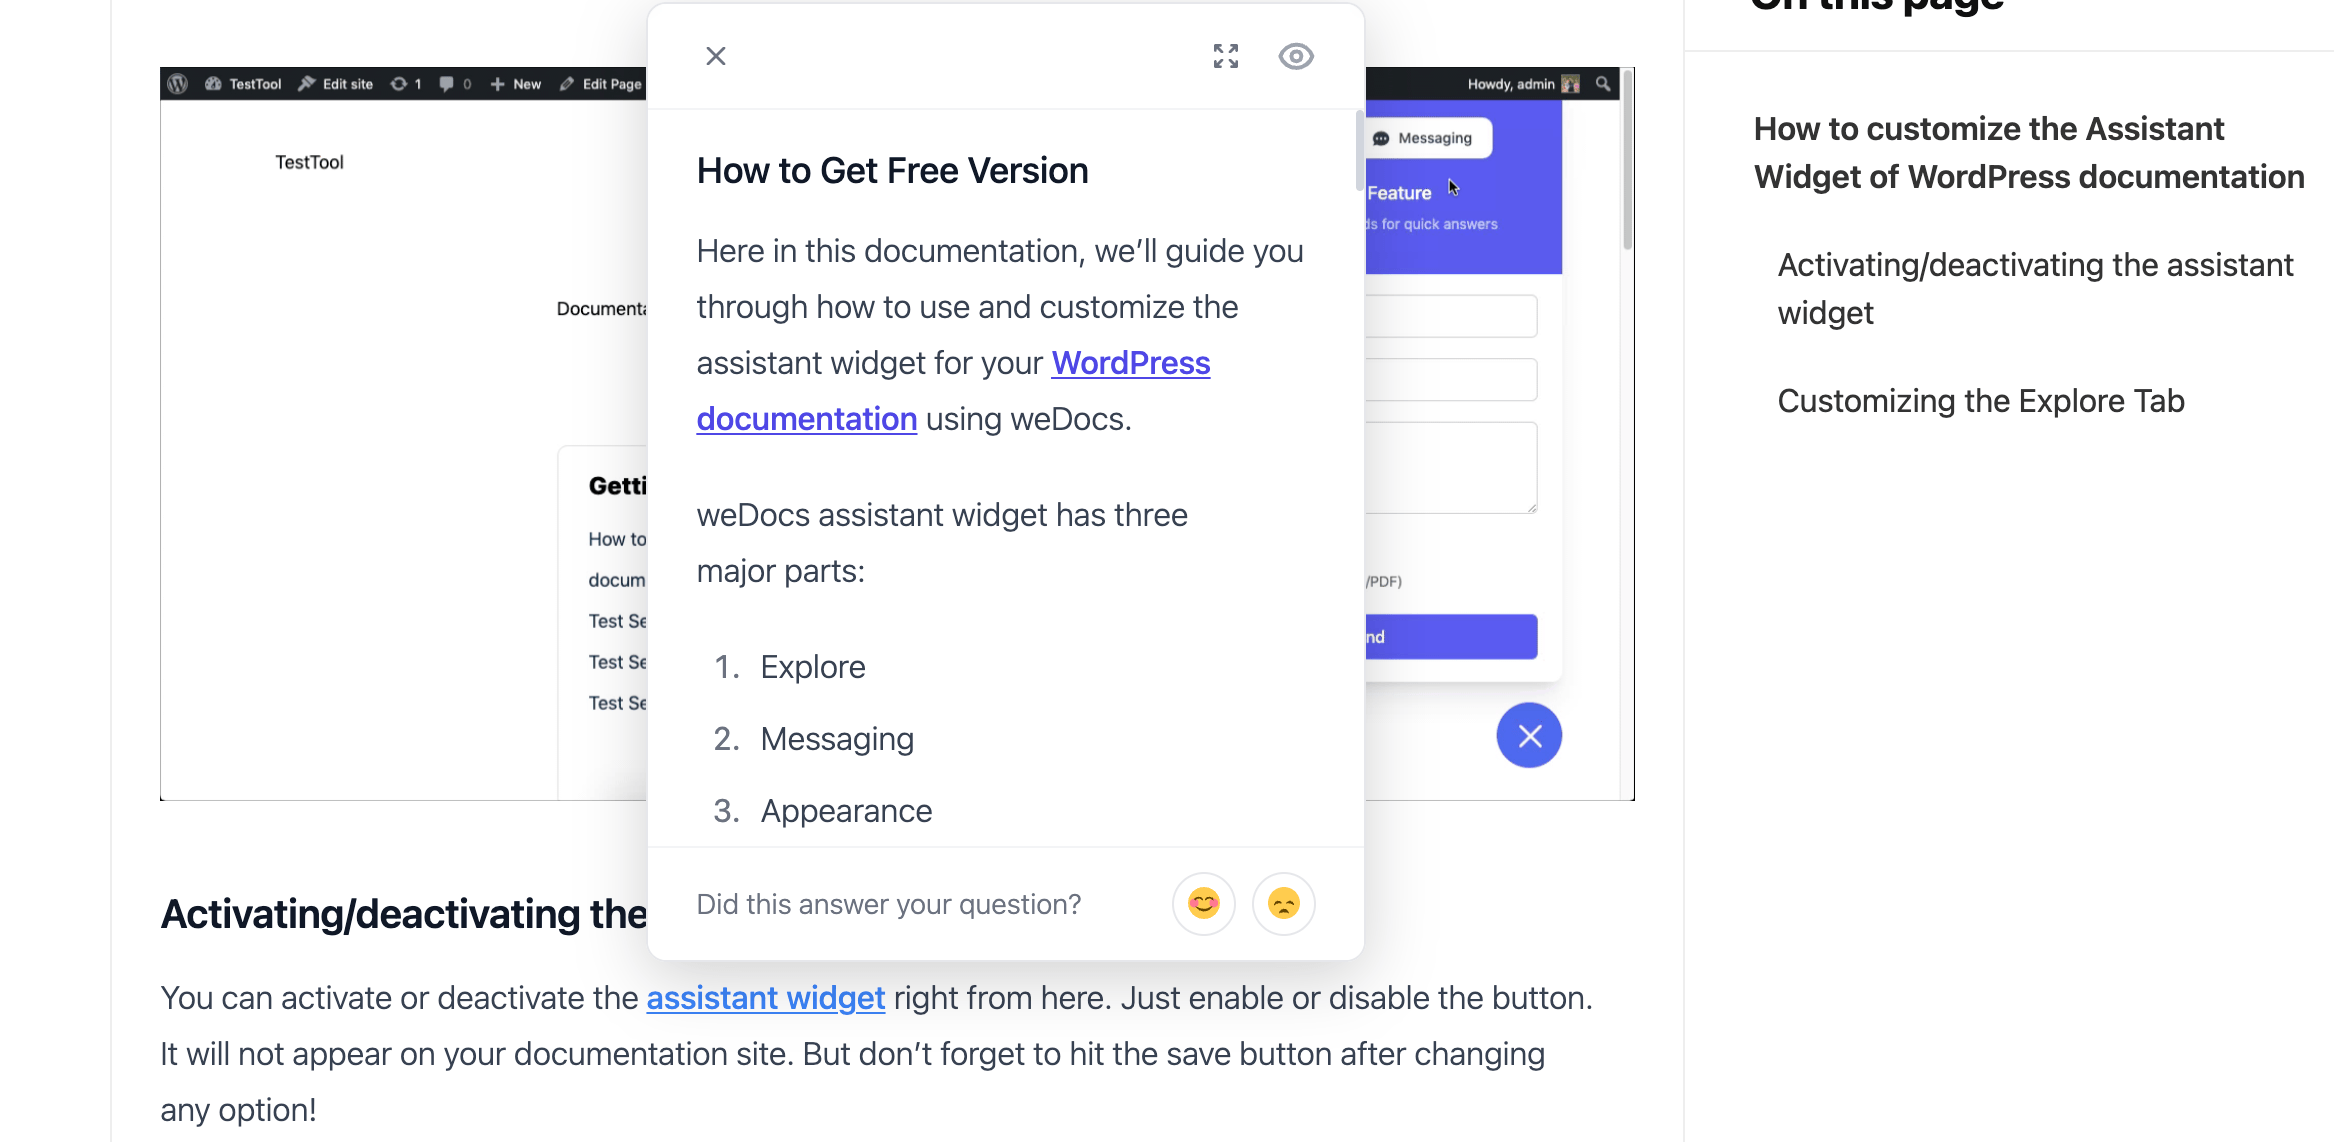
3. Sidebar
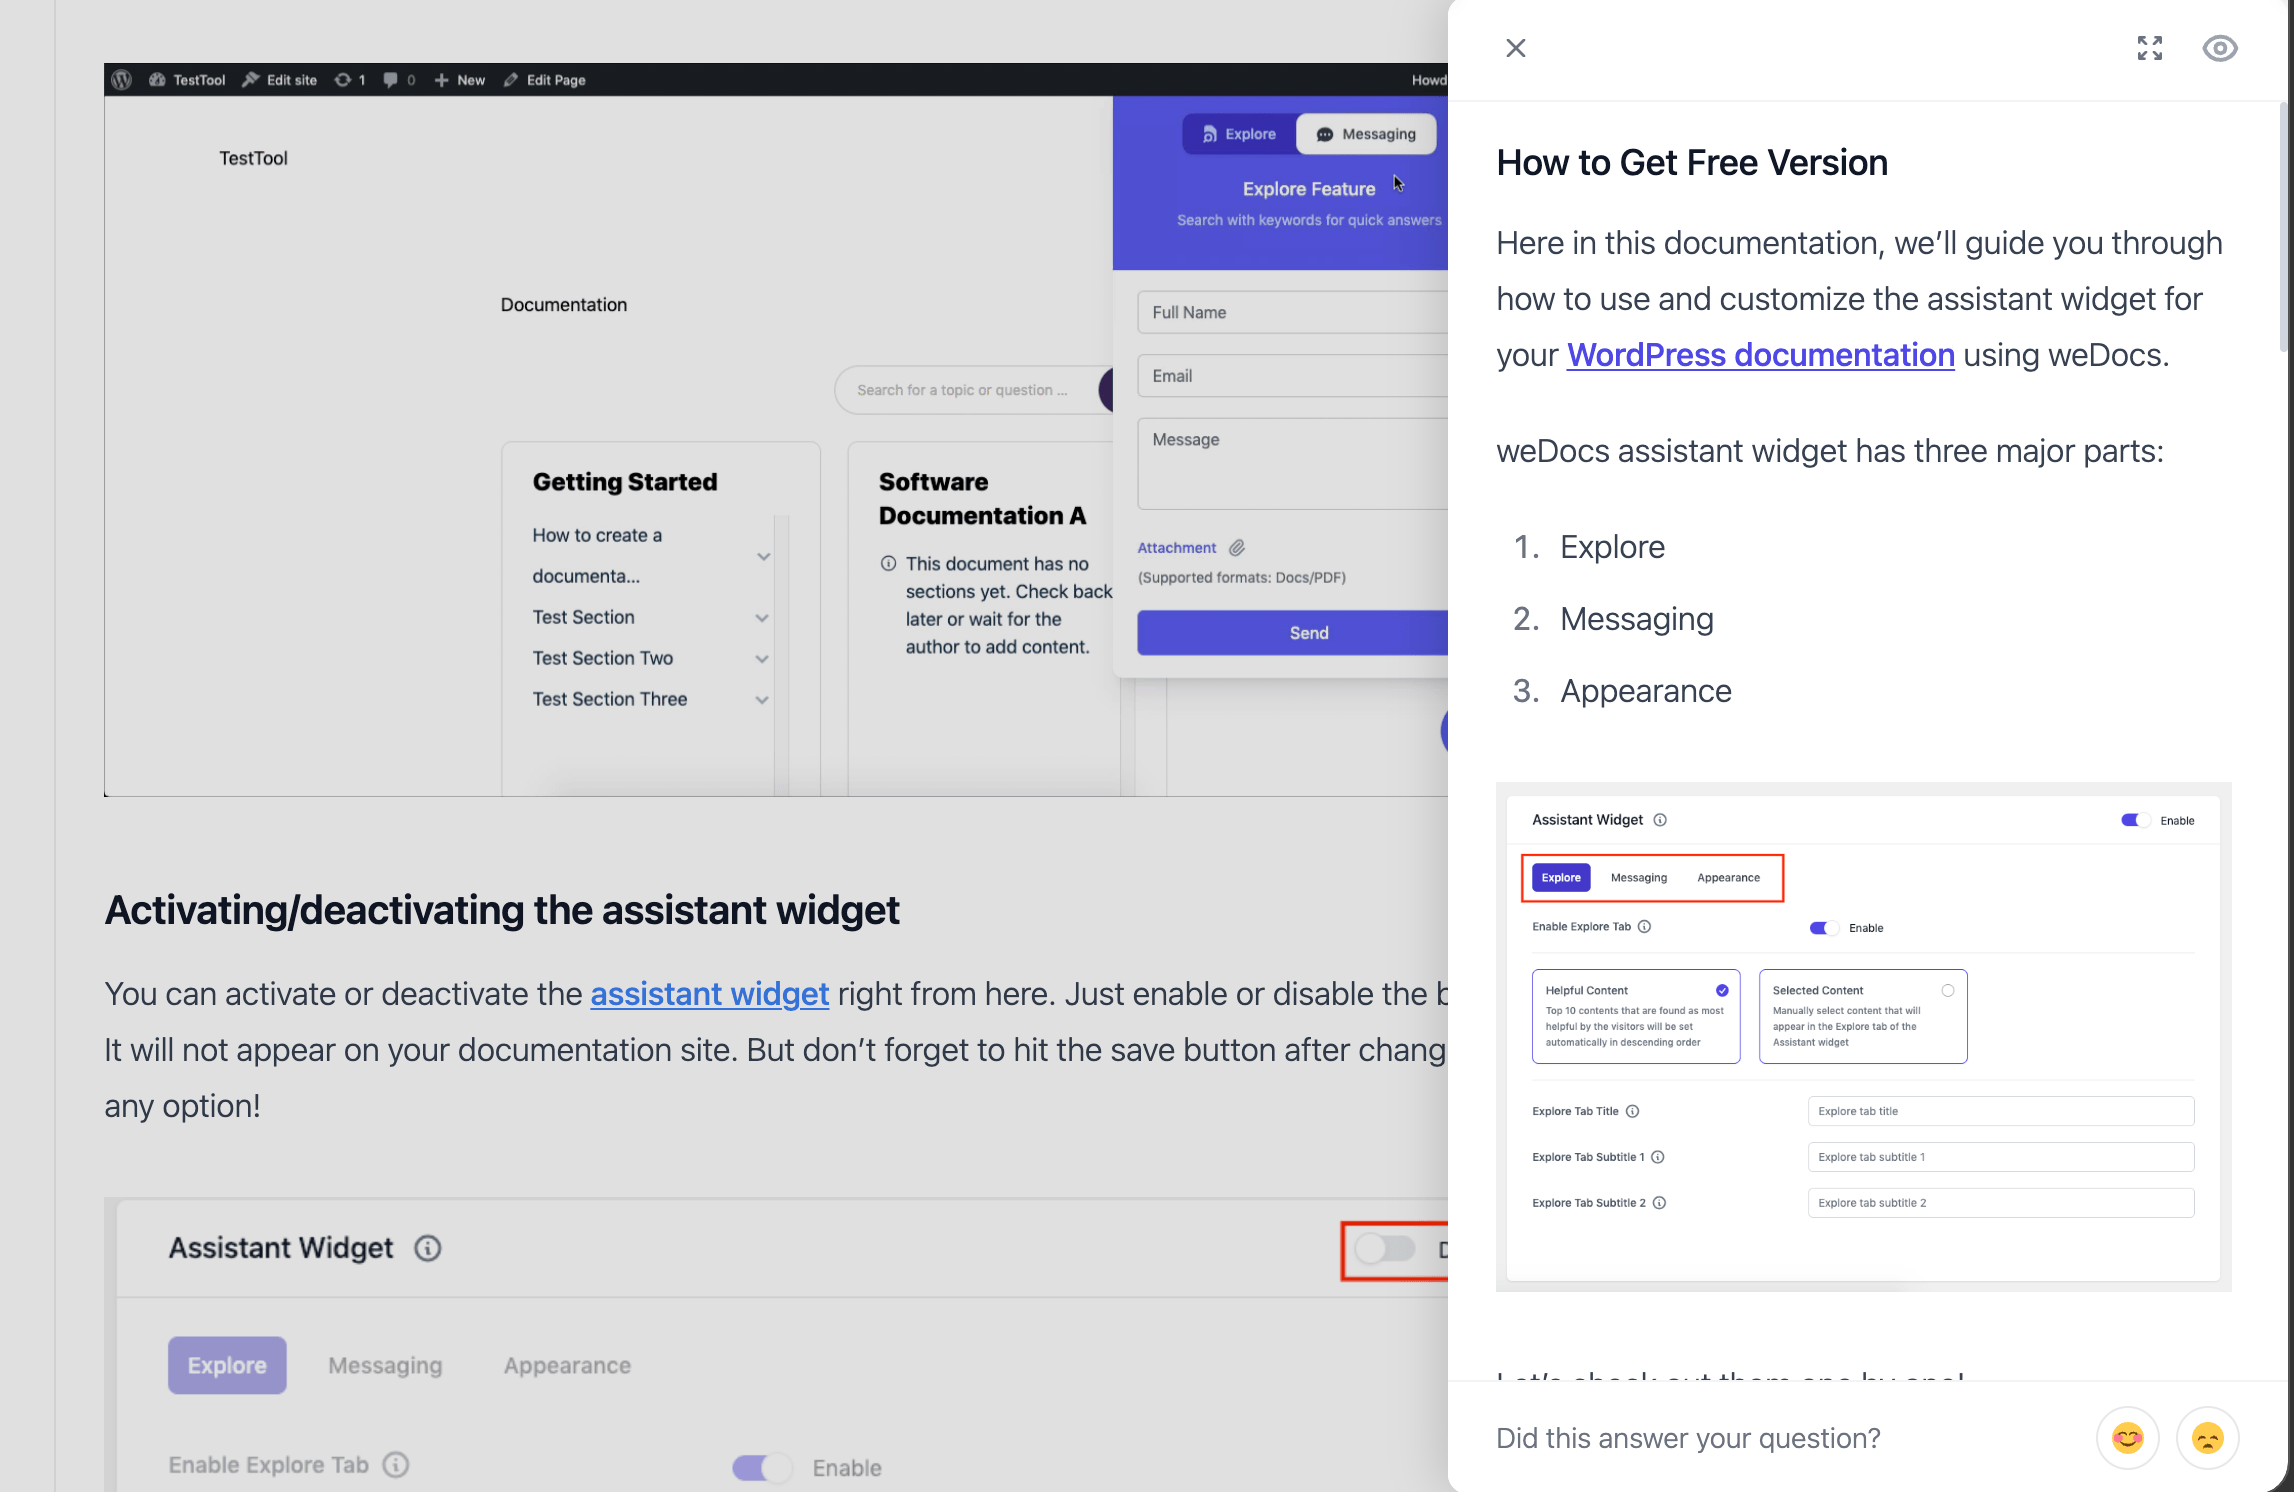
4. Modal
So this is how you can link as many documentation posts depending on your needs and requirements.