
weDocs is a powerful documentation plugin for WordPress. It allows you to create, organize, and publish documentation for your products, services, and projects. The plugin is designed with simplicity and functionality in mind.
For a long time, there was only a free version of the plugin online. But, in November 2023, we launched the pro version of the plugin. Since then, we have been working to improve its functionality, user interface, and user experience further.
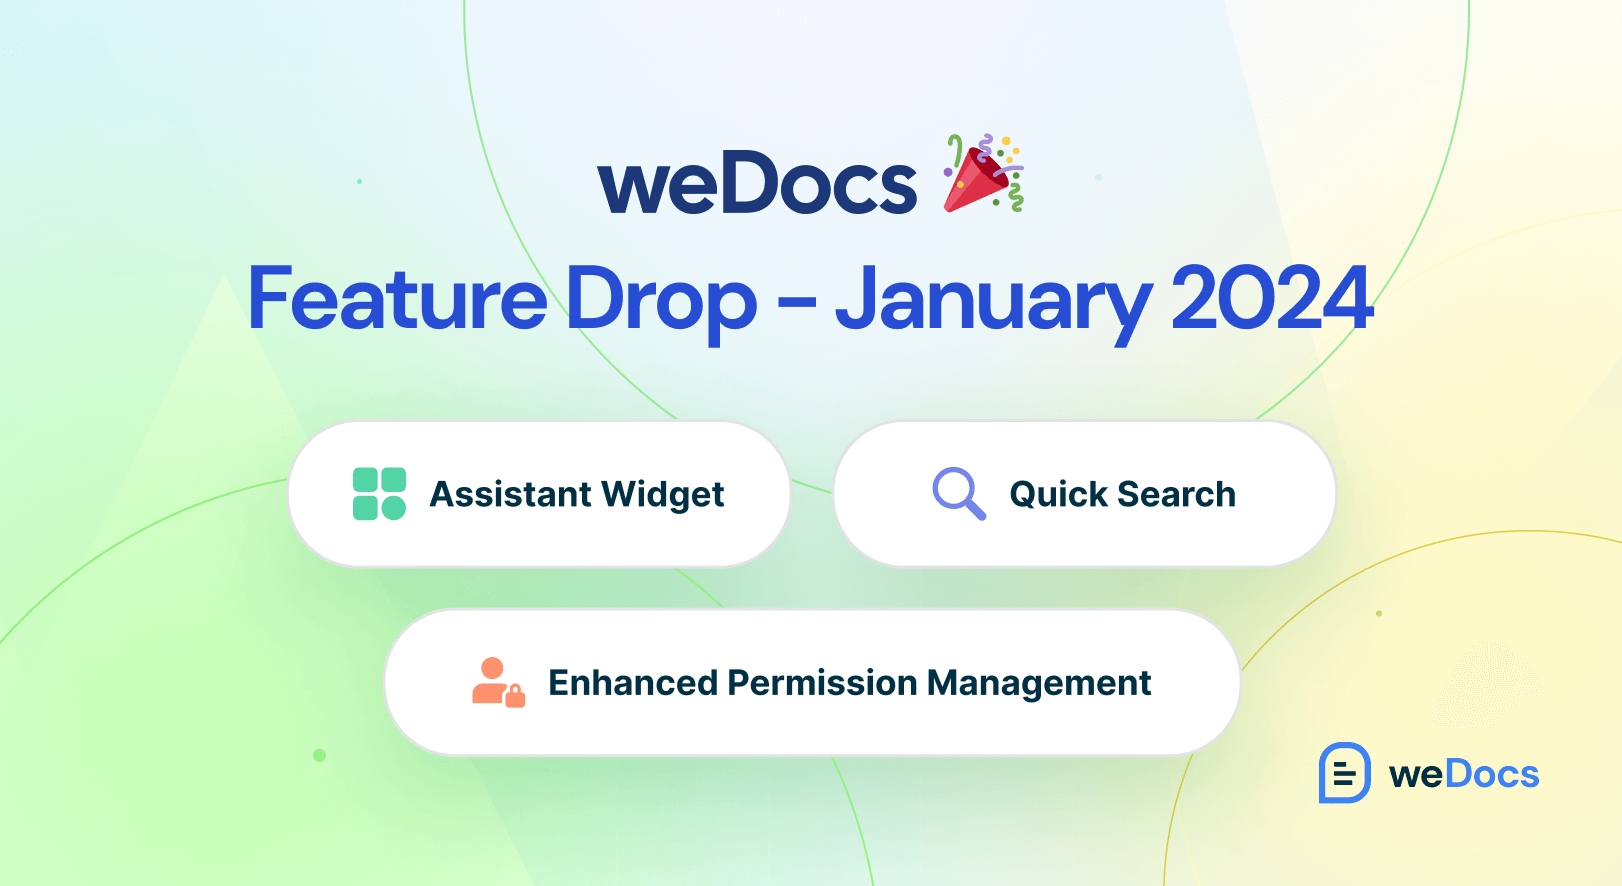
Recently, we have added some exciting new features to the plugin – Assistant Widget, Quick Search, and Permission Management. In the following part of this release post, we’ll introduce you to these features and explain what you can do with them.
What’s New in weDocs – Unwrapping the Four Features with Details
This is the biggest release since the premium version of the plugin came online. The release comes with two major new features and the enhancement of an old feature. Below are the details about the features.
1. Quick Search
By default, the single documentation posts on weDocs didn’t have any filter or search option. But from now on, you’ll get an advanced Ajax search option on single documentation posts. From there, you can find the documentation post you want just by typing keywords and quickly navigate to them.
Below is a snapshot of the weDocs Quick Search box and its interface.
How to Use the weDocs Quick Search Option
You’ll get this option available both in the free and premium versions. Here’s how to use the weDocs Quick Search Option.
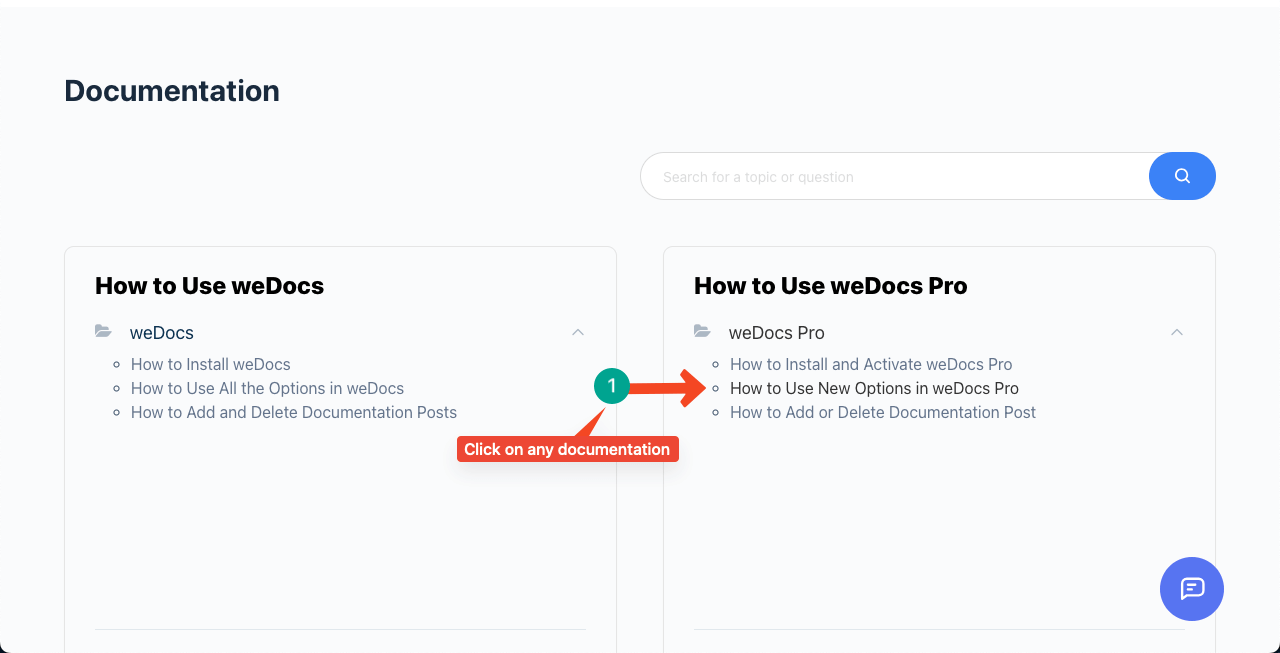
Step 01: Open Any Sigle Documentation Post
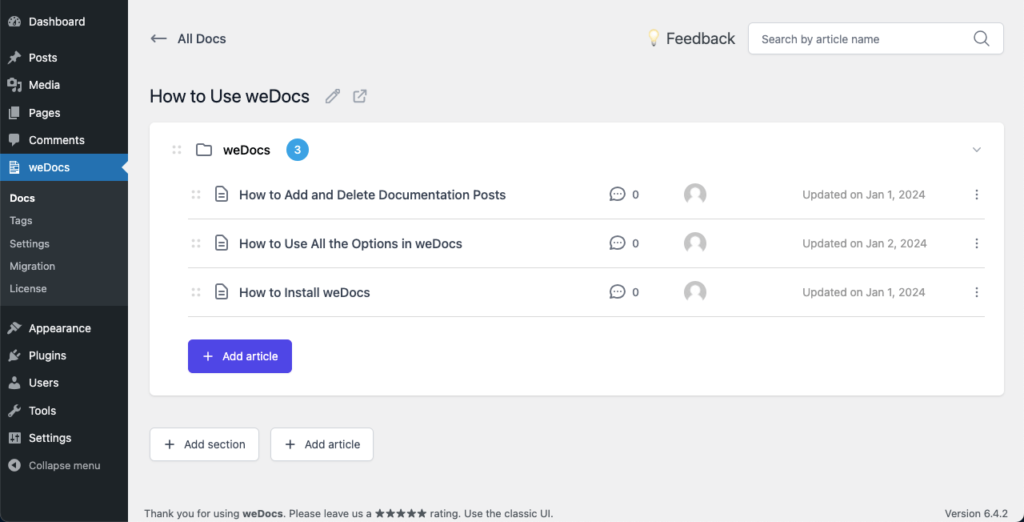
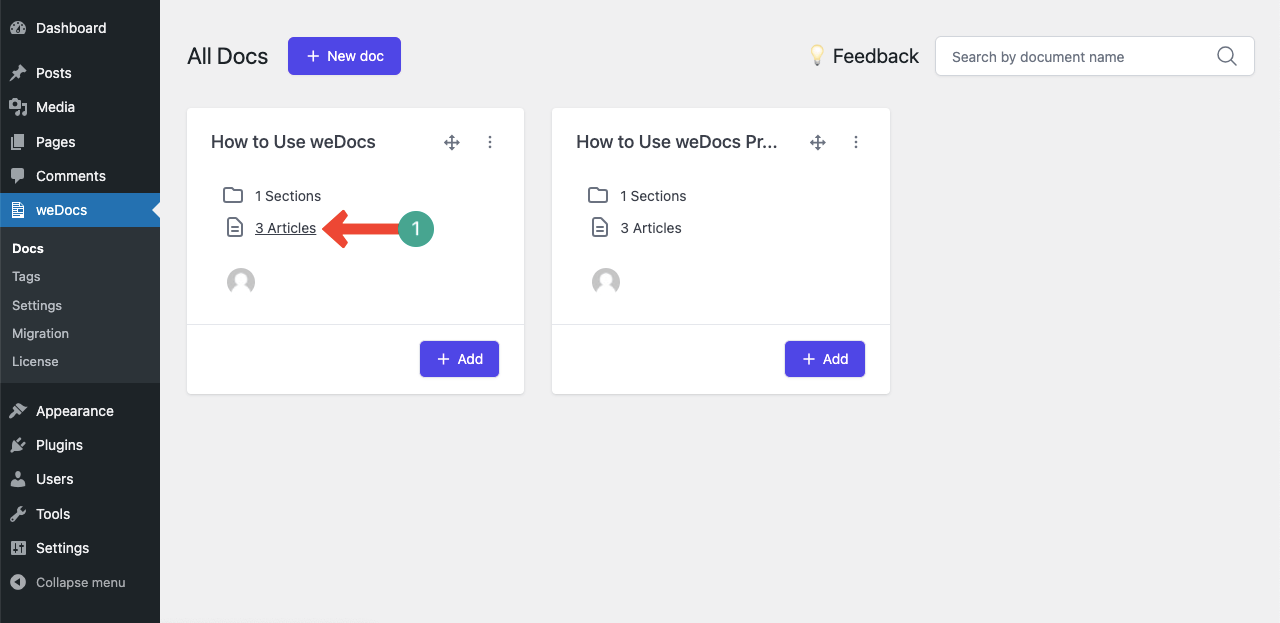
Go to your main documentation page. Click on any single documentation post. You can see in the image we are clicking on a documentation post.
Note: You’ll get a default search box on the main documentation page. But this is not the Quick Search we are referring to. You’ll get the Quick Search option only on single posts.
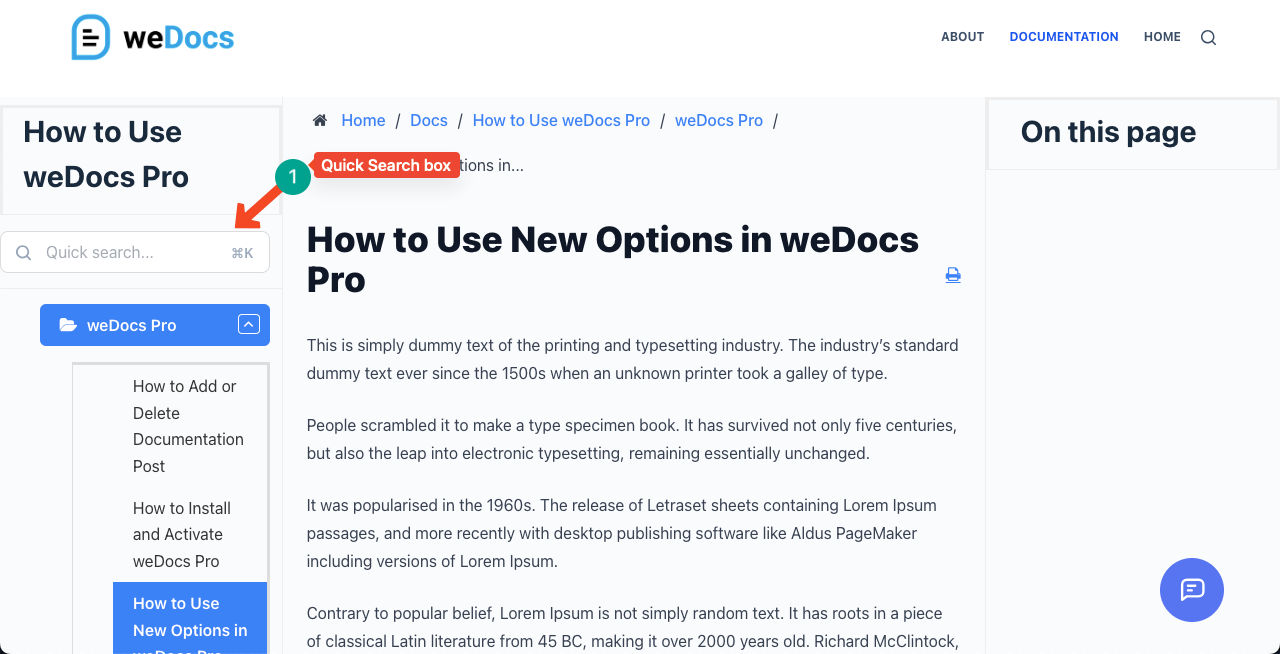
Step 02: Click on the Quick Search Box
You’ll get the Quick Search box on the left side of the single documentation post.
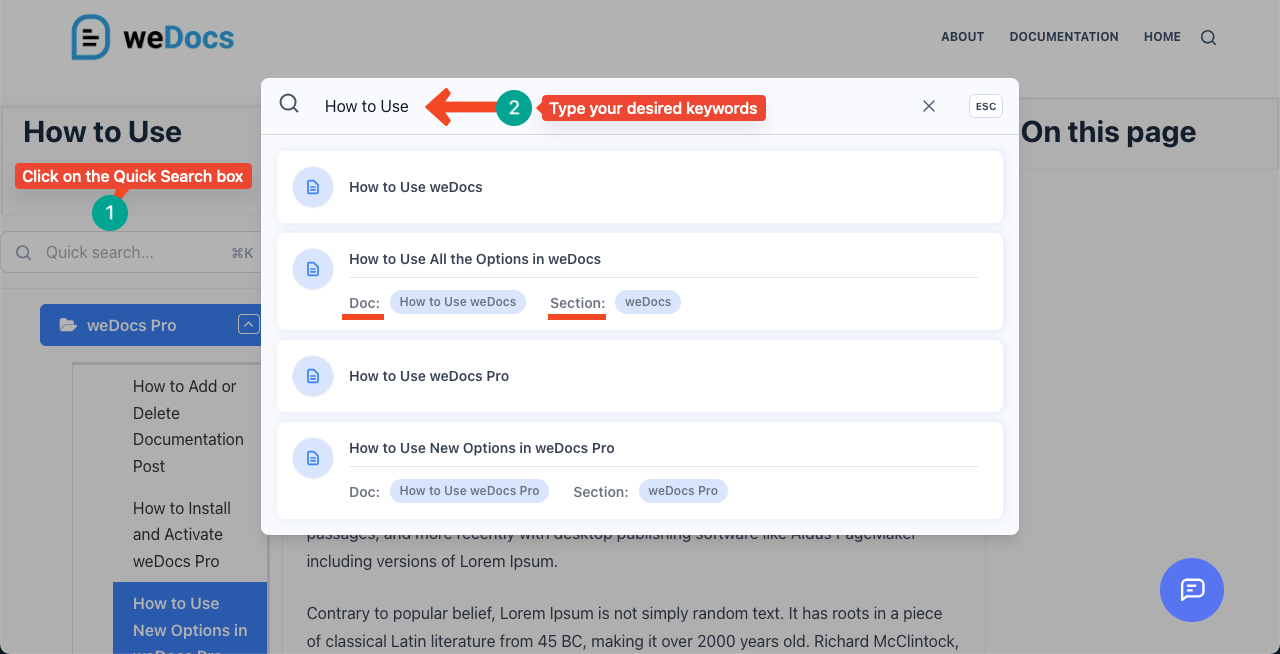
Click on the Quick Search box. A pop-up will open with an additional search box with Ajax powered. Type your desired keywords in the second search box. You’ll see the names of relevant documentation posts appearing below.
What’s more, you’ll see the parent, section, and single documentation names. The results are clickable. By clicking on them, you can quickly navigate to the respective posts.
Thus, weDocs Quick Search will improve user experience by upgrading the filtering and sorting functionalities.
2. Doc Opener (Enhanced Assitant Widget Feature)
Usually, by internal linking, we try to direct users to relevant documentation posts. Users have to open a different tab or leave their current post to explore the linked post. But there are many users who don’t love to open a new tab for exploring new posts, leaving their current post till it’s finished.
weDocs’ Assistant Widget can help you solve the problem. But one thing we want to clarify at the beginning is that weDocs already have an Assistant Widget, which we have enhanced further. It comes with a doc opener (like pop-ups) that allows users to explore information on the linked documentation while staying on the existing post.
This means you can explore numerous other documentation posts staying on a single document. The following clip explains how the weDocs Assistant Widget works.
How to Use and Enable the Do Openera (Enhanced Assistant Widget)
Here, we’ll show you a step-by-step guide on how to use and enable the Doc Opener. Take a look.
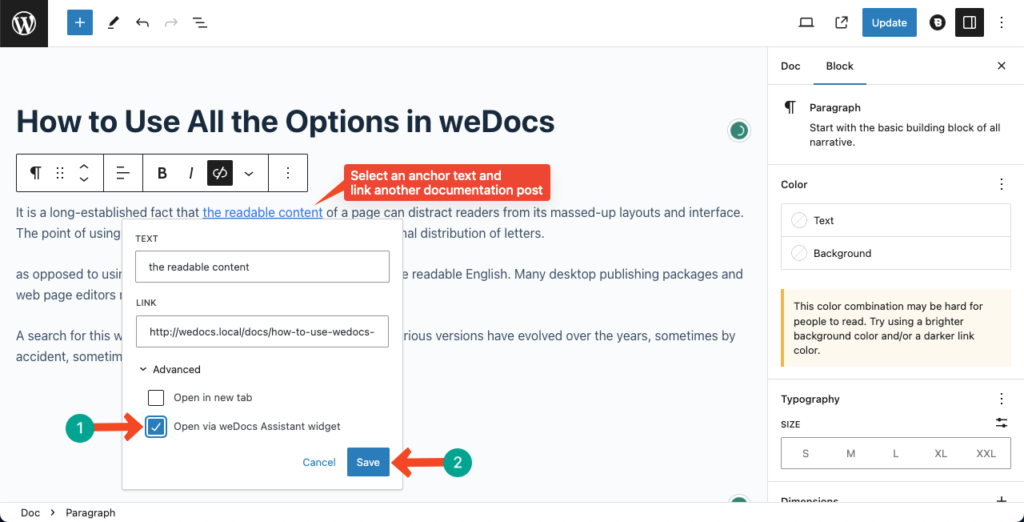
Step 01: Open a Documentation Post from the weDocs Library
Navigate to WordPress Dashboard > weDocs. Open any post where you want to link one or more documentation posts internally.
Step 02: Link Post and Enable Open via weDocs Assistant Widget
Select any suitable anchor text and link it with your desired documentation post. After that, from the Advanced option, enable the Open via the weDocs Assistant Widget option. Hit the Save button at the end.
Note: This option works only with documentation posts, not with WordPress default posts, custom post types, or pages.
Step 03: Preview the Widget on the Frontend of the Post
Go to the frontend of the documentation post. Click on the respected anchor text. You’ll see a pop-up opened with the information on your desired post.
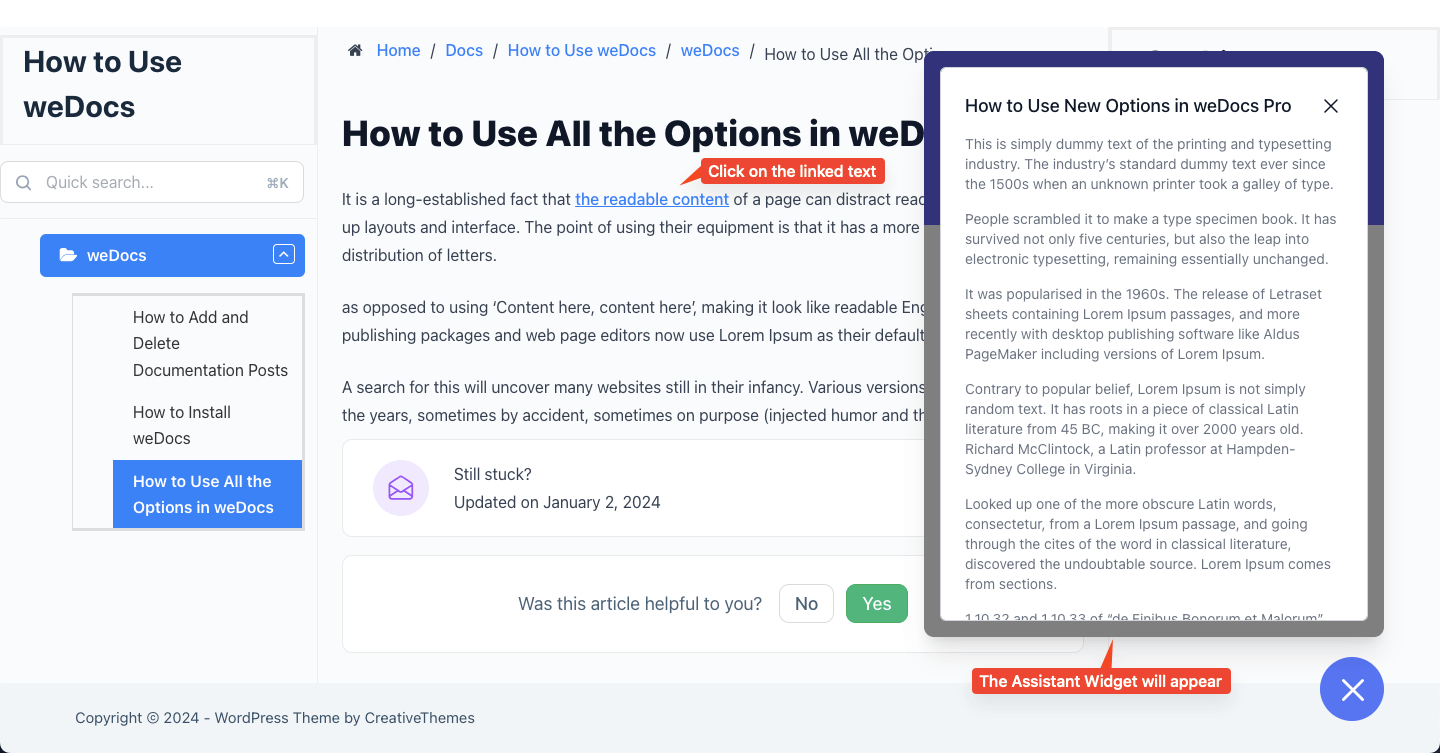
Thus, you can link as many documentation posts as you want to a single post so visitors can explore all the important ones from a single interface.
3. Publish/Draft Documentation from the weDocs Dashboard
WeDocs allows you to publish and draft documentation posts from the weDocs Dashboard without having to open the post. This can save you a lot of valuable time. The following clip will explain to you the process.
How to Publish/Draft Documentation from the weDocs Dashboard
This process is similar to publishing or drafting documentation posts and pages from the WordPress dashboard.
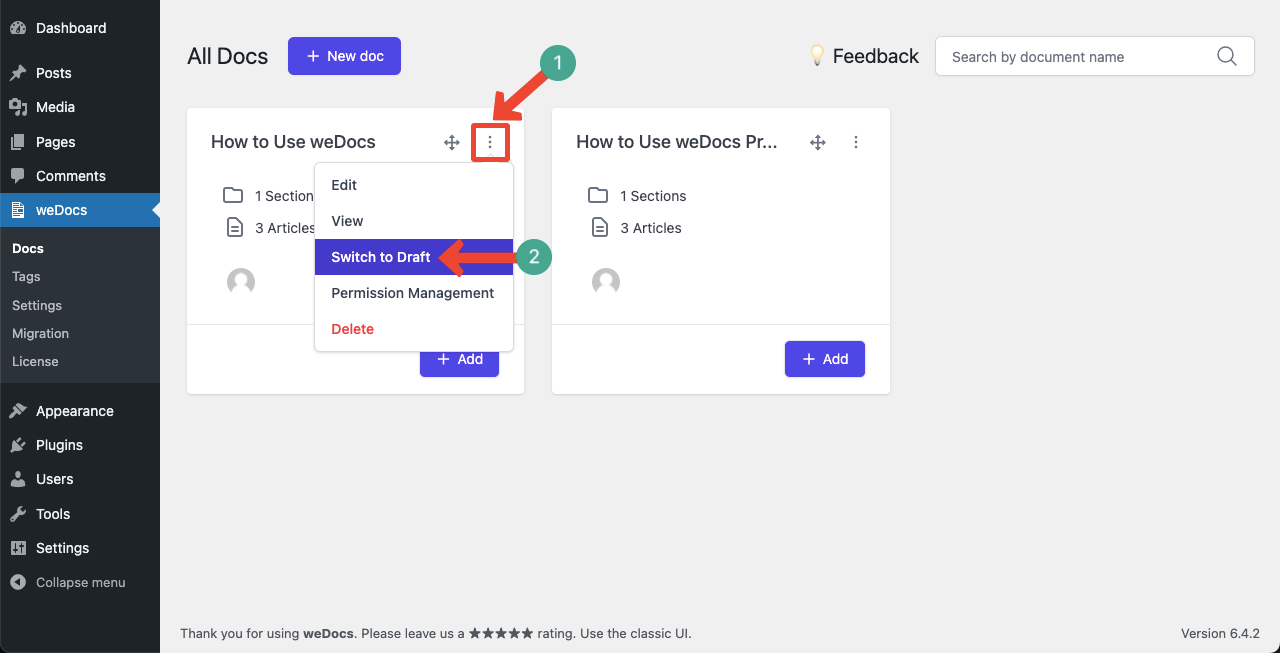
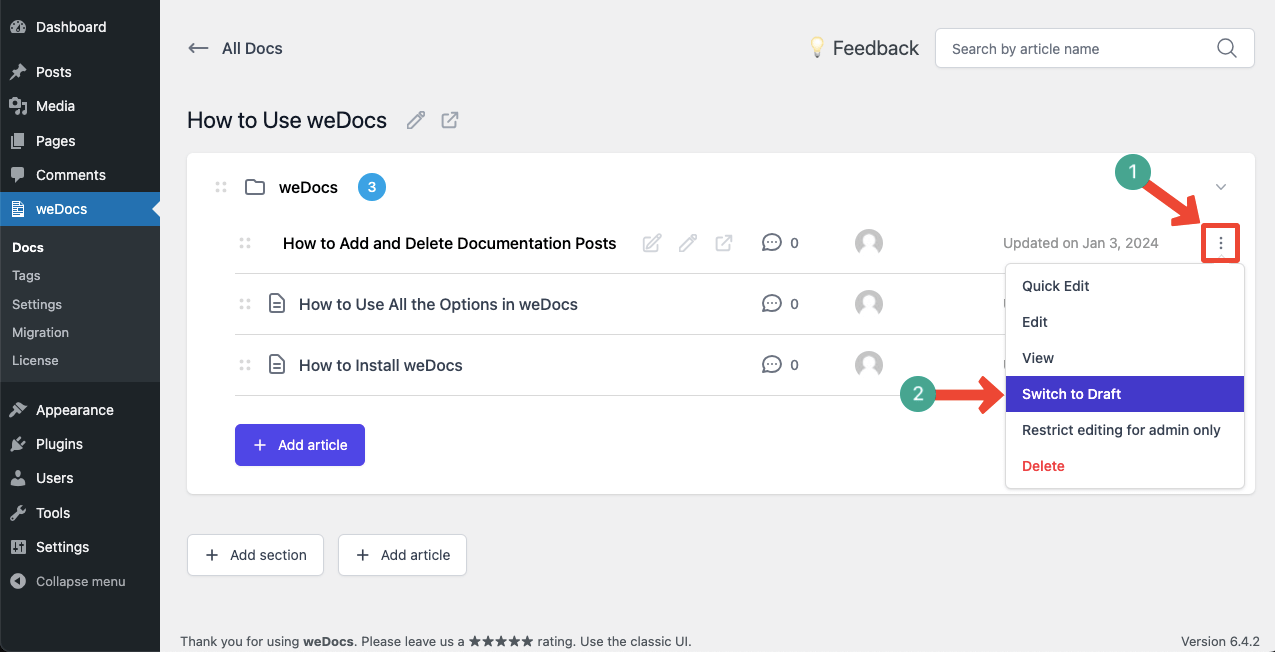
Step 01: Publish/Draft the Entire Parent Documentation from weDocs Dashboard
Go to weDocs dashboard. Click on the three-dot icon on the top-right corner of any parent documentation. You’ll get a list with the option Switch to Draft/Publish Now.
You can draft or publish your post using these options.
Step 02: Publish/Draft Individual Documentation Posts
Take your cursor on any parent documentation and click on the Articles option.
Hovering your cursor on any post will appear the three-dot icon. Clicking the icon will open a list, including the option Switch to Draft/Publish Now.
4. Enhanced Permission Management
Previously, the weDocs permission management system was limited only to the published documentation posts, not to the posts in draft. But the recent release of weDocs has overcome this issue. You can now manage permissions for draft posts as well.
How to Manage Permission for Darft Posts in weDocs
Like the other two features above, this feature is also very simple to use. Let’s explore.
Step 01: Go to weDocs Library and Select a Drafted Parent Documentation
Navigate to WordPress Dashboard > weDocs > Settings. Select a drafted parent documentation. Click on the three-dotted icon on the top-right corner.
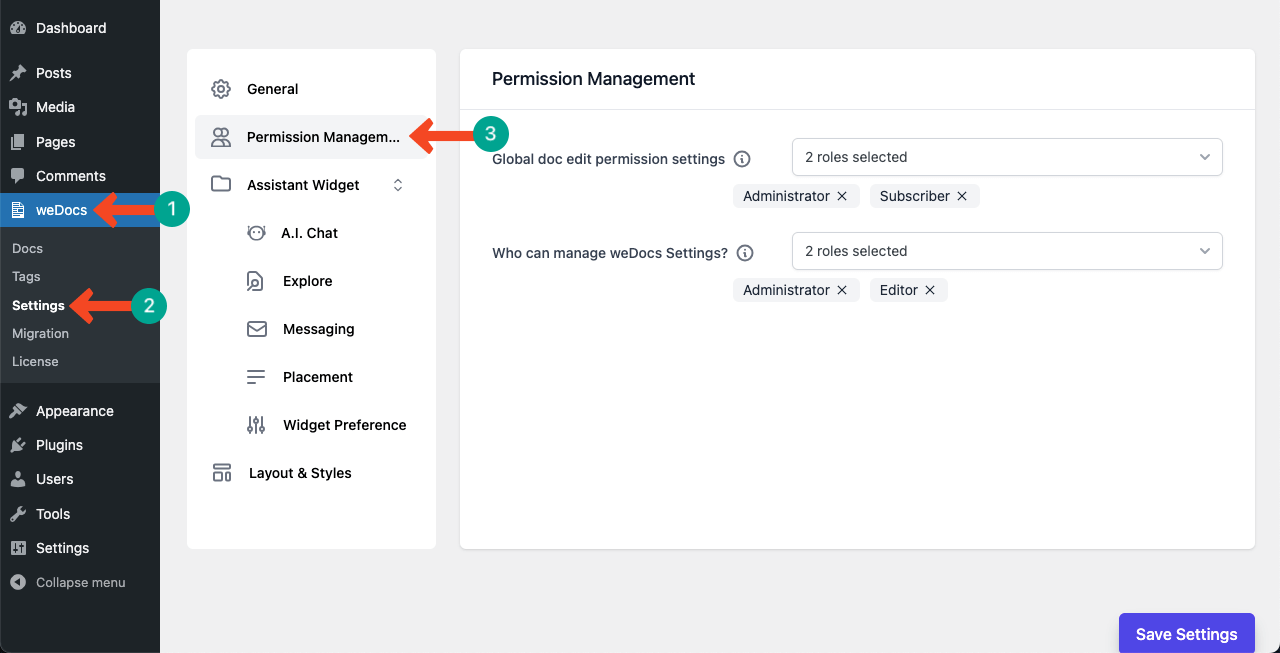
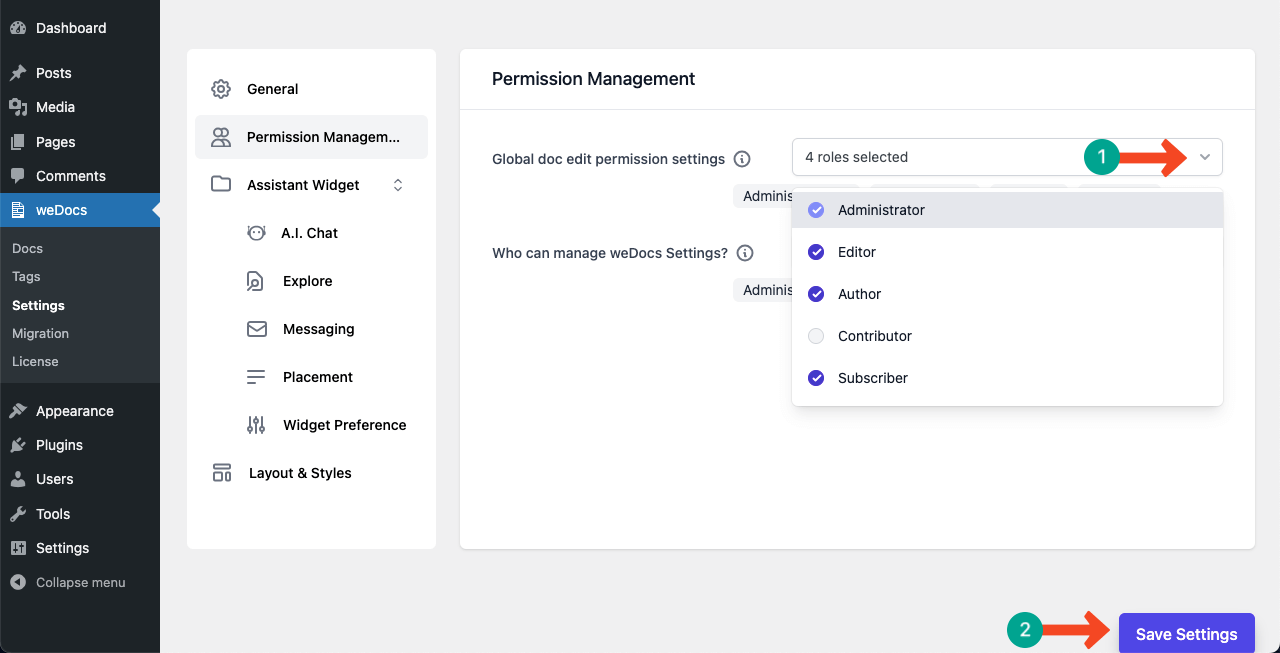
Hit the dropdown icon next to the option Global doc edit permission settings. The dropdown list will show you five users. Select the options with whom you want to share access to the documentation posts. Hit the Save Settings button in the end.
Try weDocs to Revamp Your Documentation Experience
weDocs is undoubtedly a pioneer plugin in the WordPress documentation segment. Although it was kept in the repository as a free version for a long time, we are currently undertaking massive development of the plugin to make documentation easy for all types of products.
Not just the premium version. We will bring many more innovations in the future for its free version as well. So understandably, the weDocs team will release many more releases in the coming days, like today. So stay tuned with us for regular updates and submit your reviews in the comment box.
Subscribe to
weDocs blog
We send weekly newsletters,
no spam for sure!