
If you are using weDocs Pro, you can now publish a Changelog alongside your documentation.
A changelog gives your users a clean public timeline of everything you ship. Every new feature, improvement, and fix, laid out by release date. This helps product owners keep customers informed, cut down on repetitive support questions, and show that the product is actively maintained.
You can run one changelog for a single product, or several side by side channels, for example a Free channel and a Pro channel, each with its own page, banner, and web address.
In this guide, you will learn how to create a changelog, add entries, choose how it is structured, and style the public page.
Here is how to set it up.
Note: Make sure you have weDocs Pro active and are running weDocs 2.4.0 (Free) and 1.3.0 (Pro) or later.
Also, before you start, it helps to know two terms. A Changelog is a stream of updates, also called a channel. An Entry is a single update inside it, with a title, a release date, and a category.
Create a Changelog
From your WordPress dashboard, go to weDocs–> Changelogs. You will find it right under Docs.
Click on the New changelog button and give it a name.
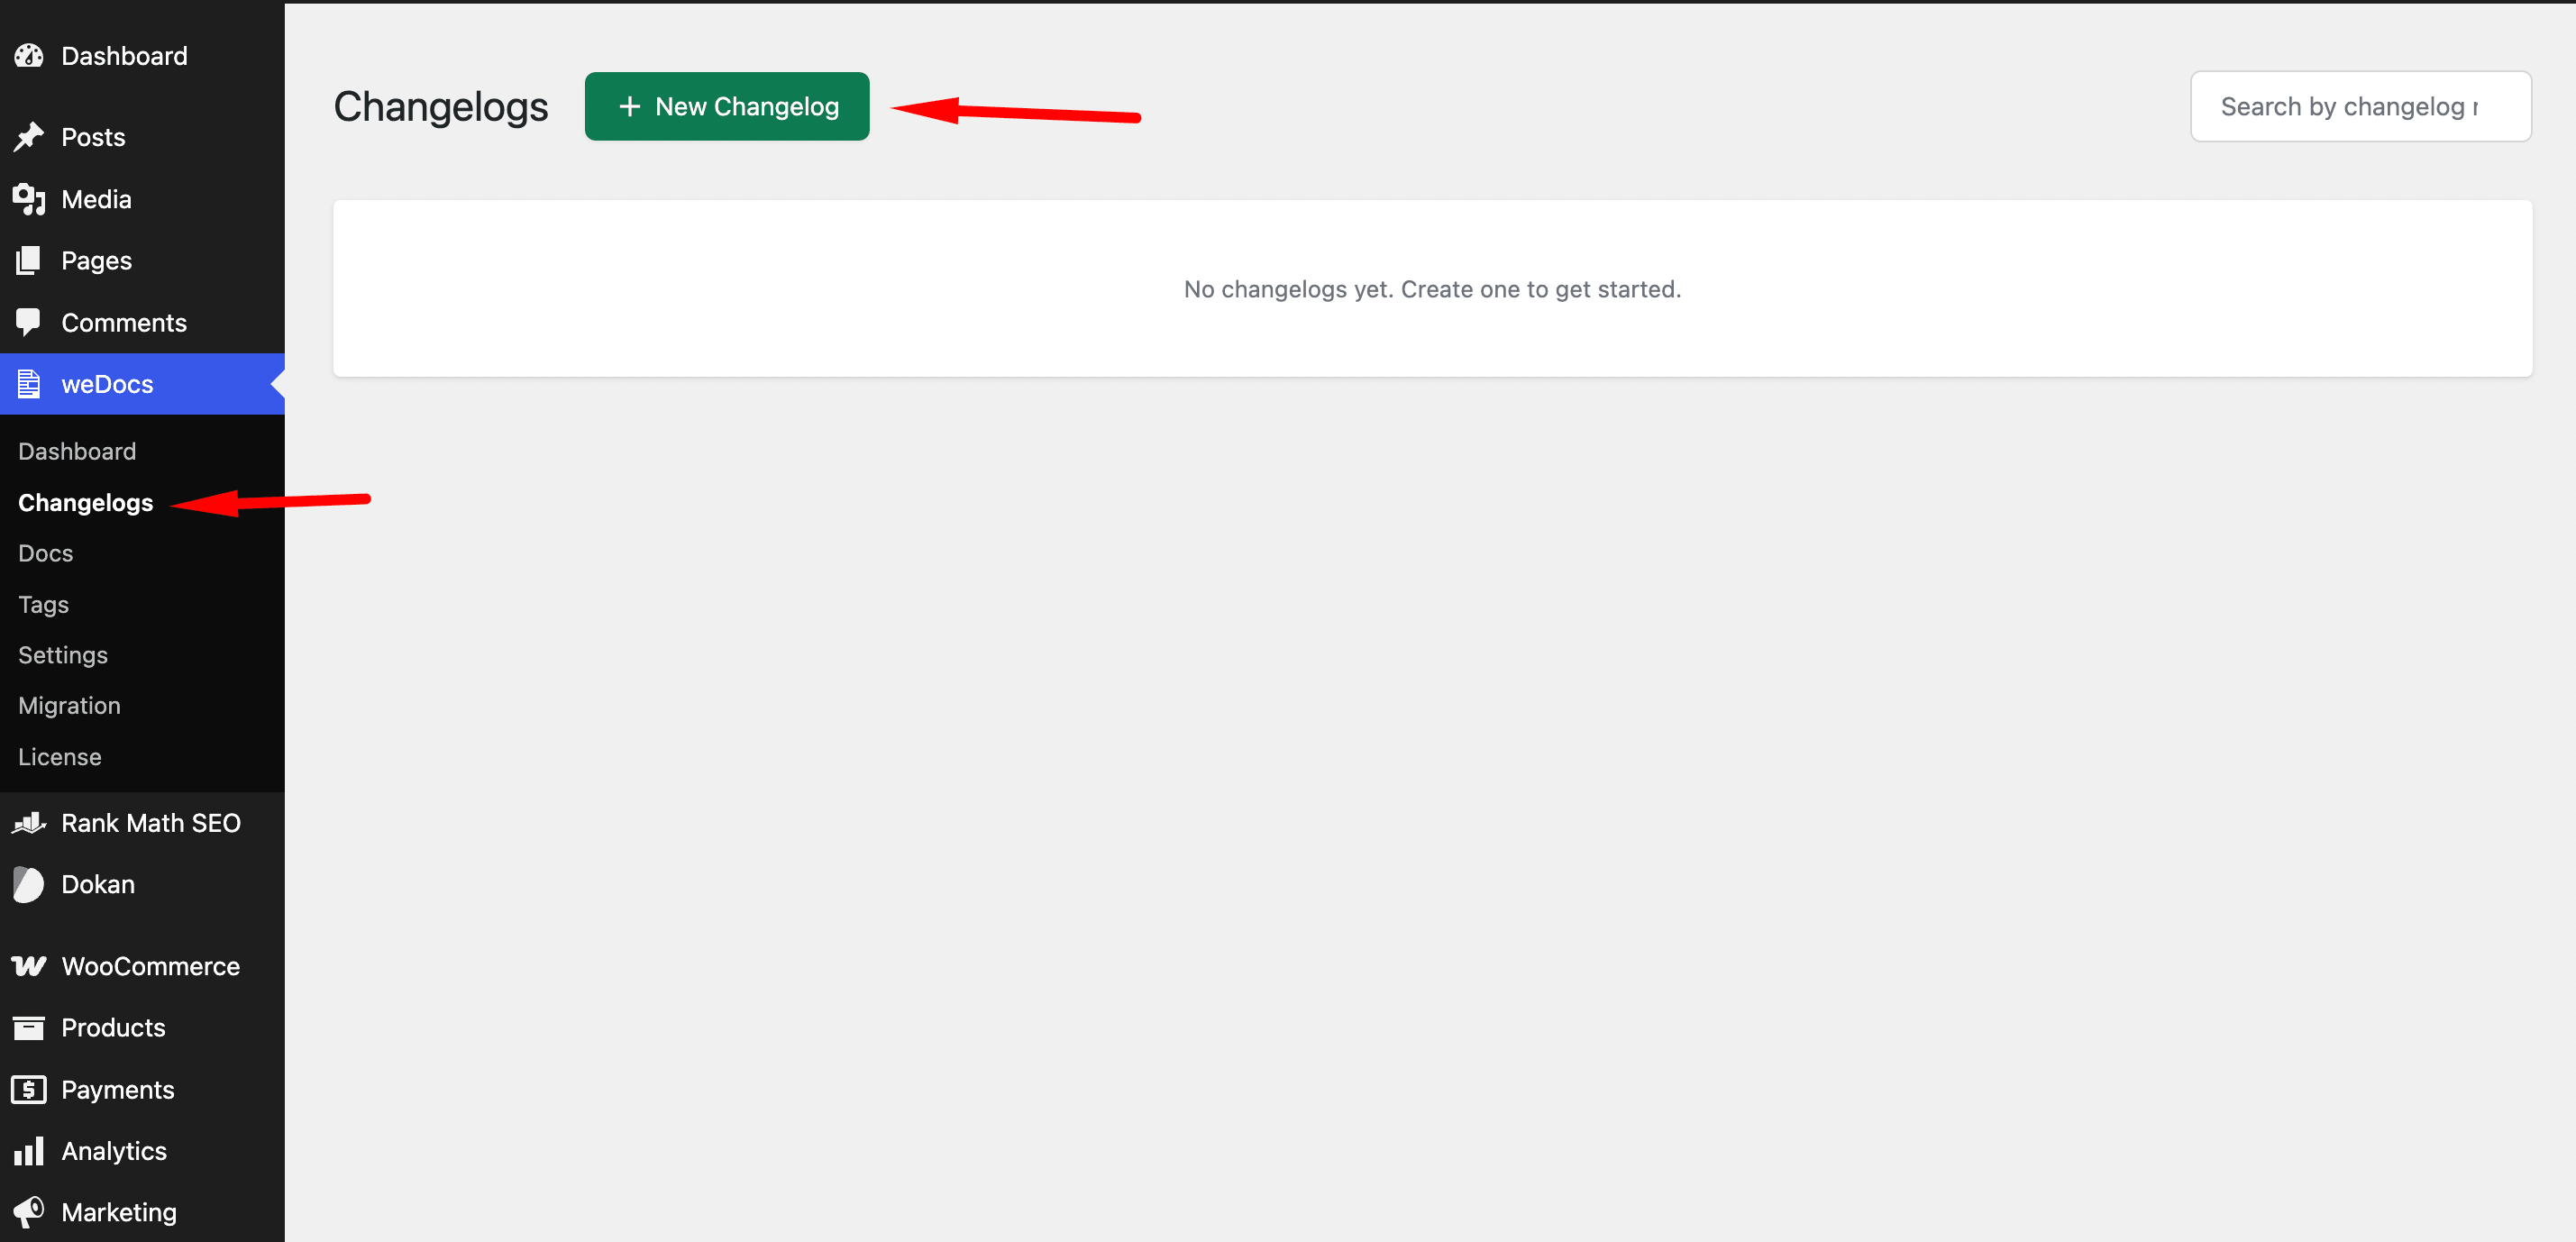
For a single product, something like Product updates works well. If you are running separate streams, name them Free and Pro–
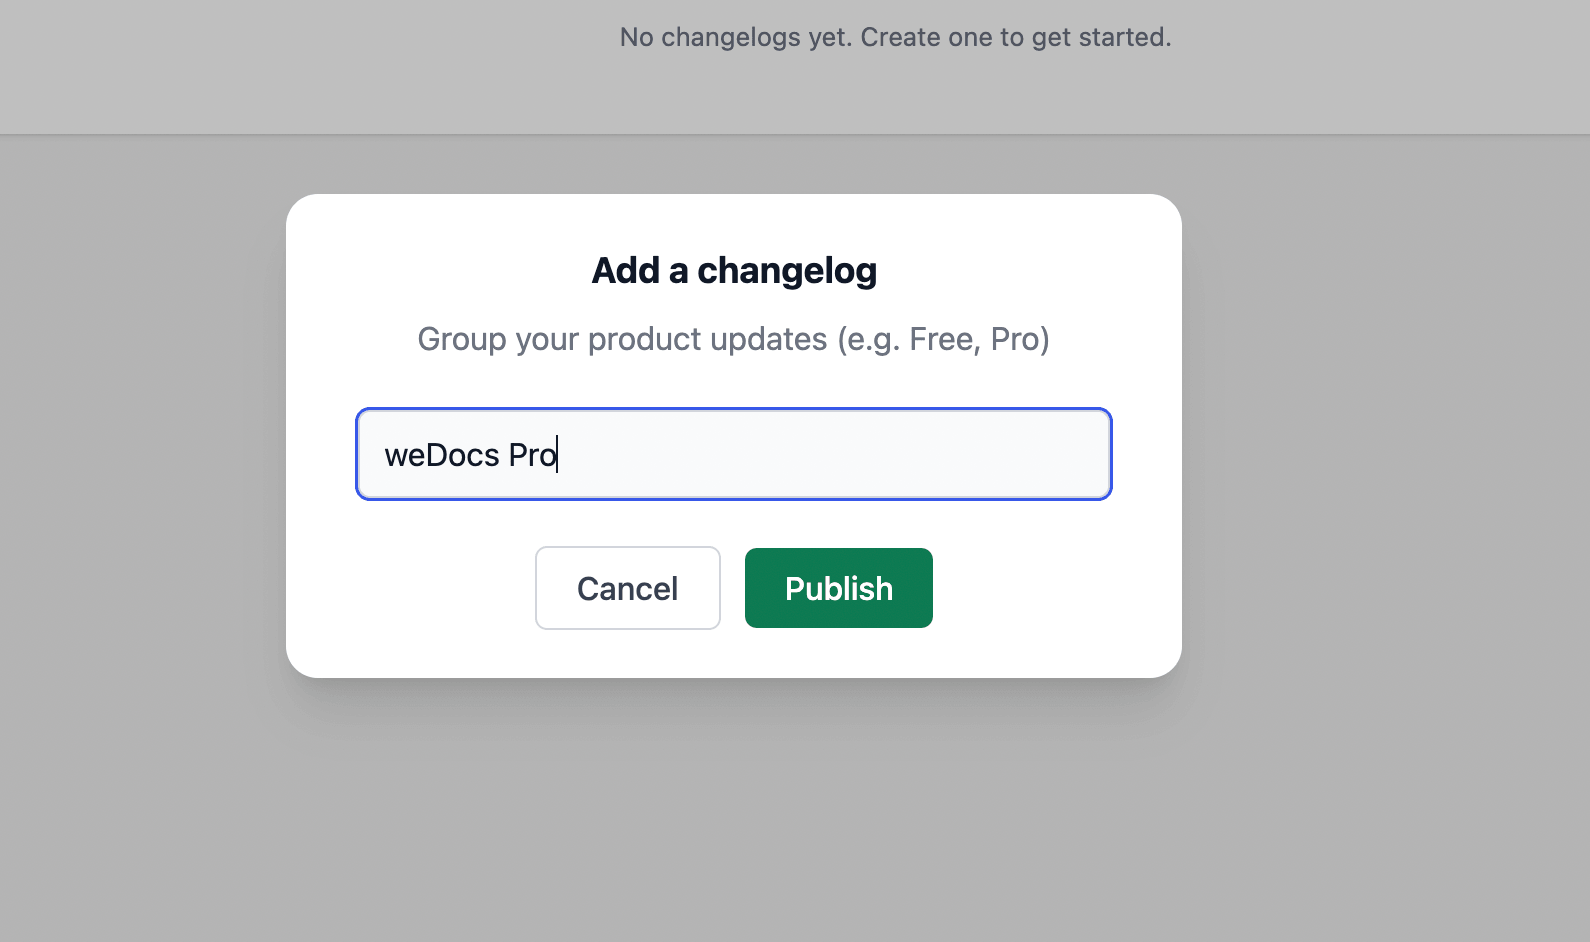
Save it, and the new changelog card will appear in your grid.
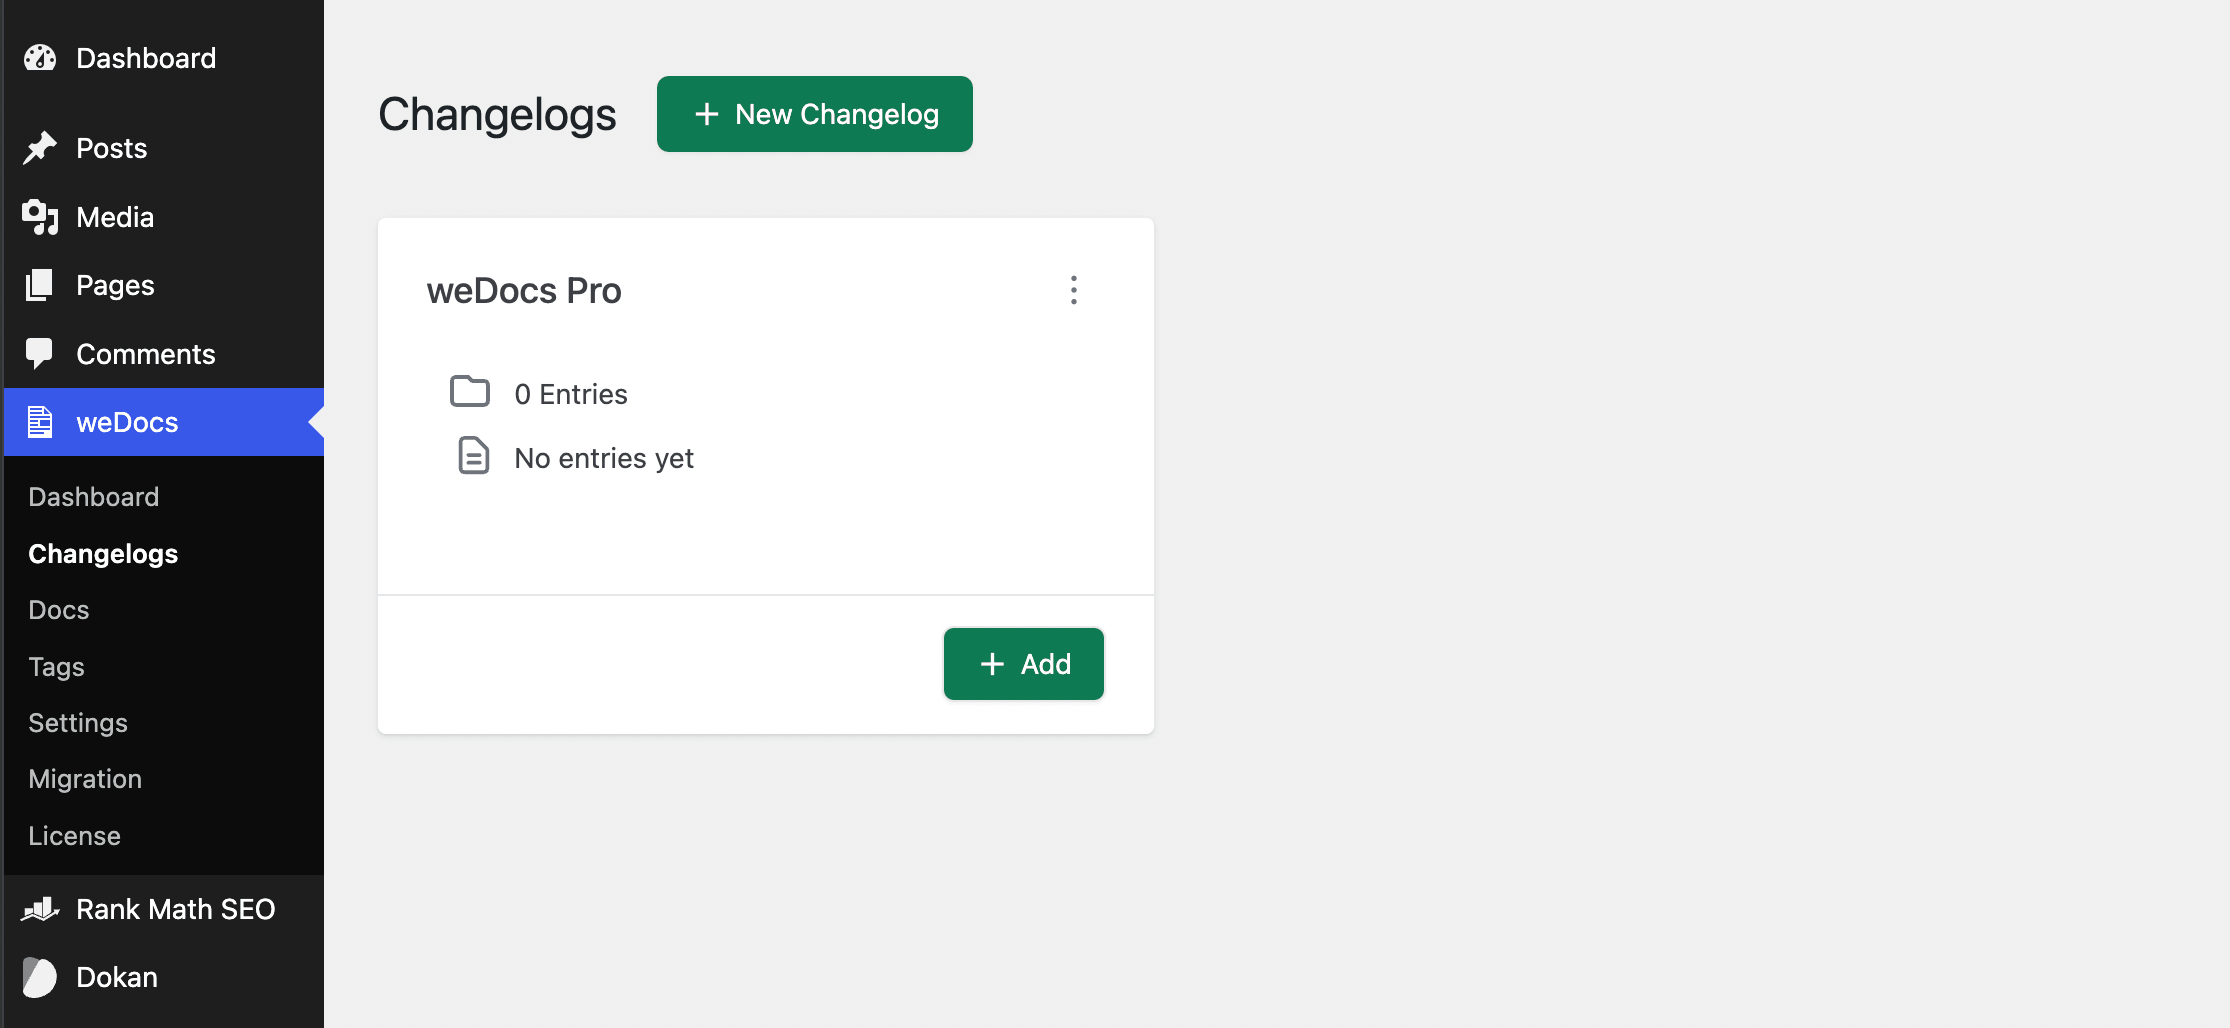
Note: The first changelog you create becomes the primary one.
Add Entries
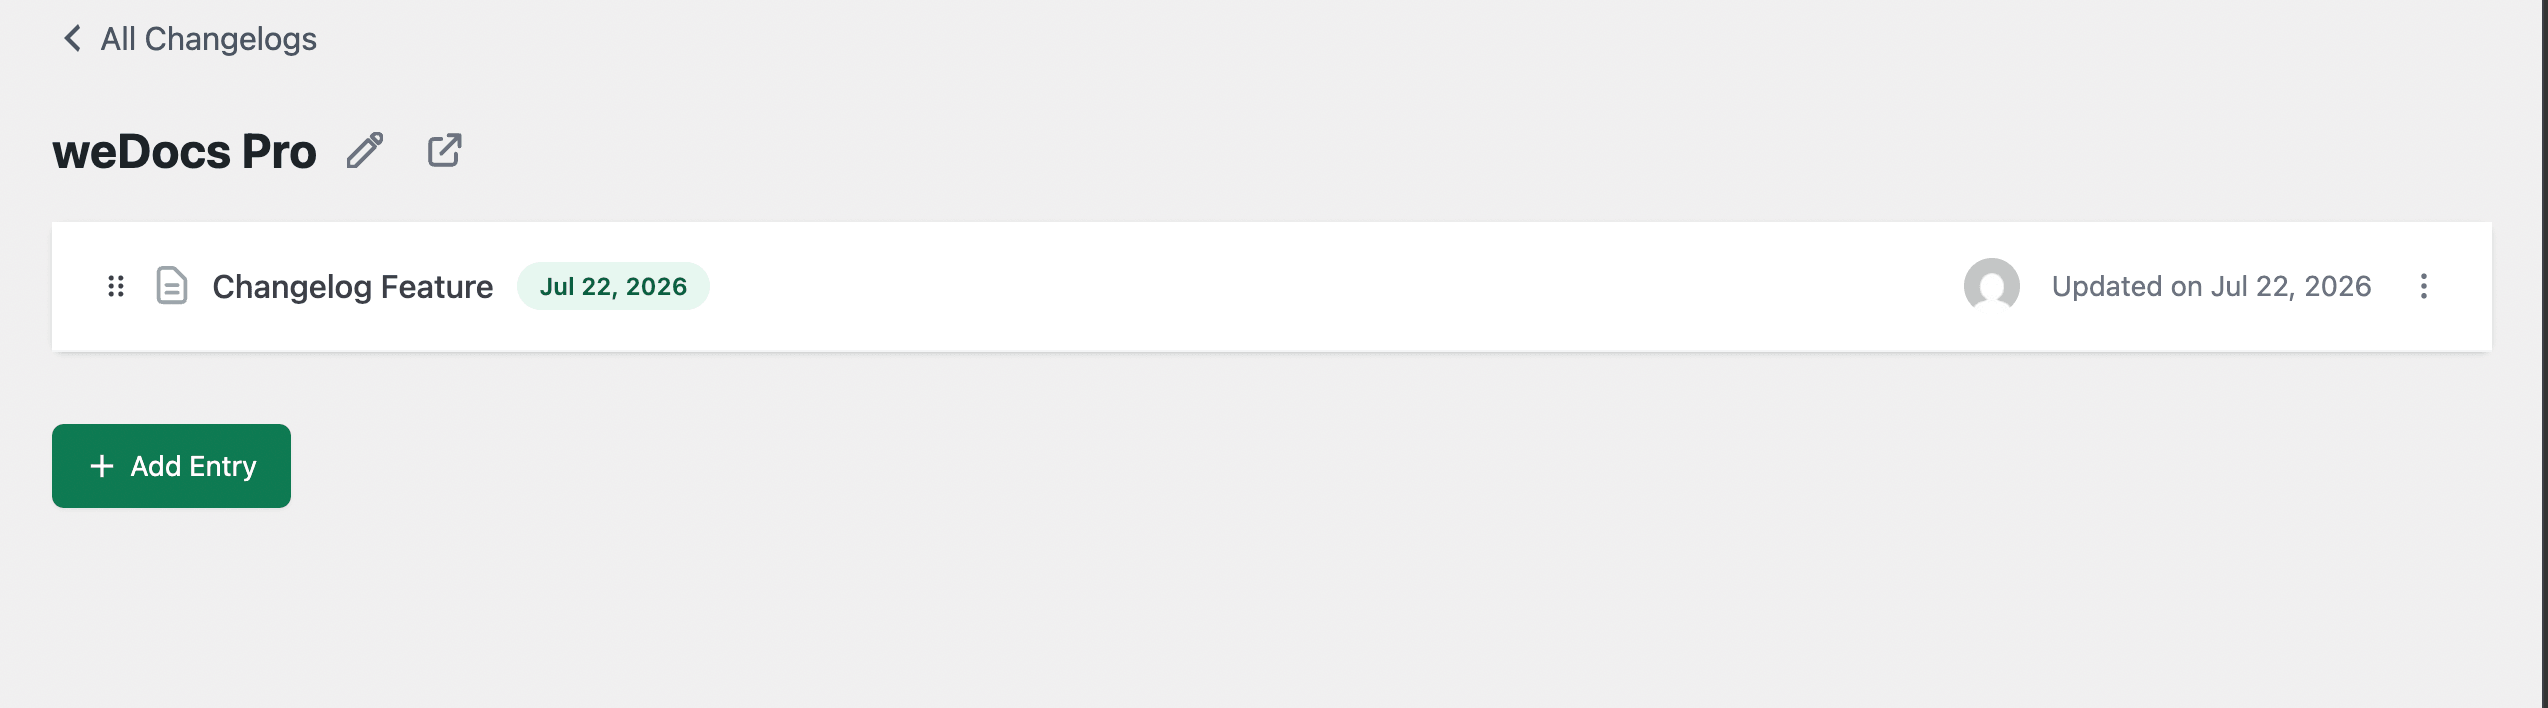
Open a changelog card to see its entries. There are two ways to add an update.
For a quick one-liner, click on Add entry. A small pop-up lets you set the title, release date, and category, then publish right away-
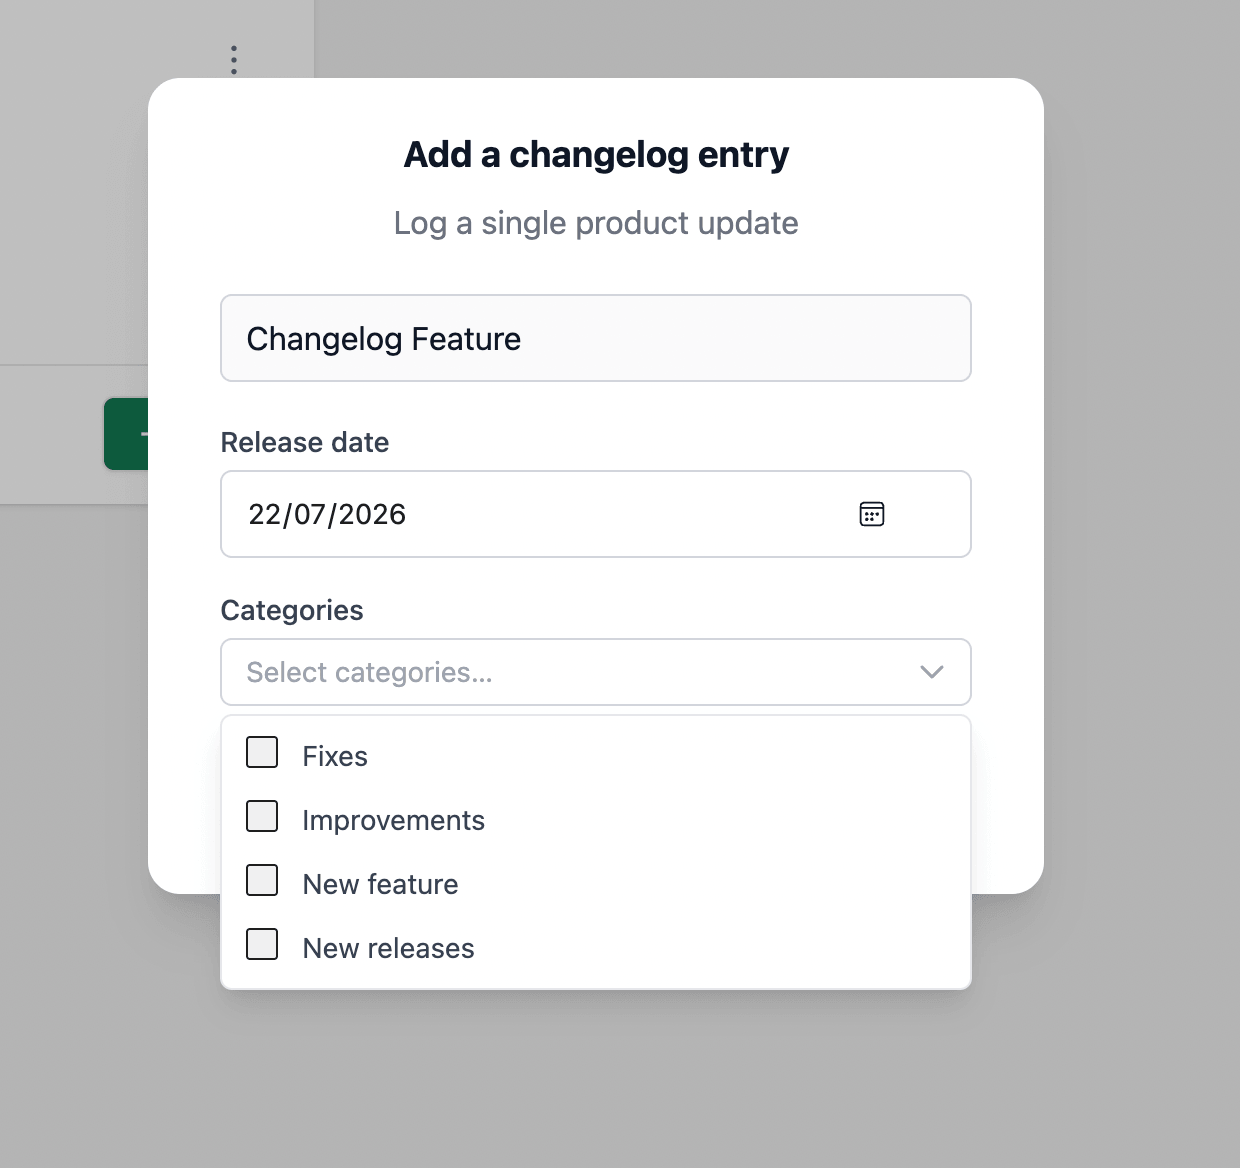
For a proper write-up, open the entry in the editor using the pencil or Edit icon. You will get the full WordPress editor, so you can add headings, images, lists, and links.
In the right-hand sidebar, open the Changelog panel to set the Release date, the Category, and the Channel the entry belongs to-
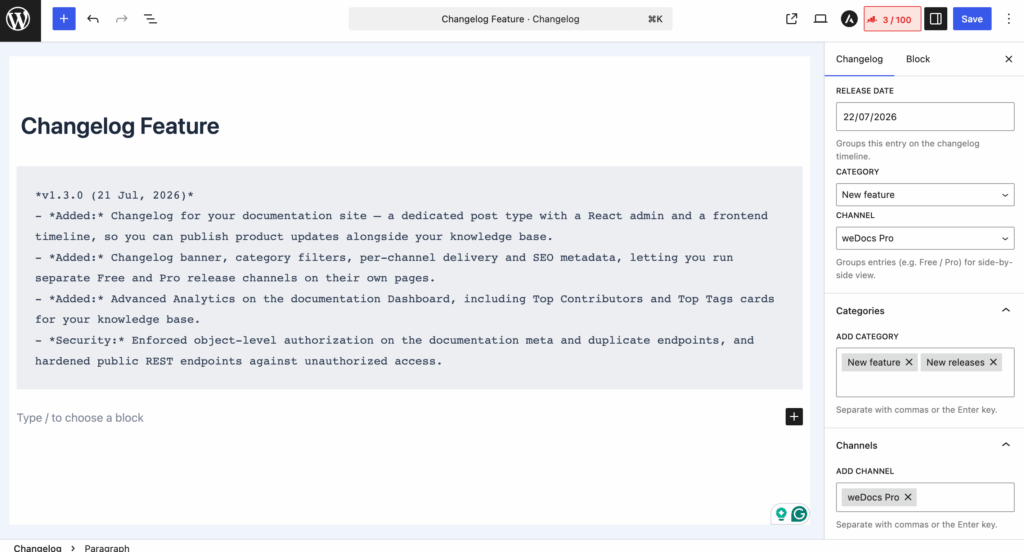
Note: The Release date is what groups the entry on the public timeline. It is separate from the “Updated on” date.
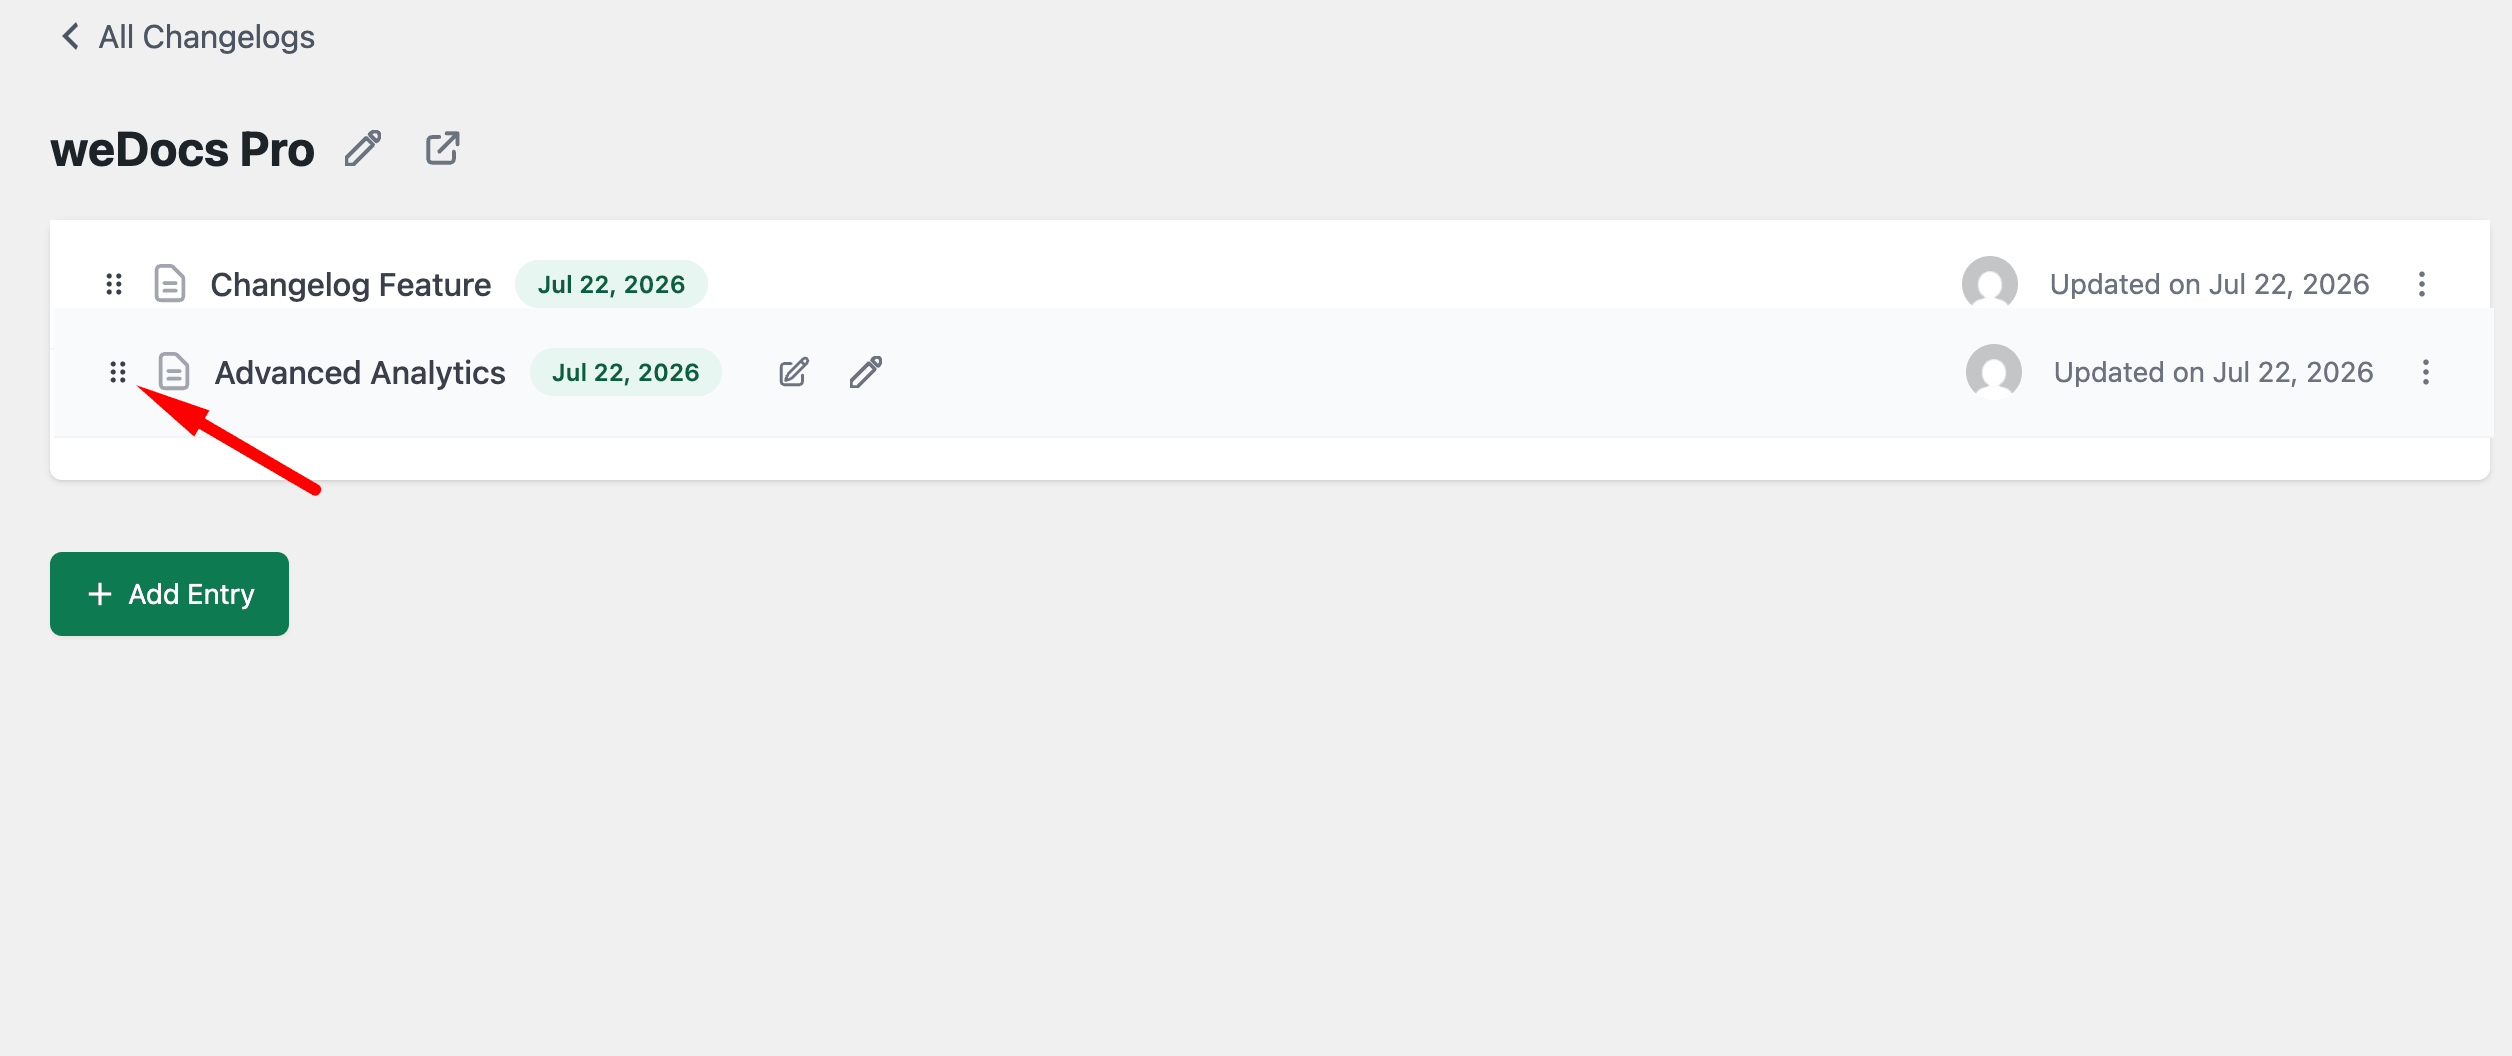
You can drag entries to reorder them within a changelog. The ⋯ menu on each entry gives you Switch to Draft, Publish Now, Duplicate, and Delete. Contributor avatars show who worked on each entry-
Changelog Settings
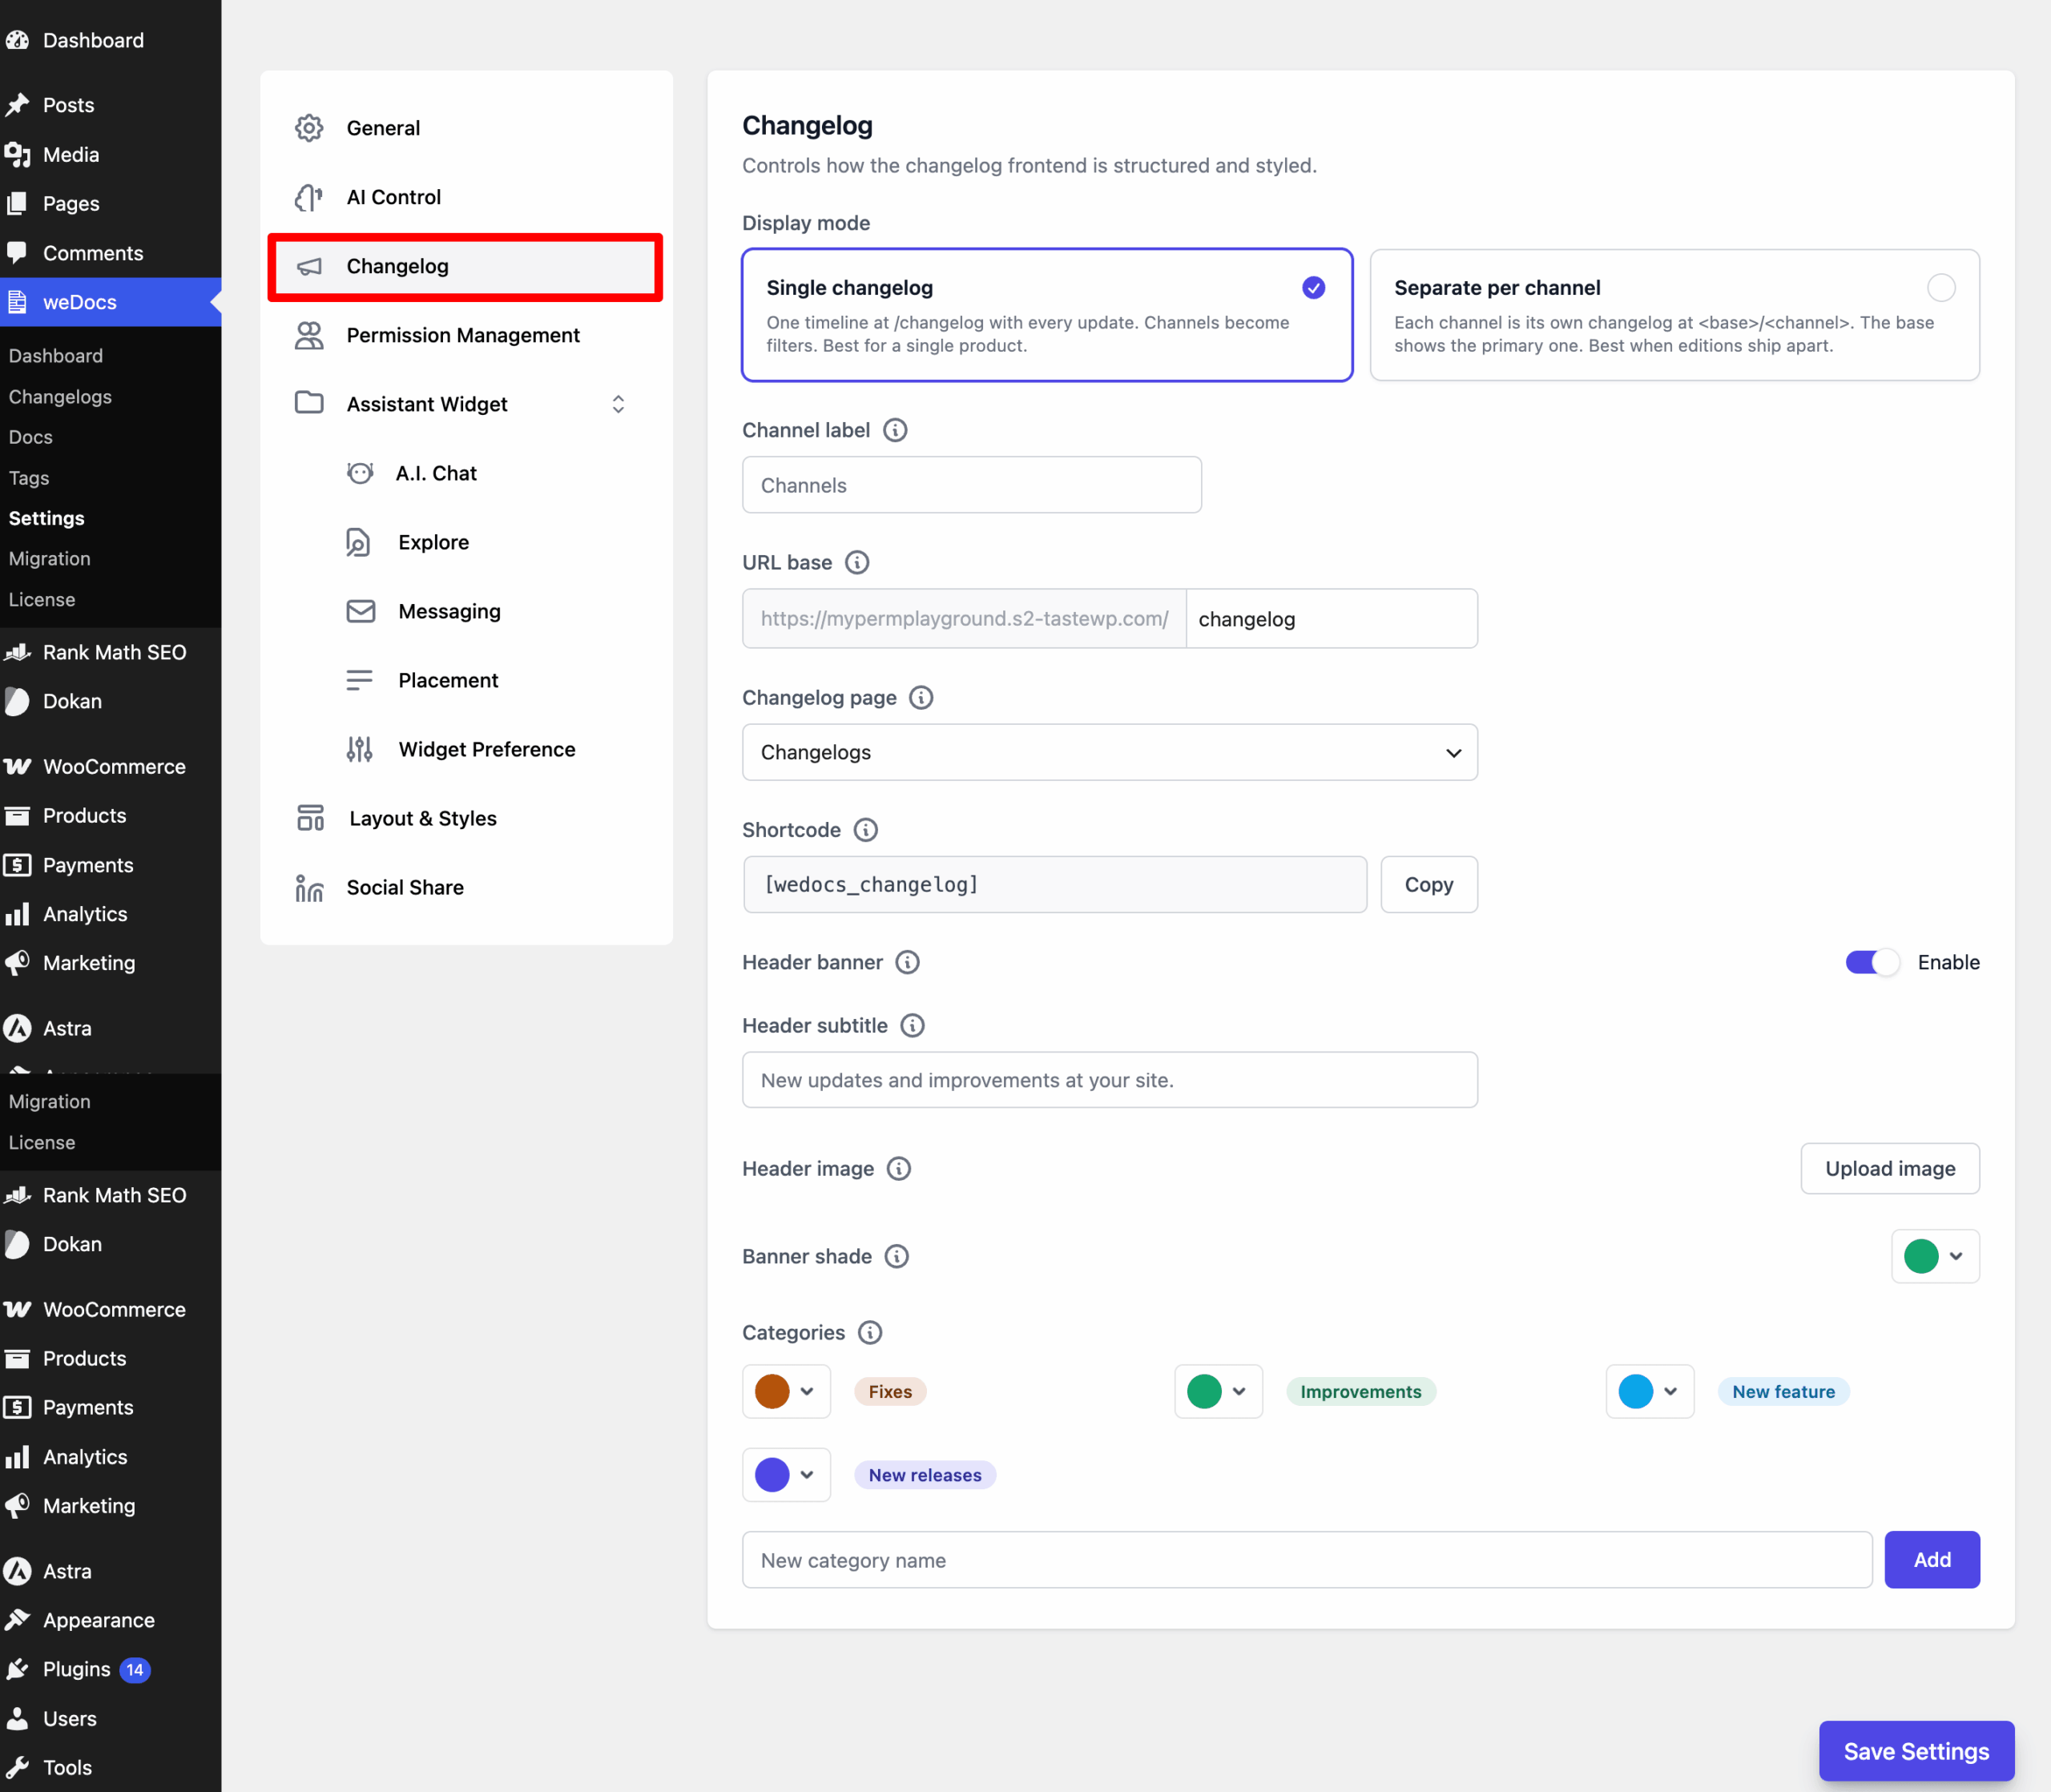
Now go to weDocs–> Settings–> Changelog. The first option is the Display mode, and you have two choices-
Single changelog shows one timeline at your changelog address with every update on it. Your channels become filters that readers can click. This works best for a single product.
Separate per channel gives each channel its own changelog at its own address, for example /changelog/free and /changelog/pro. Your main address shows the primary changelog. This works best when your editions ship apart.
Pick whichever matches how you release. You can switch anytime.
Changelog Address
In Settings–> Changelog, you can decide where the changelog lives on your site.
The Channel label controls what channels are called in the public switcher. The default is Channels, but you can change it to Products, Editions, Apps, or anything your visitors will understand.
The URL base sets the web address. By default it is changelog, so your changelog lives at yoursite.com/changelog and channels at yoursite.com/changelog/free. You can change it to something like updates or releases–
Note: If your links show a 404 after changing the URL base, save your settings and then open Settings–> Permalinks once. You do not need to change anything there. Just loading the page refreshes the link rules in WordPress.If it still doesn’t work, save it to Post settings.
If you would rather use an existing page, select one under Changelog page. The changelog renders on it automatically with an in-page channel switcher, and you can add that page to your menu like any other-
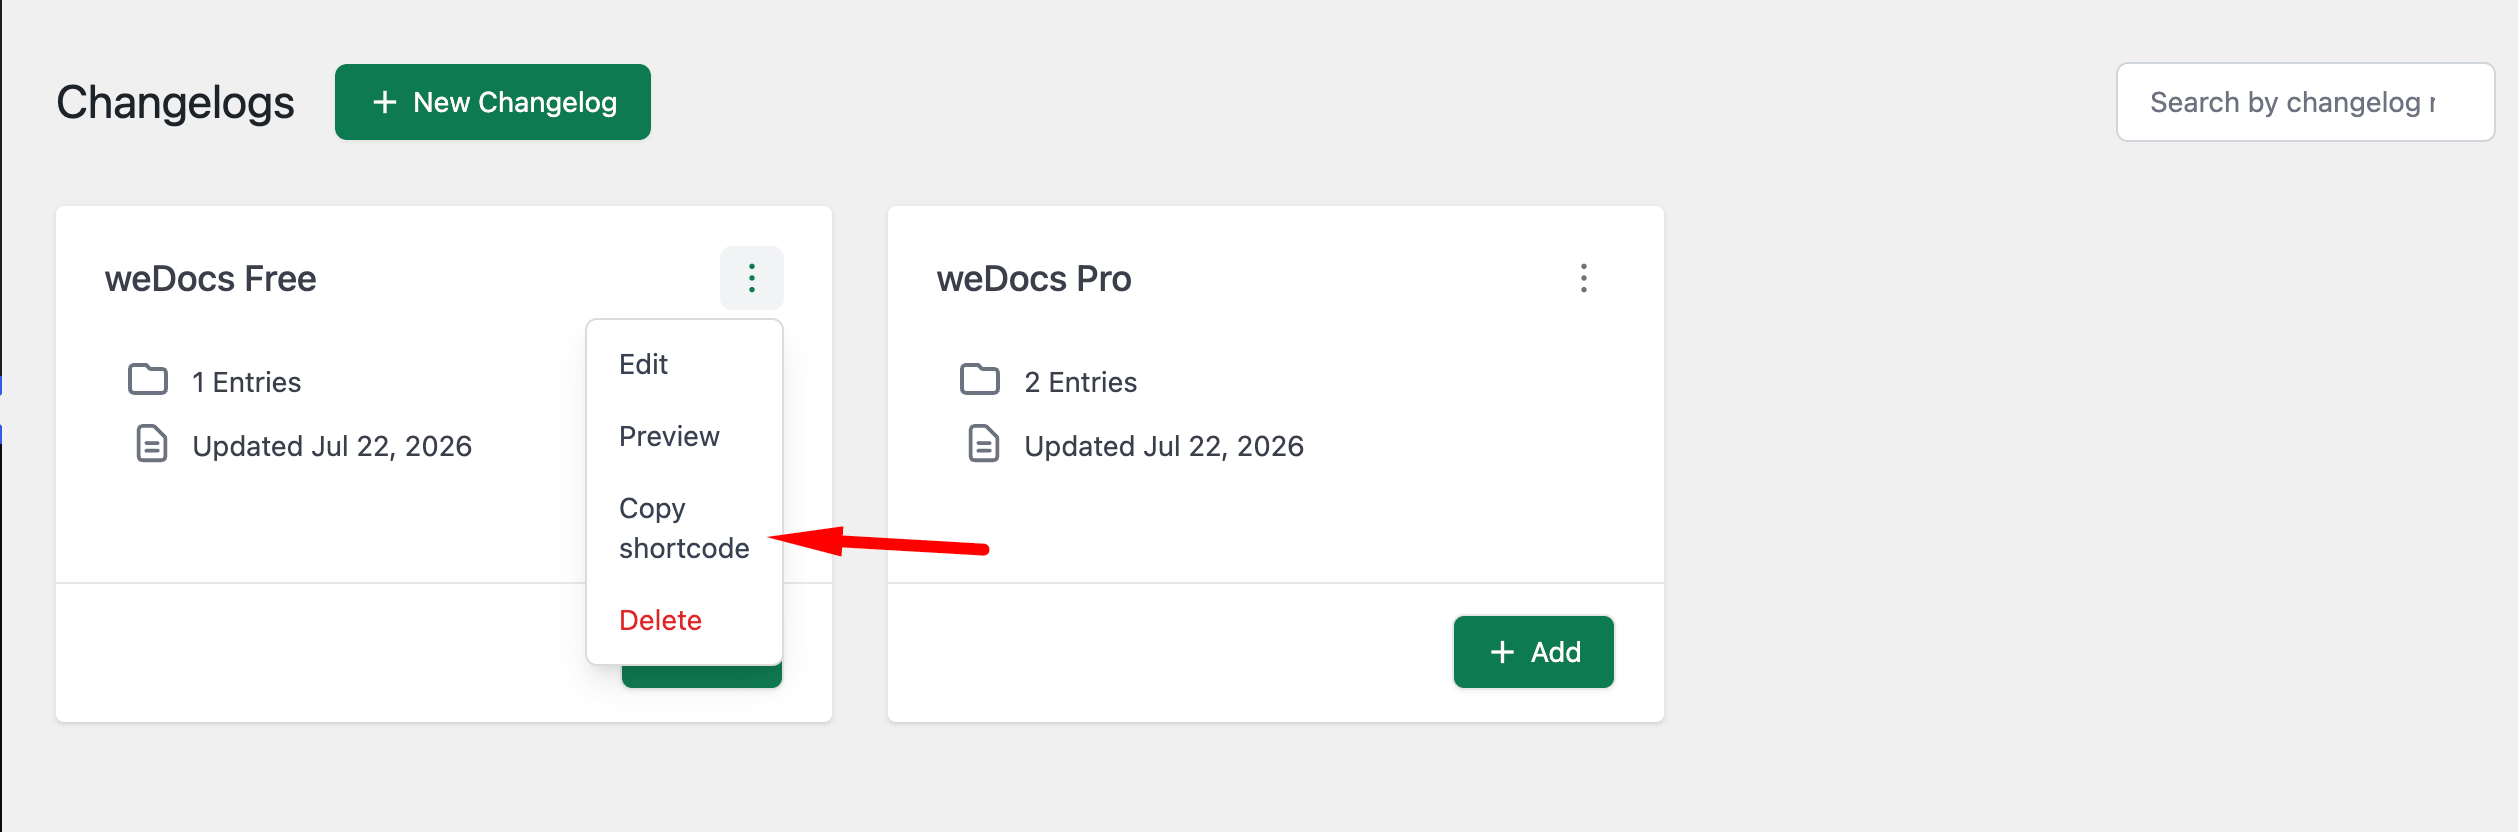
You can also embed the timeline anywhere using the [wedocs_changelog] shortcode. Copy it from Settings and paste it into any page or post.
Header Banner
A polished changelog opens with a banner. In Settings–> Changelog, turn on the Header banner toggle to reveal the styling options-
The Header subtitle is the line under the Changelog title, for example “New updates and improvements at Acme”. Leave it blank to hide it.
The Header image is the illustration shown on the right of the header. Click Upload image to pick one from your Media Library. You can change or remove it anytime.
The Banner shade is the gradient tint behind the header. Click the swatch and pick a color that matches your brand.
Note: The subtitle, image, and shade options only appear when the Header banner toggle is on. Turn the banner off if you prefer a plain, minimal header.
Categories
Categories are the colored labels on each entry. You will find them in Settings–> Changelog under Categories–
Four categories come ready out of the box. New release(s), Improvements, Fixes, and New feature. Click any swatch to recolor a category.
To create your own, type a name and click Add. It gets a random color that you can adjust.
Note: You can delete your custom categories, but the four built-in ones cannot be removed.
What Your Visitors See
On the public page, readers get a clean vertical timeline grouped by release date, with the latest update highlighted-
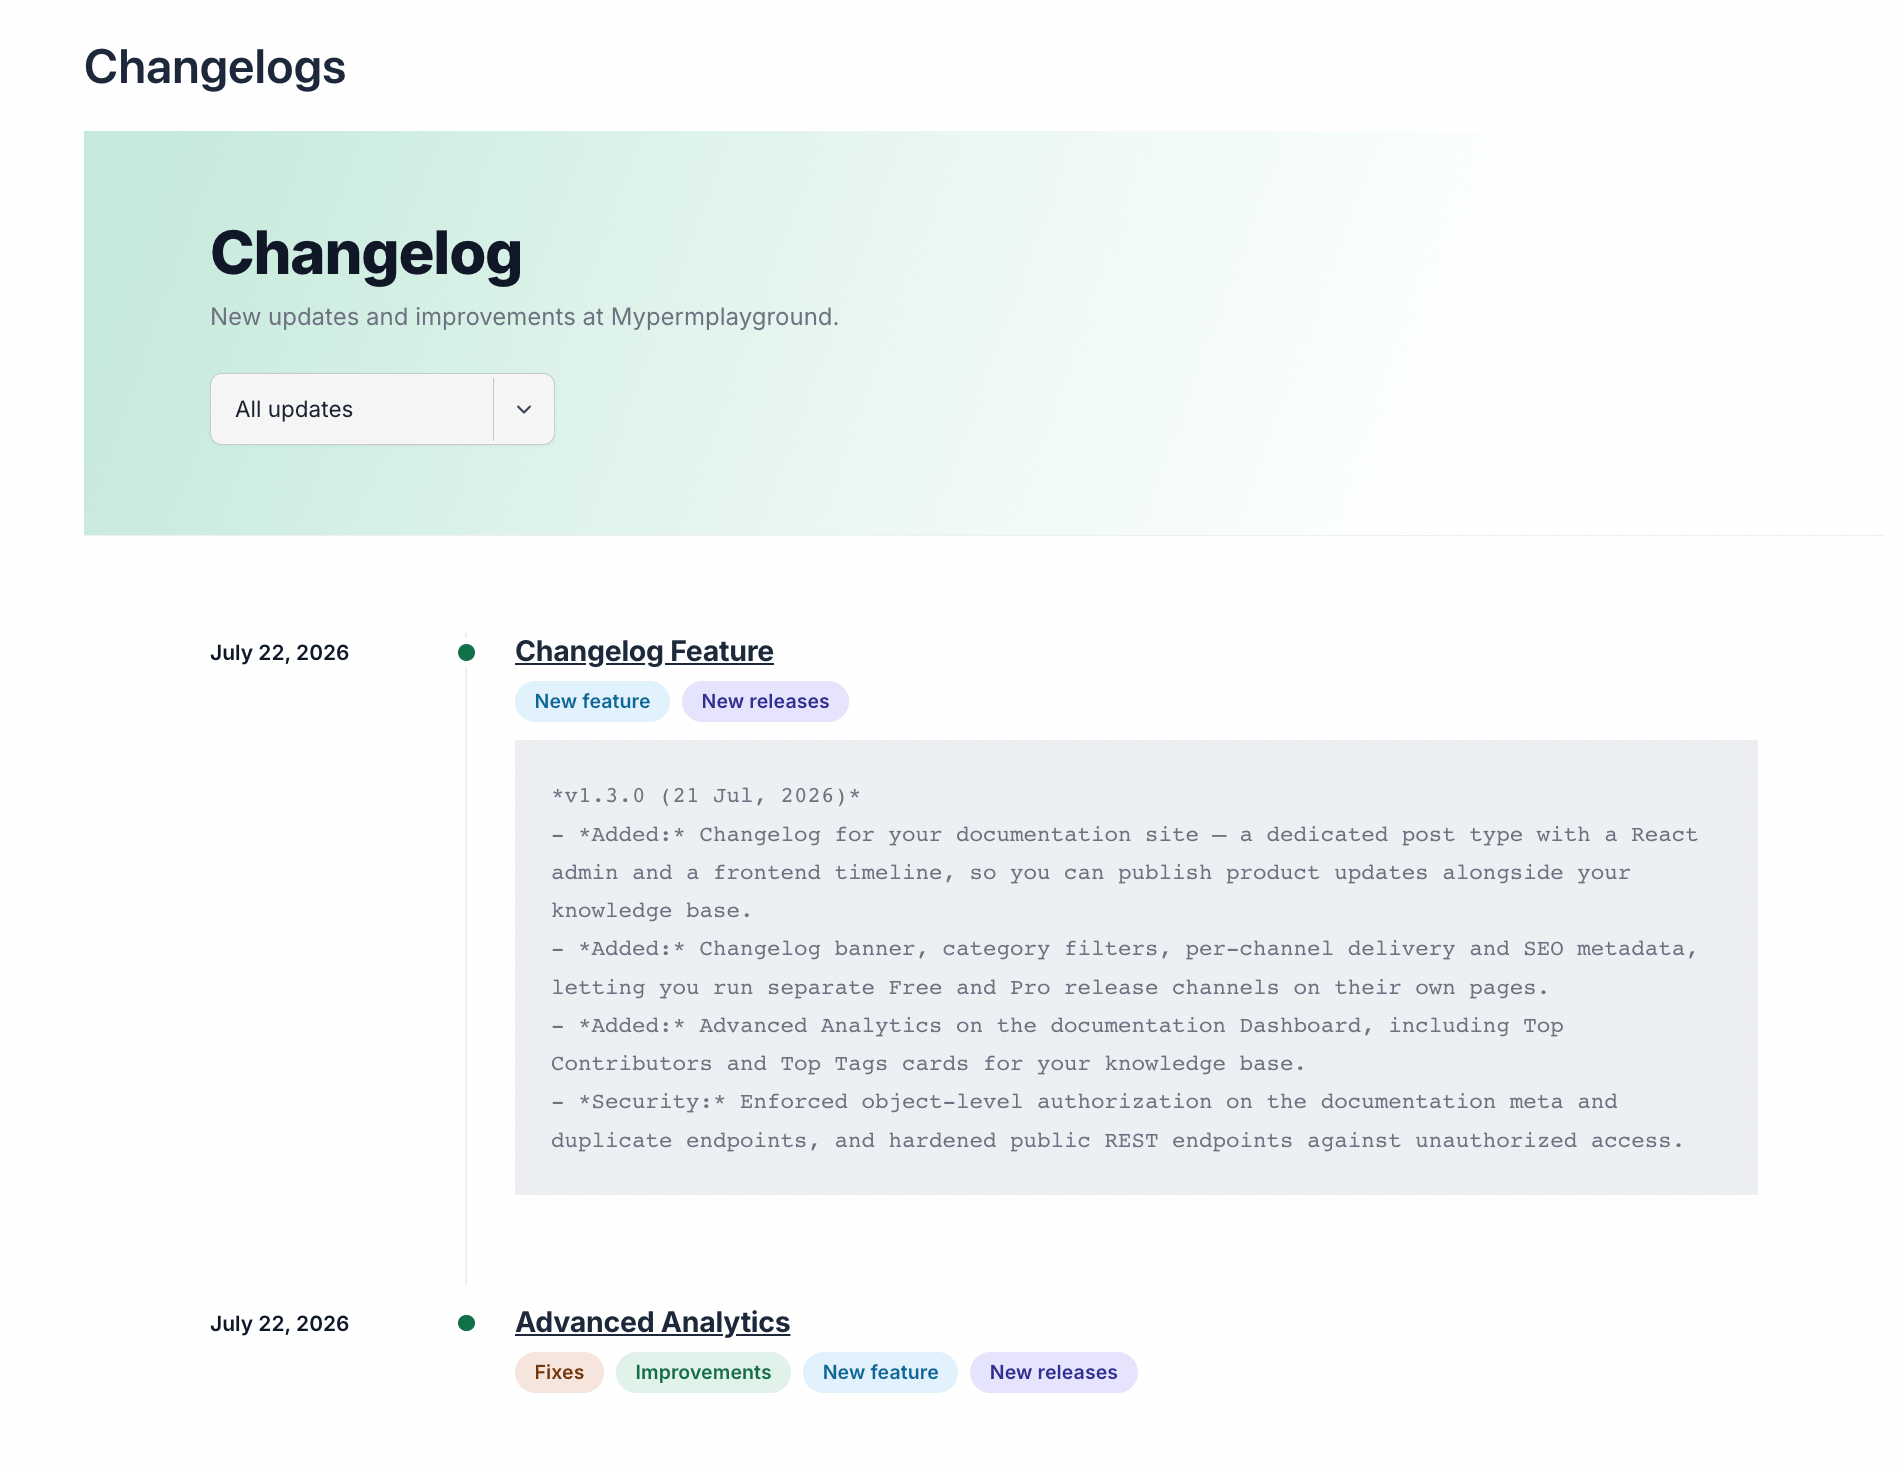
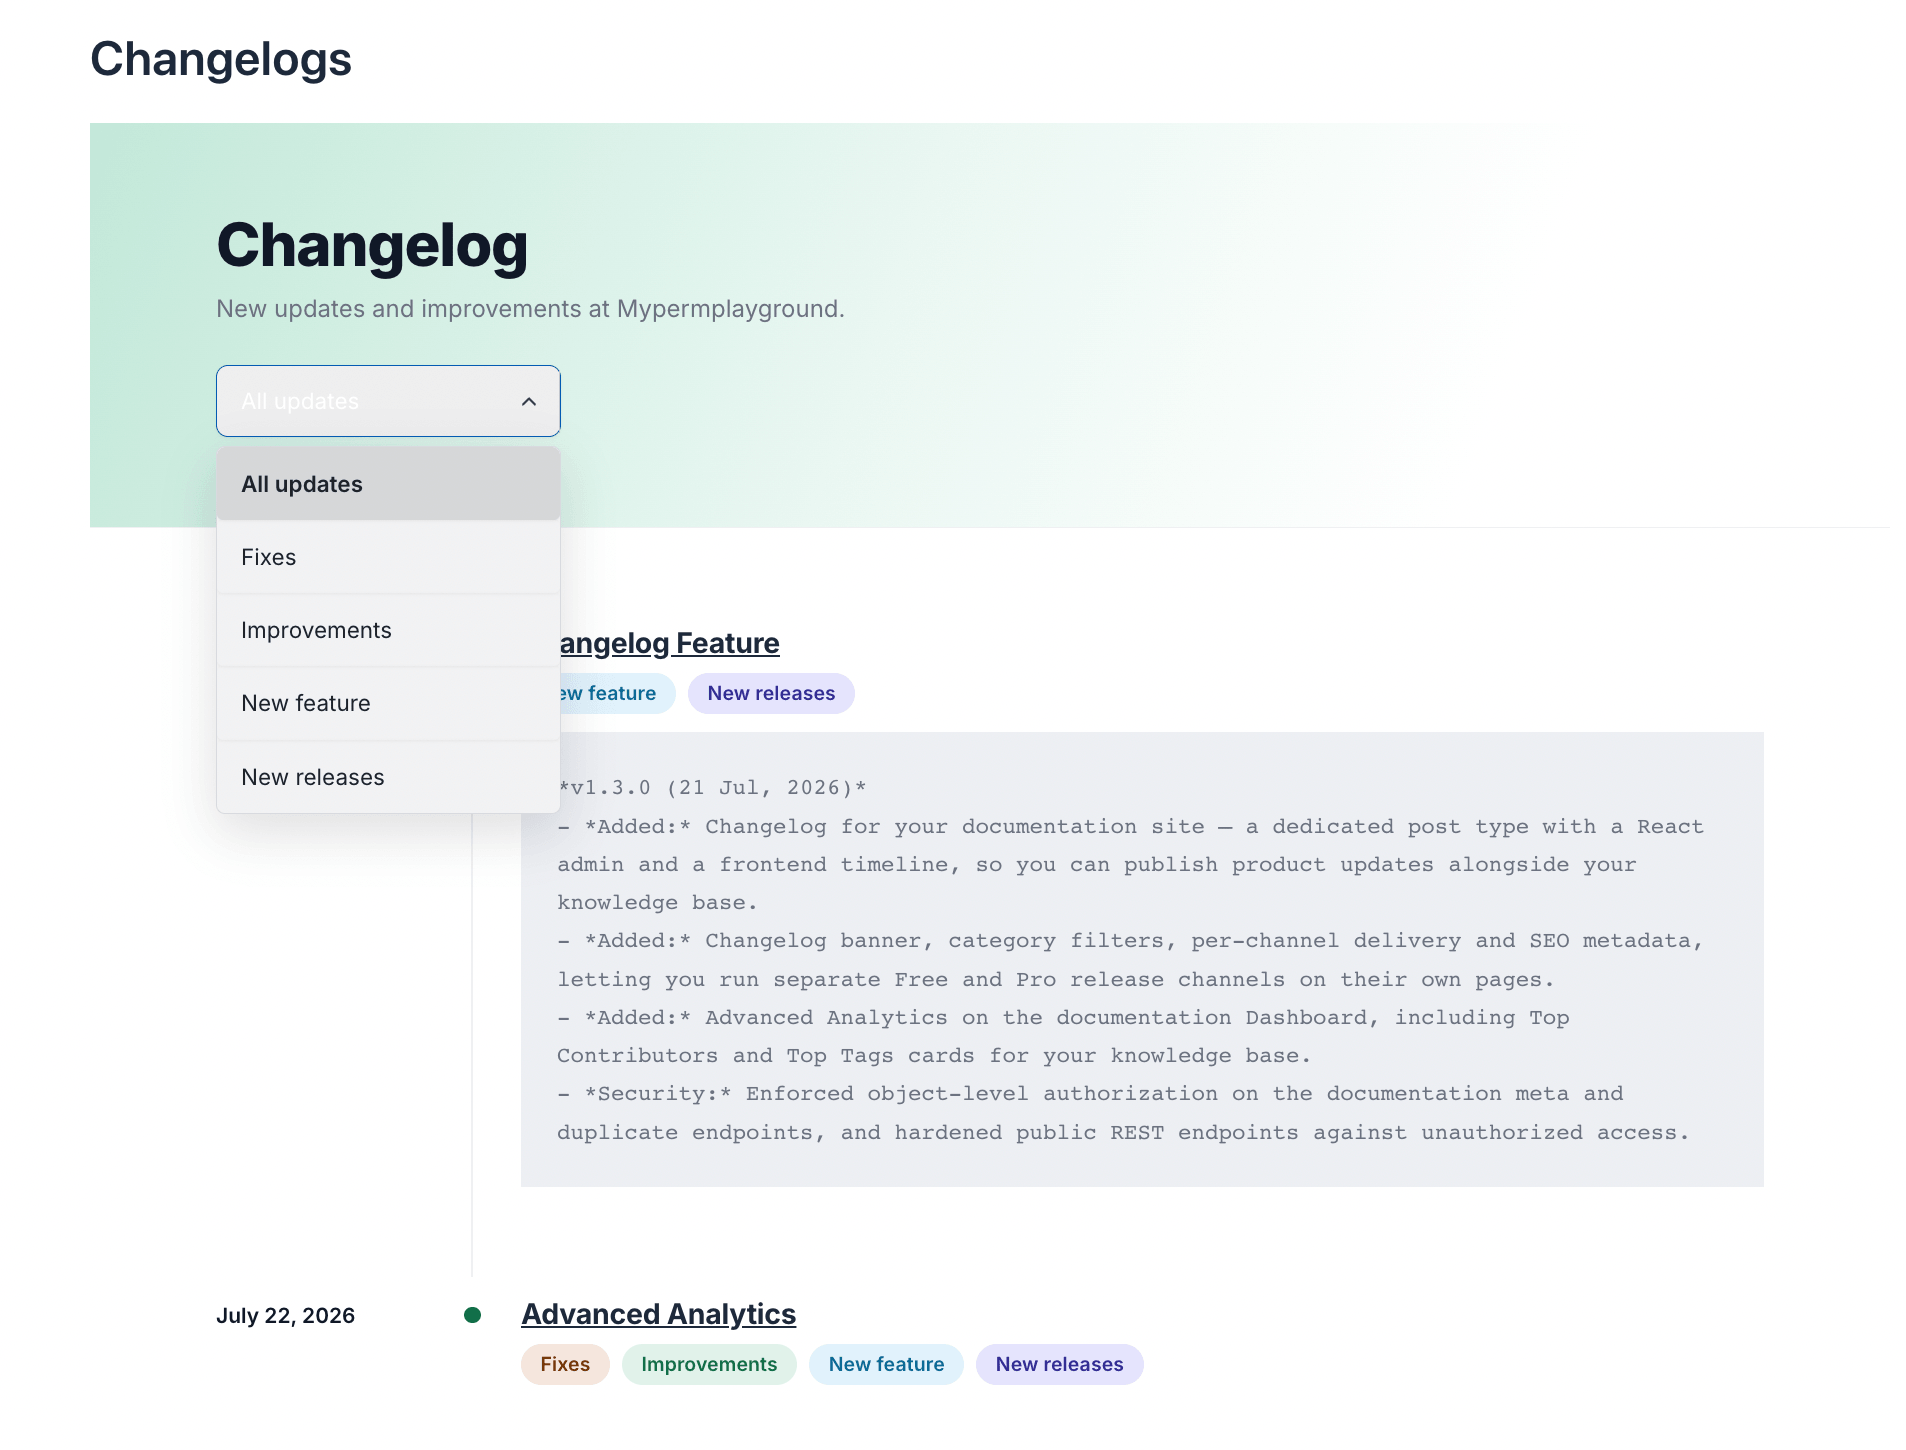
Depending on your display mode, they can filter by channel and by category using the header dropdowns. There is also a Subscribe to RSS link so power users can follow your releases in their own reader.
Each entry links to its own page, and channels have their own pages too, which is handy for linking directly to “what is new in Pro” from an email or a docs article.
You can also use the dropdown to filter the changelogs-
Note: If you have multiple products, then you can use the Shortcode of each changelogs to publish different changelogs for each product.
This is how you can publish and manage a changelog for your documentation site using weDocs Pro.