

Documentation is full of terms your readers do not know. Acronyms, feature names, technical words. Explaining each one inside every article makes the writing long, and skipping it leaves readers stuck.
The Glossary in weDocs Pro solves this. You add a term once with a short definition and an optional link. weDocs then finds that term across your documentation and shows the definition in a tooltip when a reader hovers over it.
Set Up the Glossary in weDocs
The whole process takes a few minutes. Turn the feature on, add your first term, then check how it looks to a reader.
Step 1. Turn On the Glossary
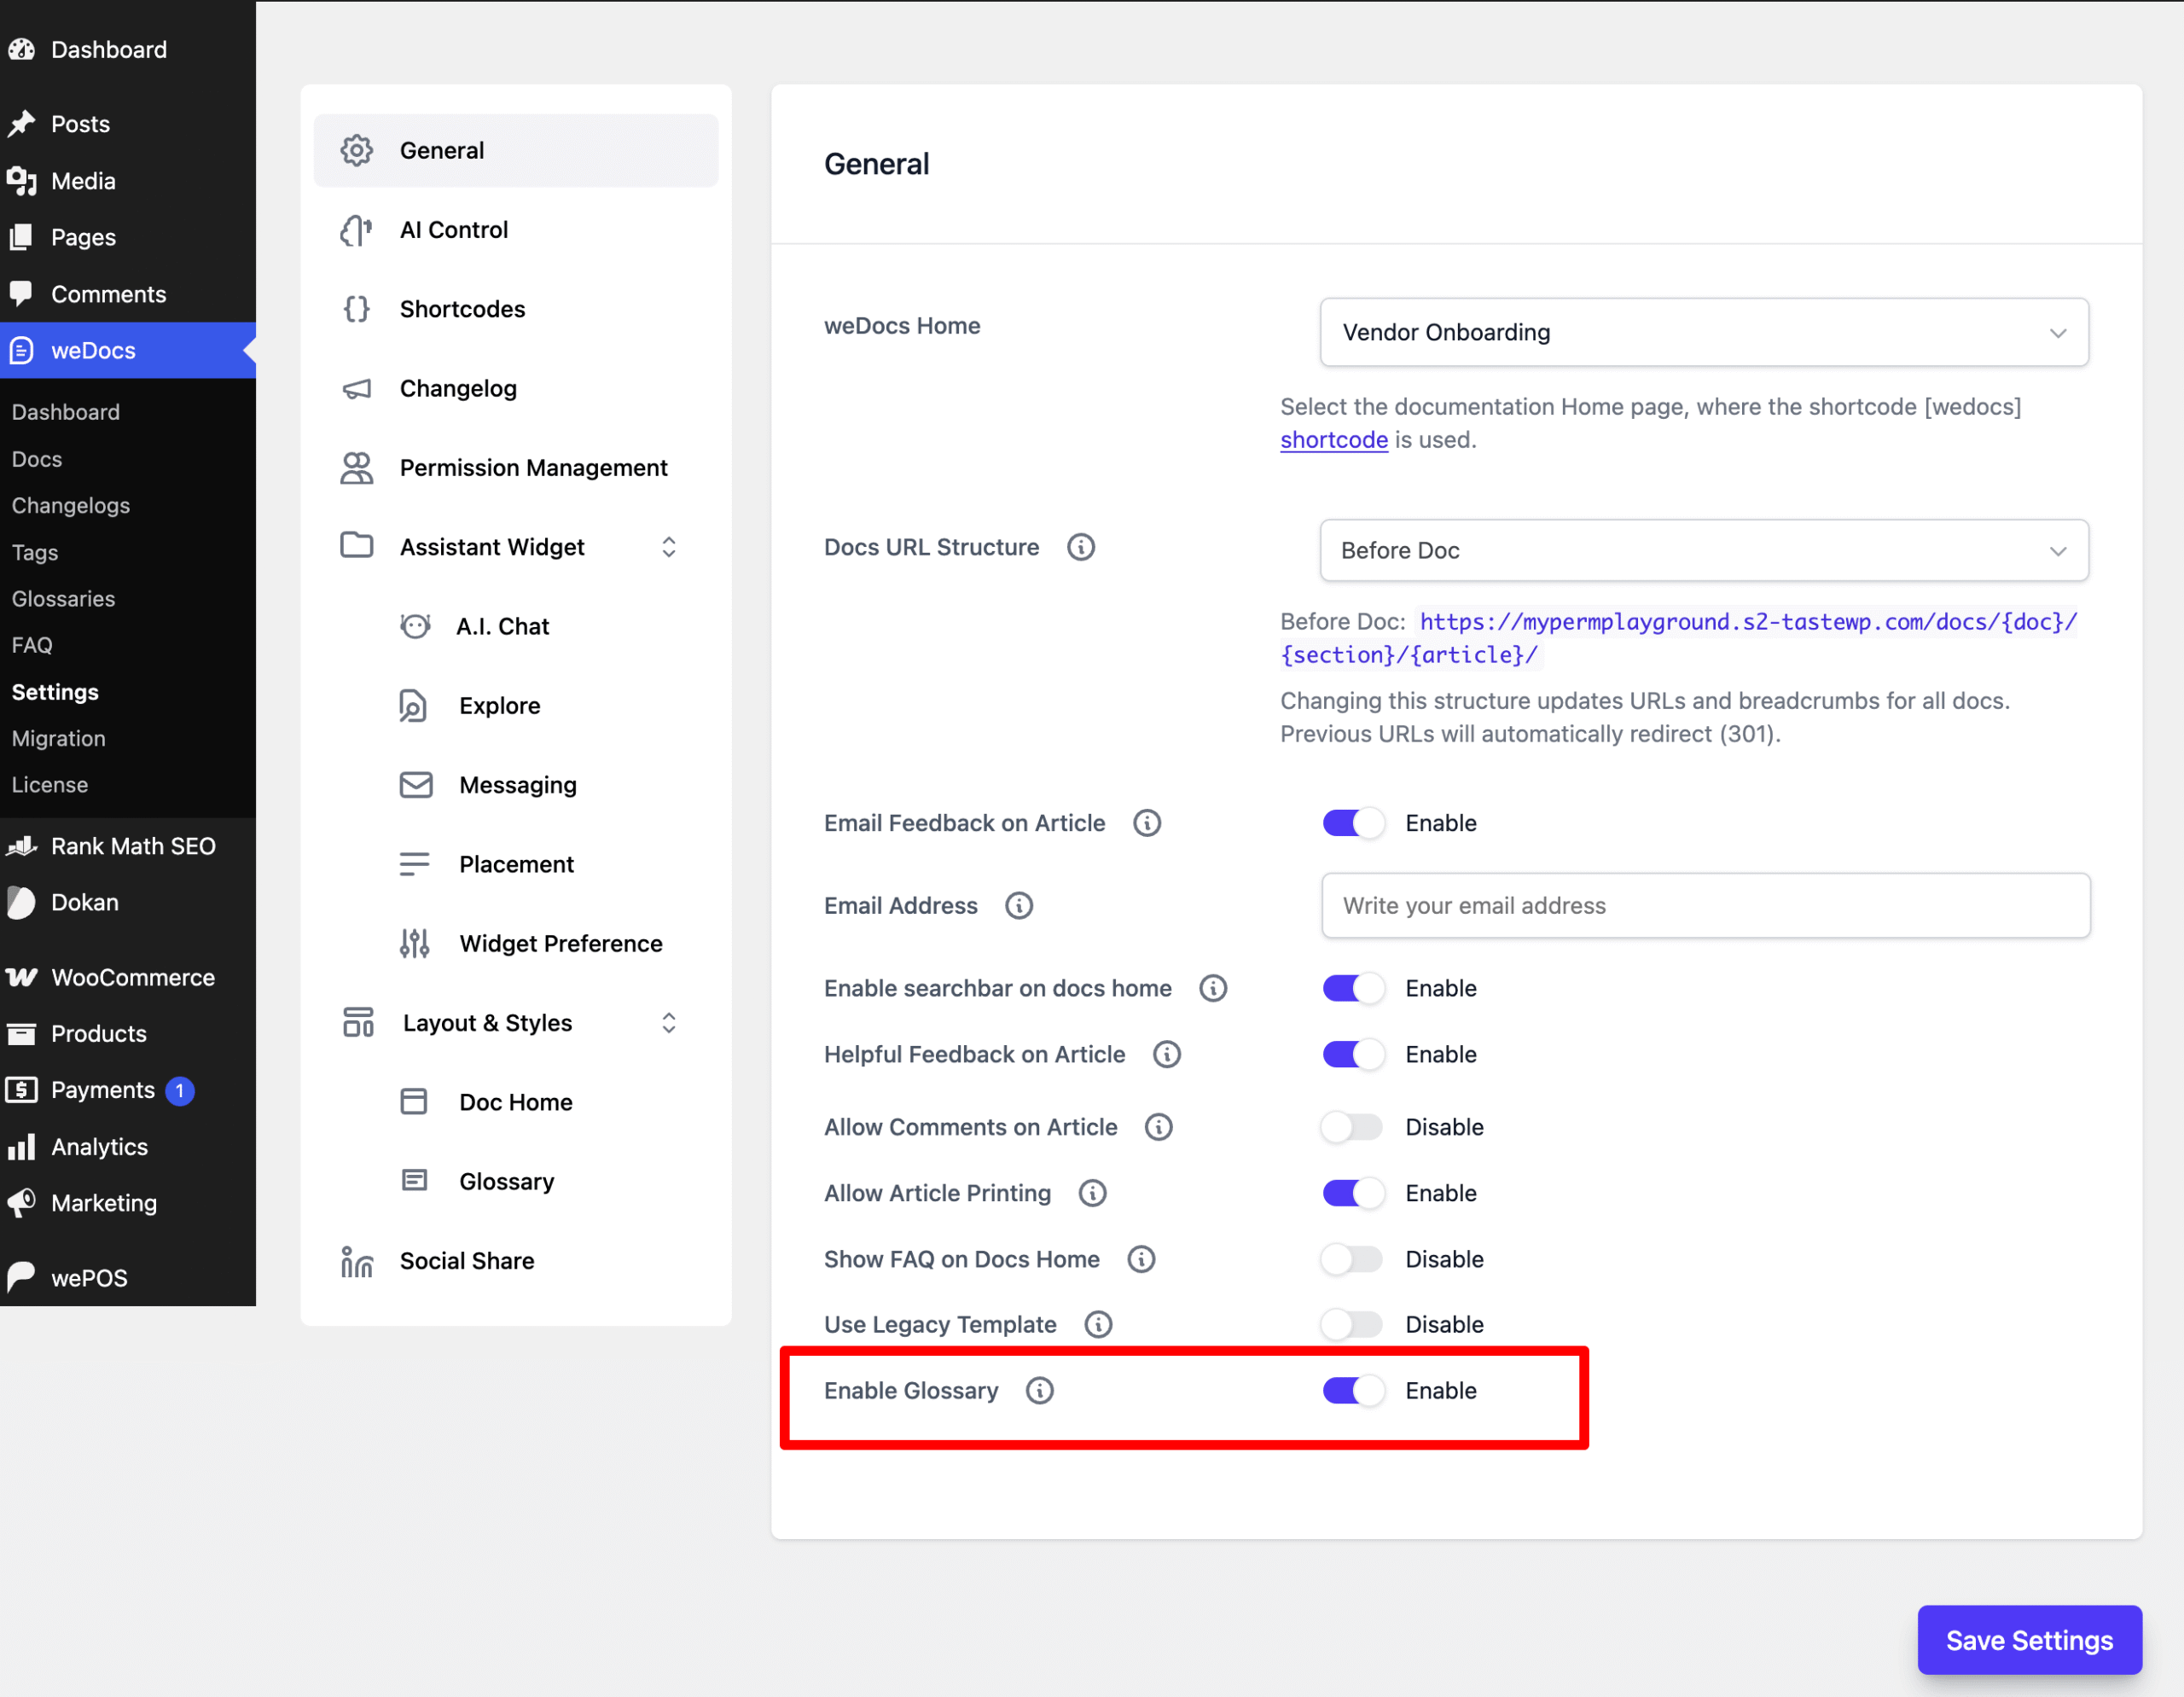
Go to weDocs > Settings and stay on the General tab. Scroll to the bottom of the list and switch Enable Glossary to Enable.
Click Save Settings. The Glossaries menu item becomes available under weDocs, and your terms start rendering on the front end.
Step 2. Open the Glossaries Page
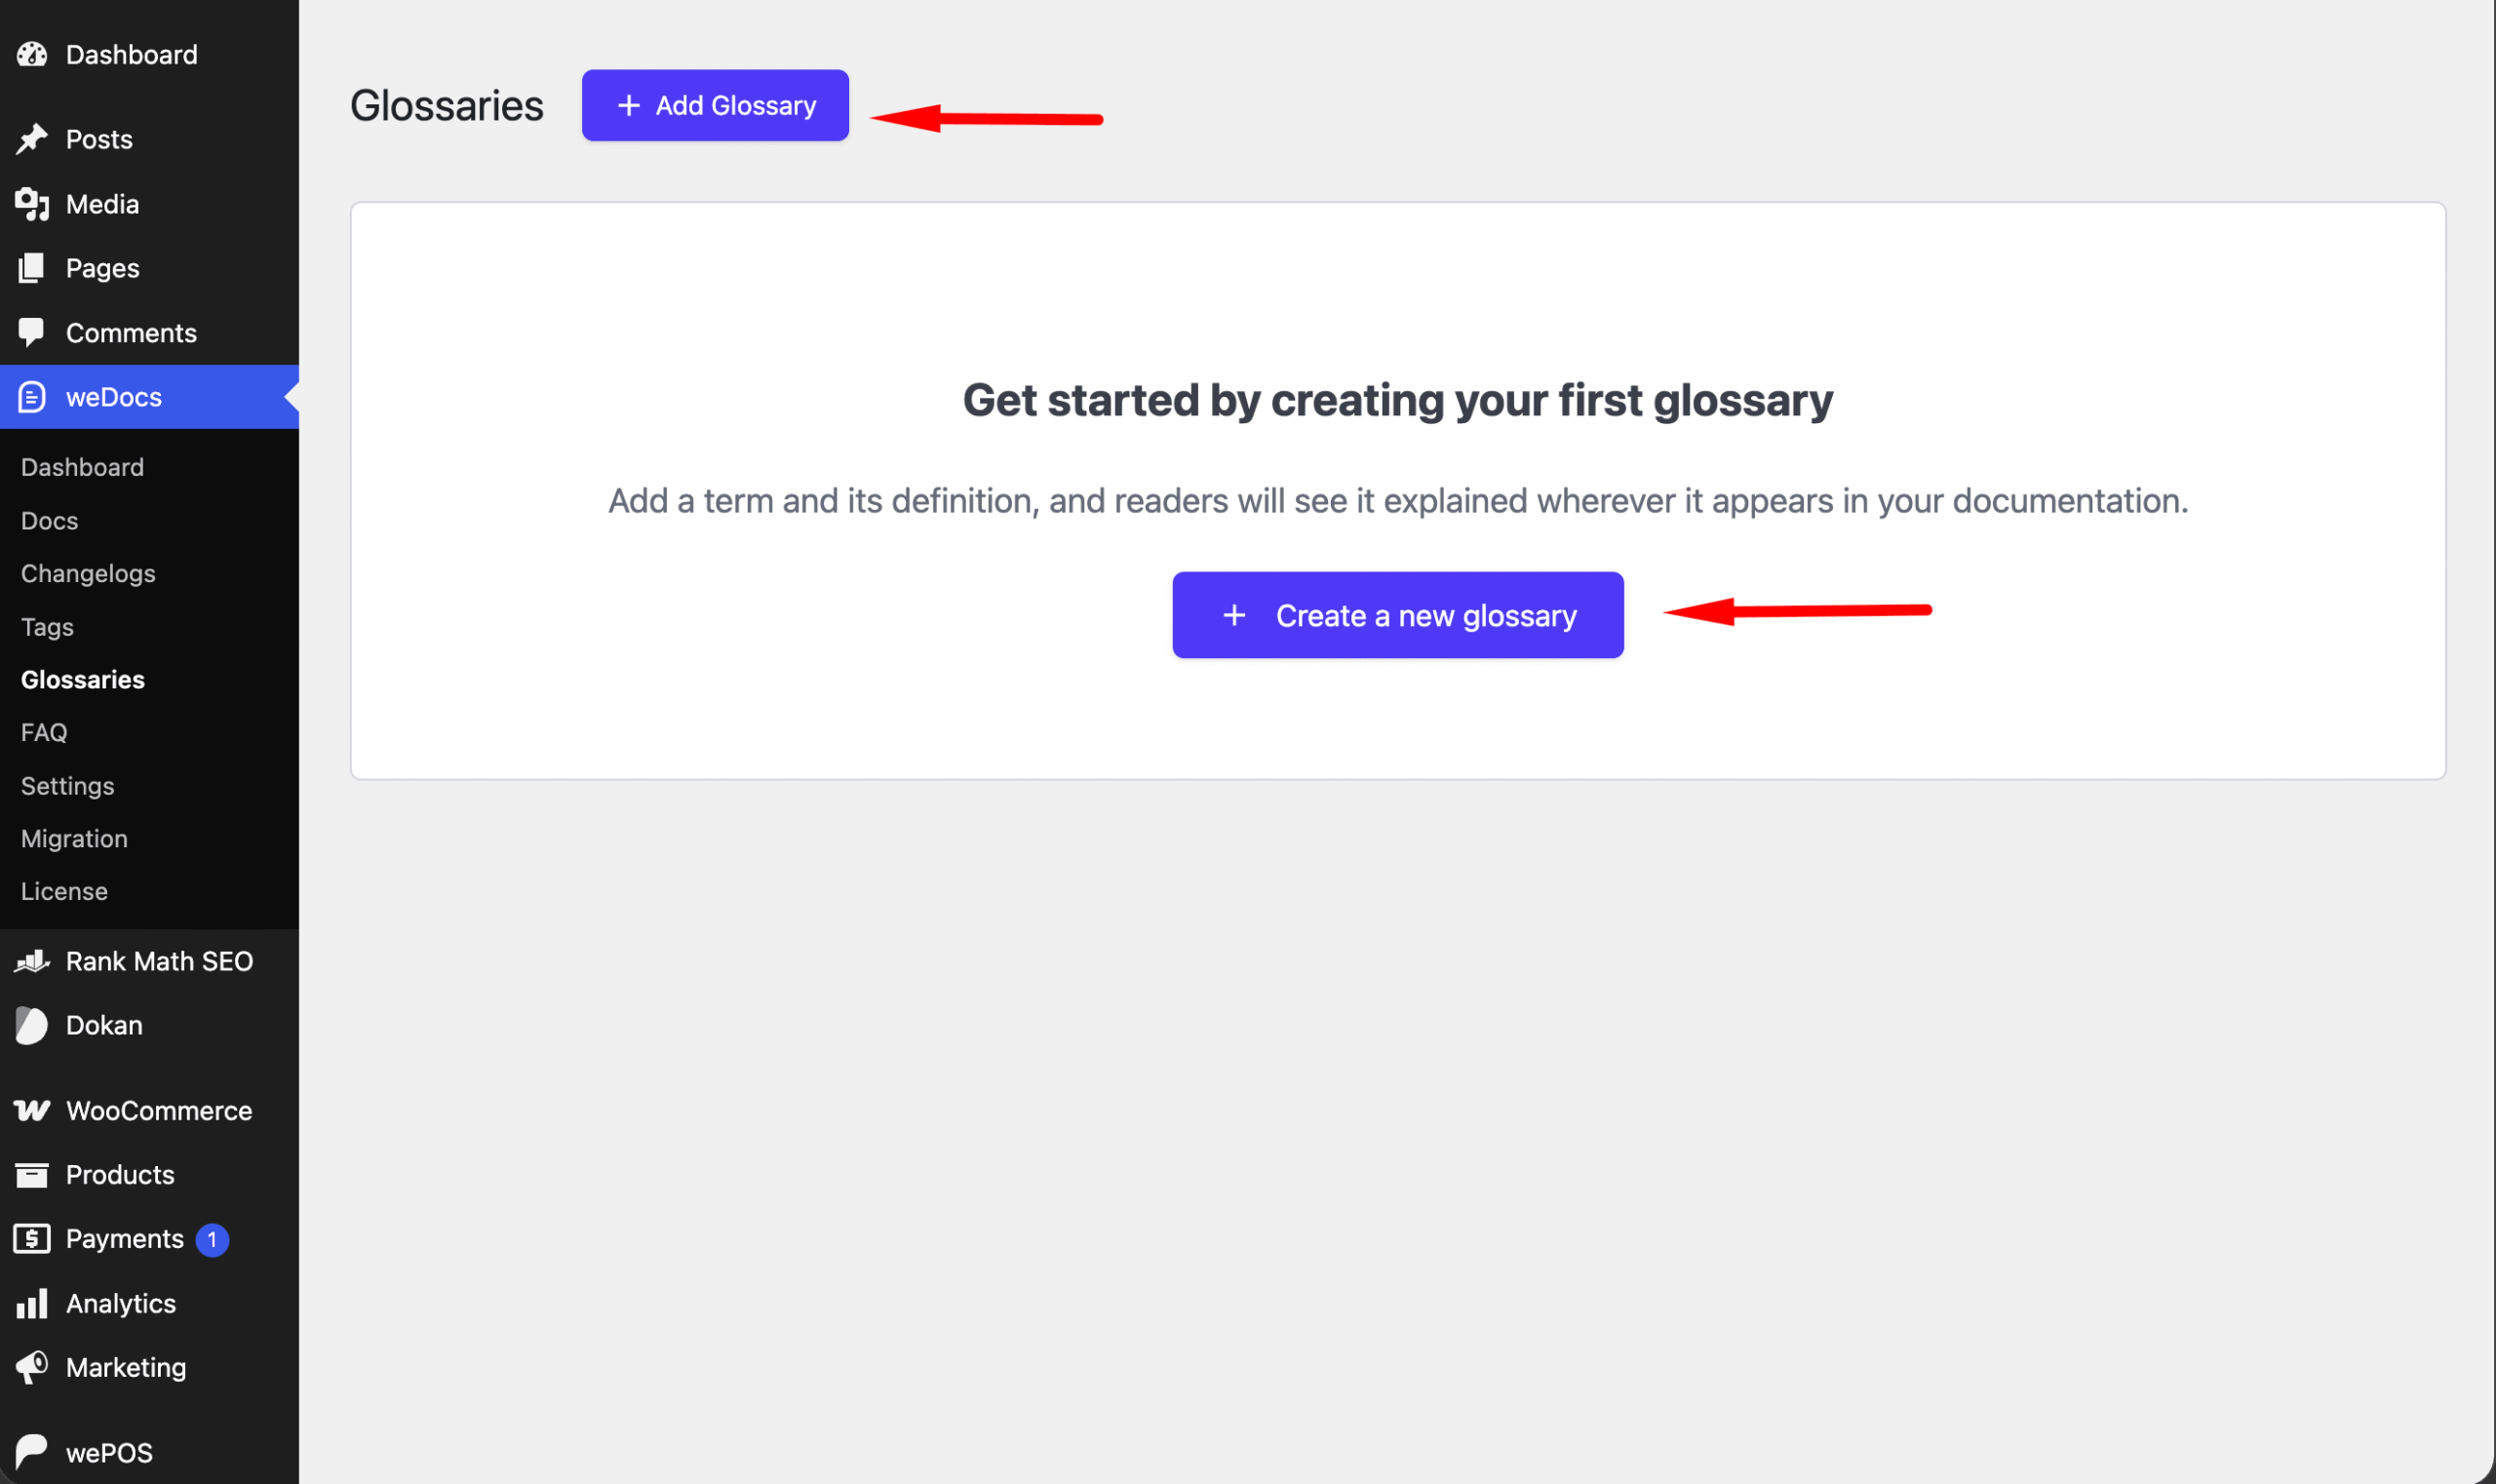
From your WordPress dashboard, go to weDocs > Glossaries.
Before you add anything, the page shows an empty state explaining what the feature does, with a Create a new glossary button in the middle. An Add Glossary button also sits at the top of the page next to the Glossaries heading. Both open the same window.
Step 3. Add Your First Term
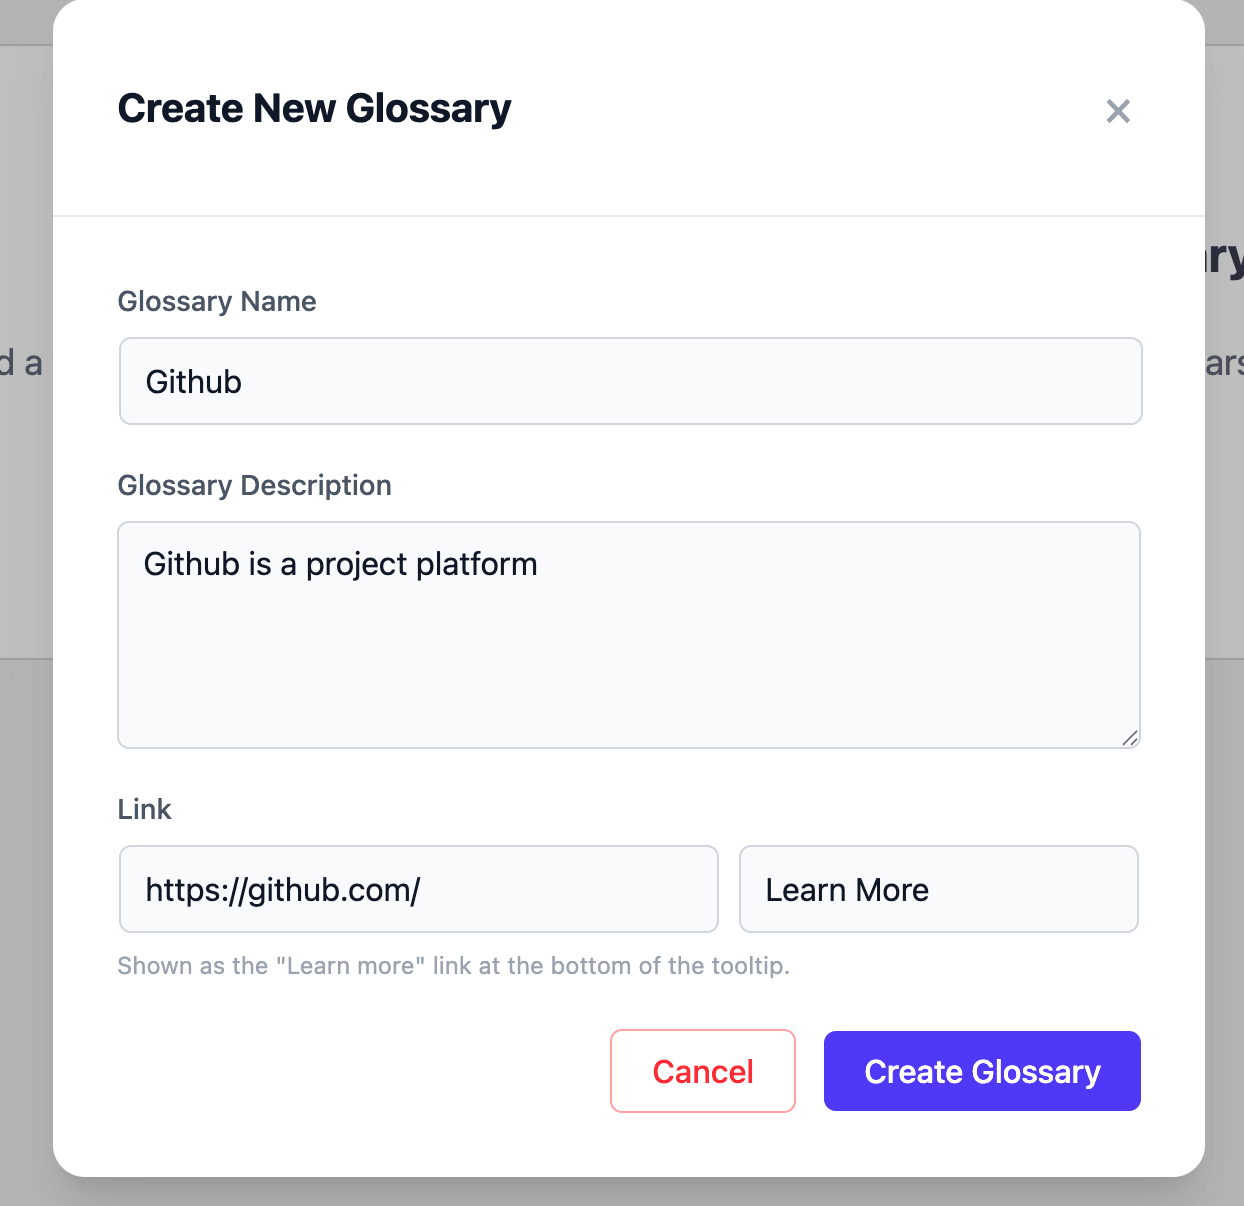
Click either button and the Create New Glossary window opens. It has three parts.
- Glossary Name. The exact word or phrase you want weDocs to find in your documentation. This is what readers see in bold at the top of the tooltip.
- Glossary Description. The short explanation that appears inside the tooltip. Keep it to a sentence or two, since a tooltip is not the place for a full article.
- Link. Two fields sitting side by side. The first takes a URL, the second sets the label readers click, for example Learn More. This becomes the link at the bottom of the tooltip. Leave both empty if a term needs no further reading.
Click Create Glossary to save, or Cancel to close without saving.
Repeat for every term you want covered. Add the words your support team explains most often, since those are the ones costing you tickets.
Step 4. Check It on the Front End
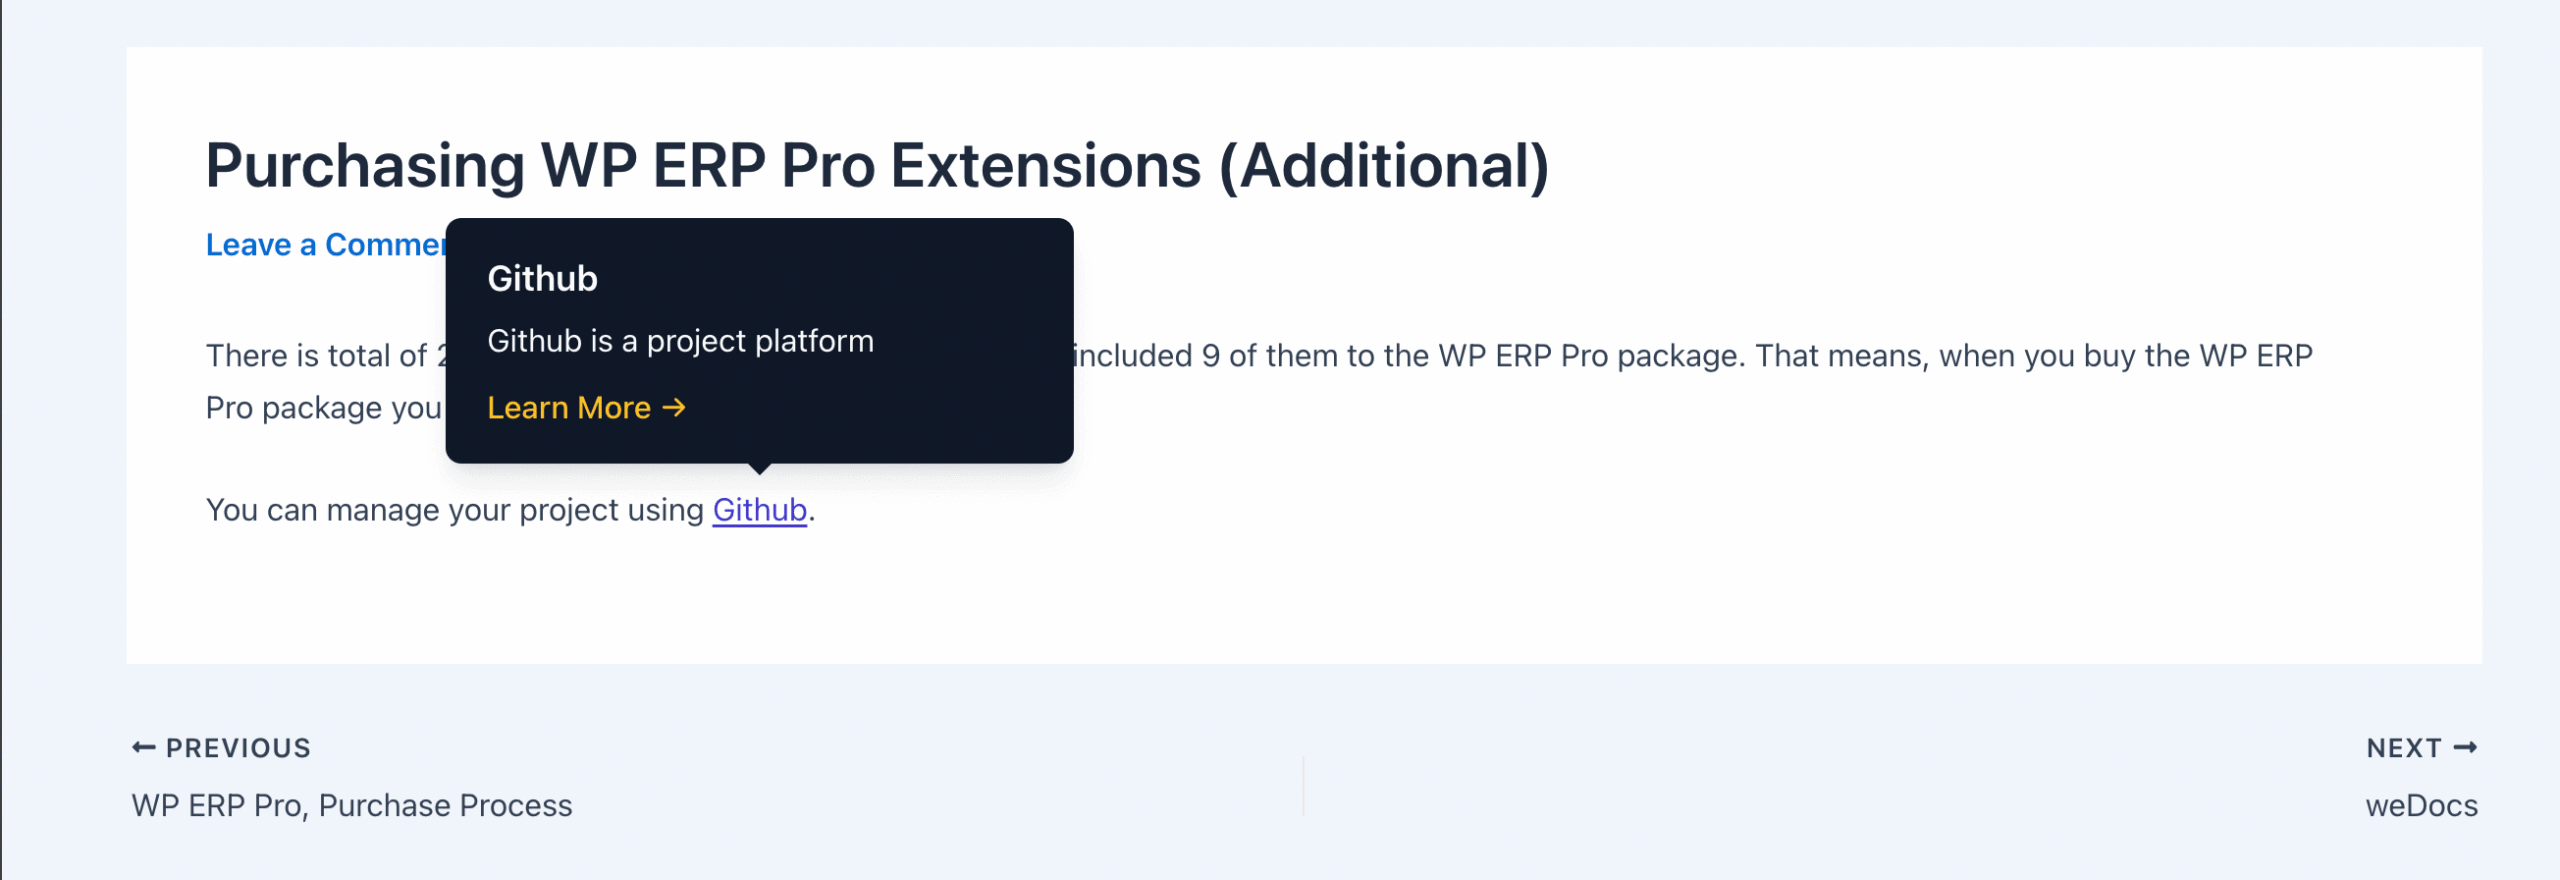
Open any documentation article containing one of your terms. You do not need to edit the article or add anything to it. weDocs finds the word on its own.
The term now appears as a link inside your text. Hovering over it opens a tooltip carrying the name, the description, and the Learn More link if you set one.
Step 5. Manage Your Terms
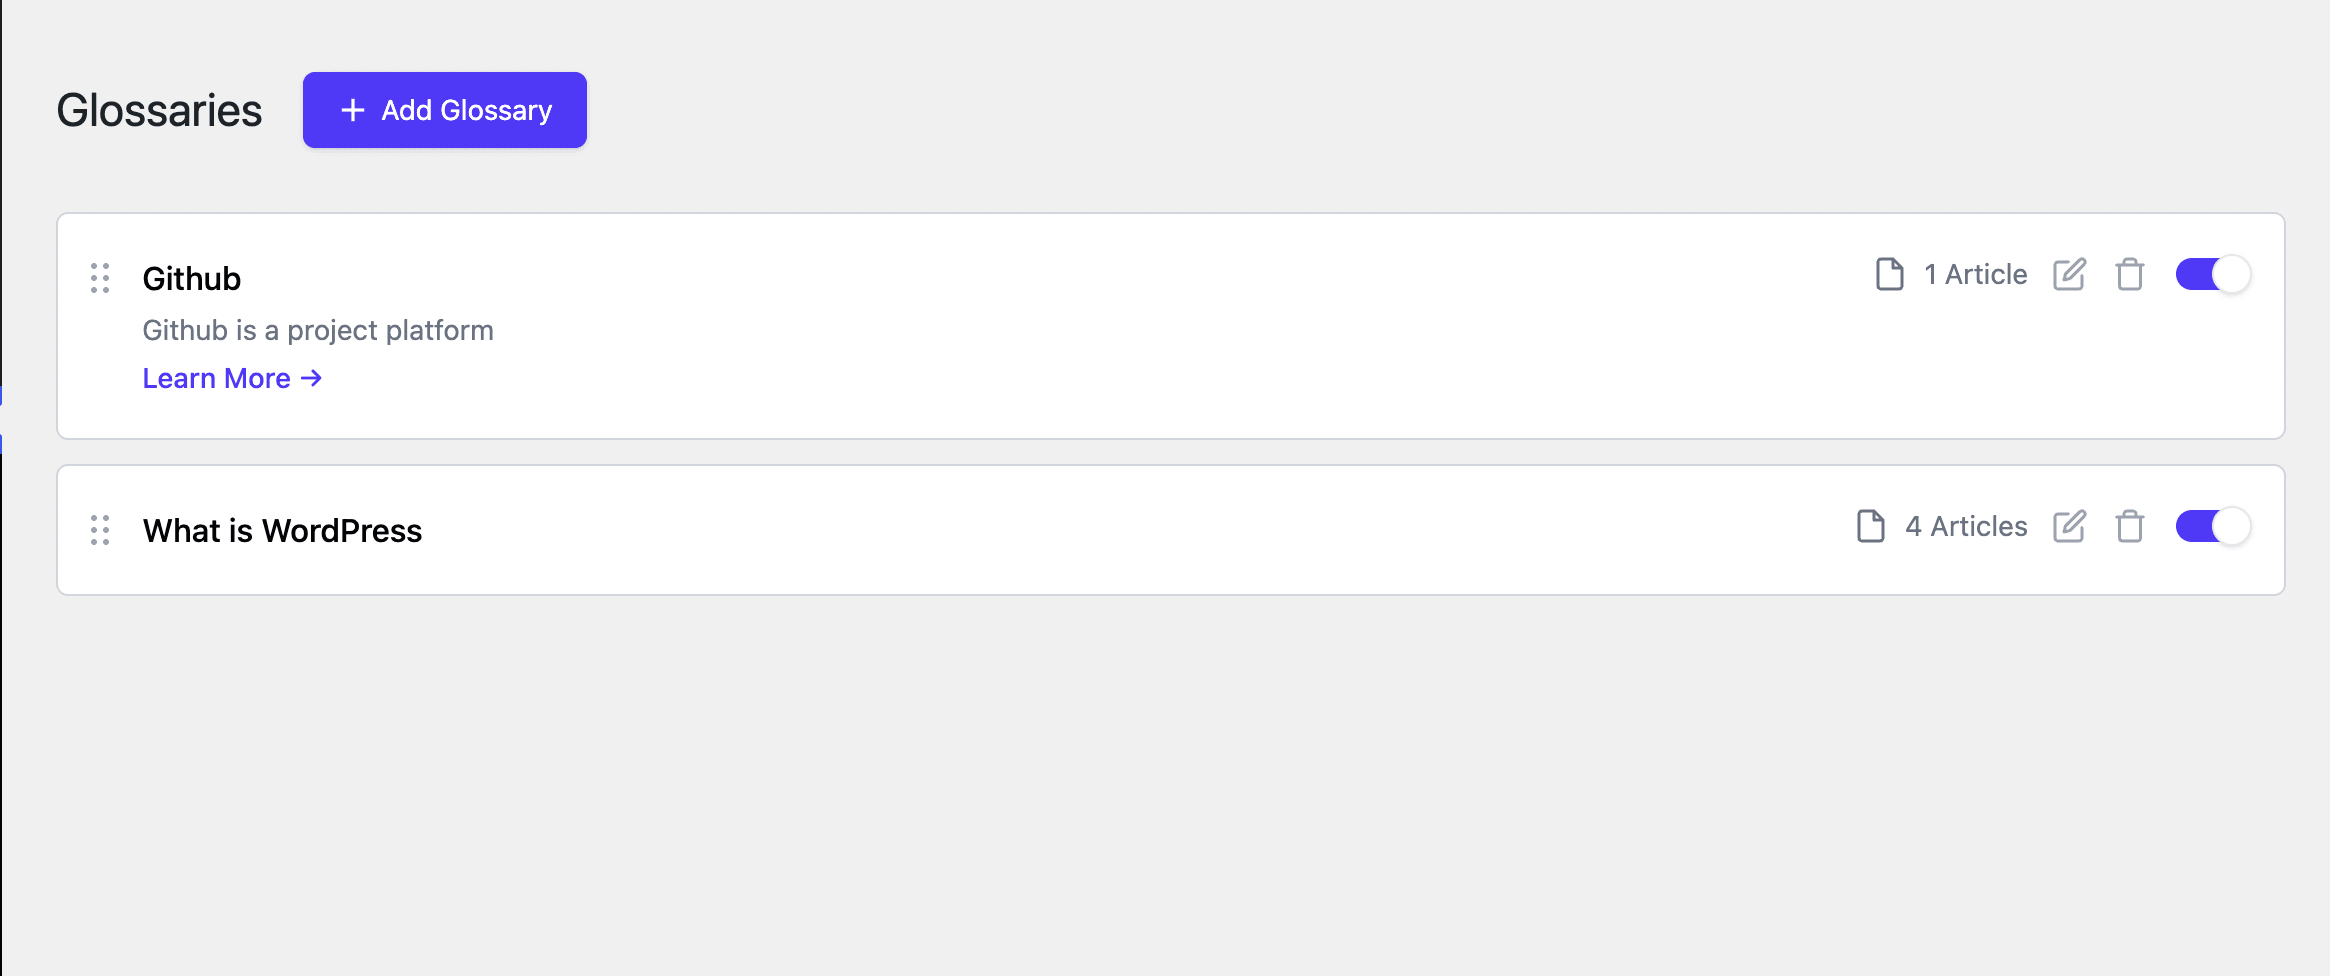
Back on the Glossaries page, each term sits in its own row with a set of controls.
- Drag handle. The six dots at the far left. Drag a term to change its position in the list.
- Article count. Shows how many articles that term currently appears in, so you can see at a glance which definitions are doing work and which are sitting unused.
- Edit. Reopens the window so you can change the name, the description, or the link.
- Delete. Removes the term. Readers stop seeing the tooltip, and your article text stays exactly as it was.
- Enable toggle. Switches a term on or off. A term switched off keeps its definition in your dashboard but stops rendering on the front end, which is useful while you rewrite one.
Step 6. Match the Tooltip to Your Design
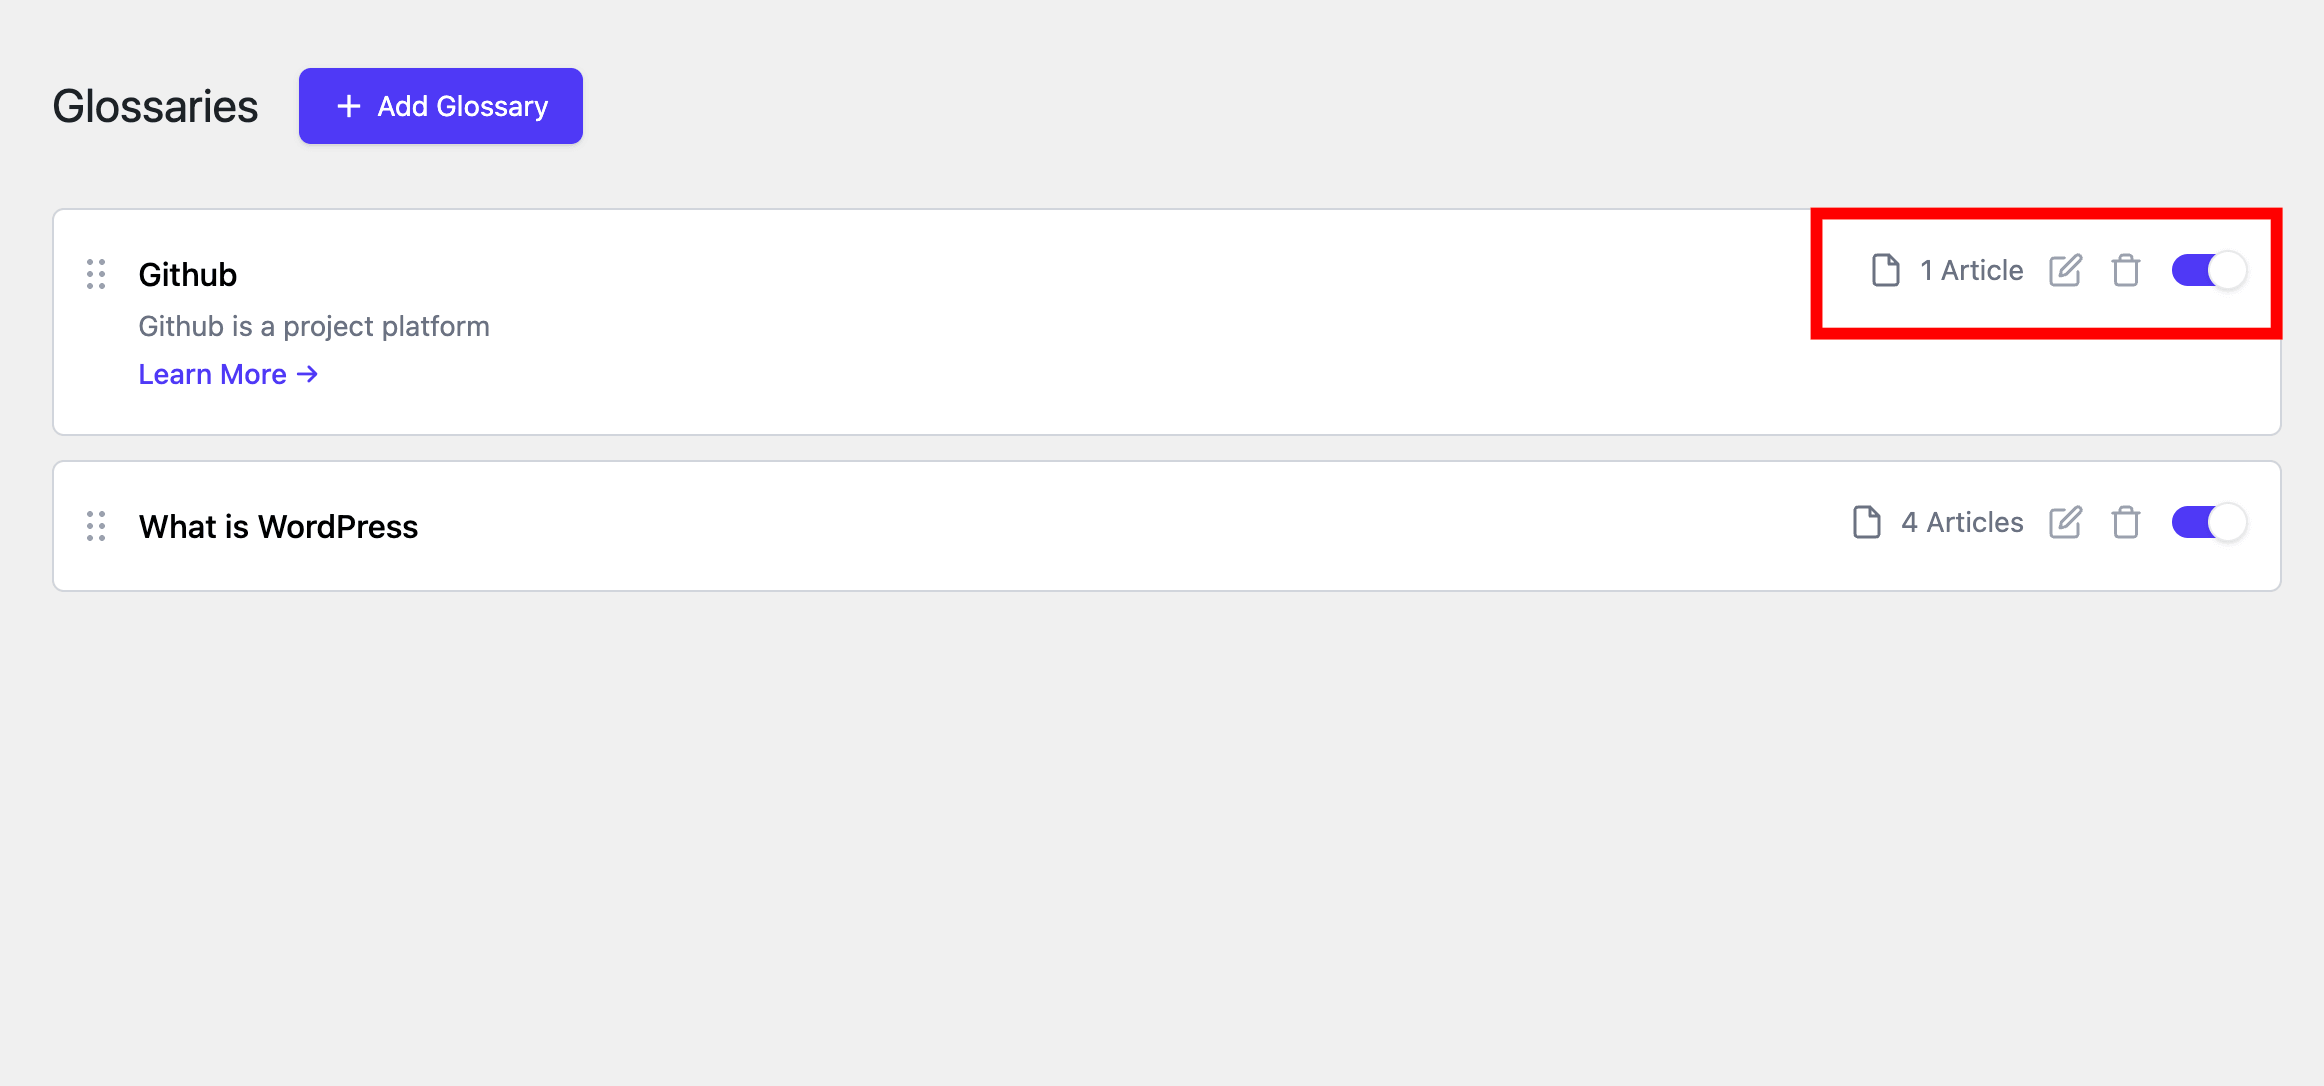
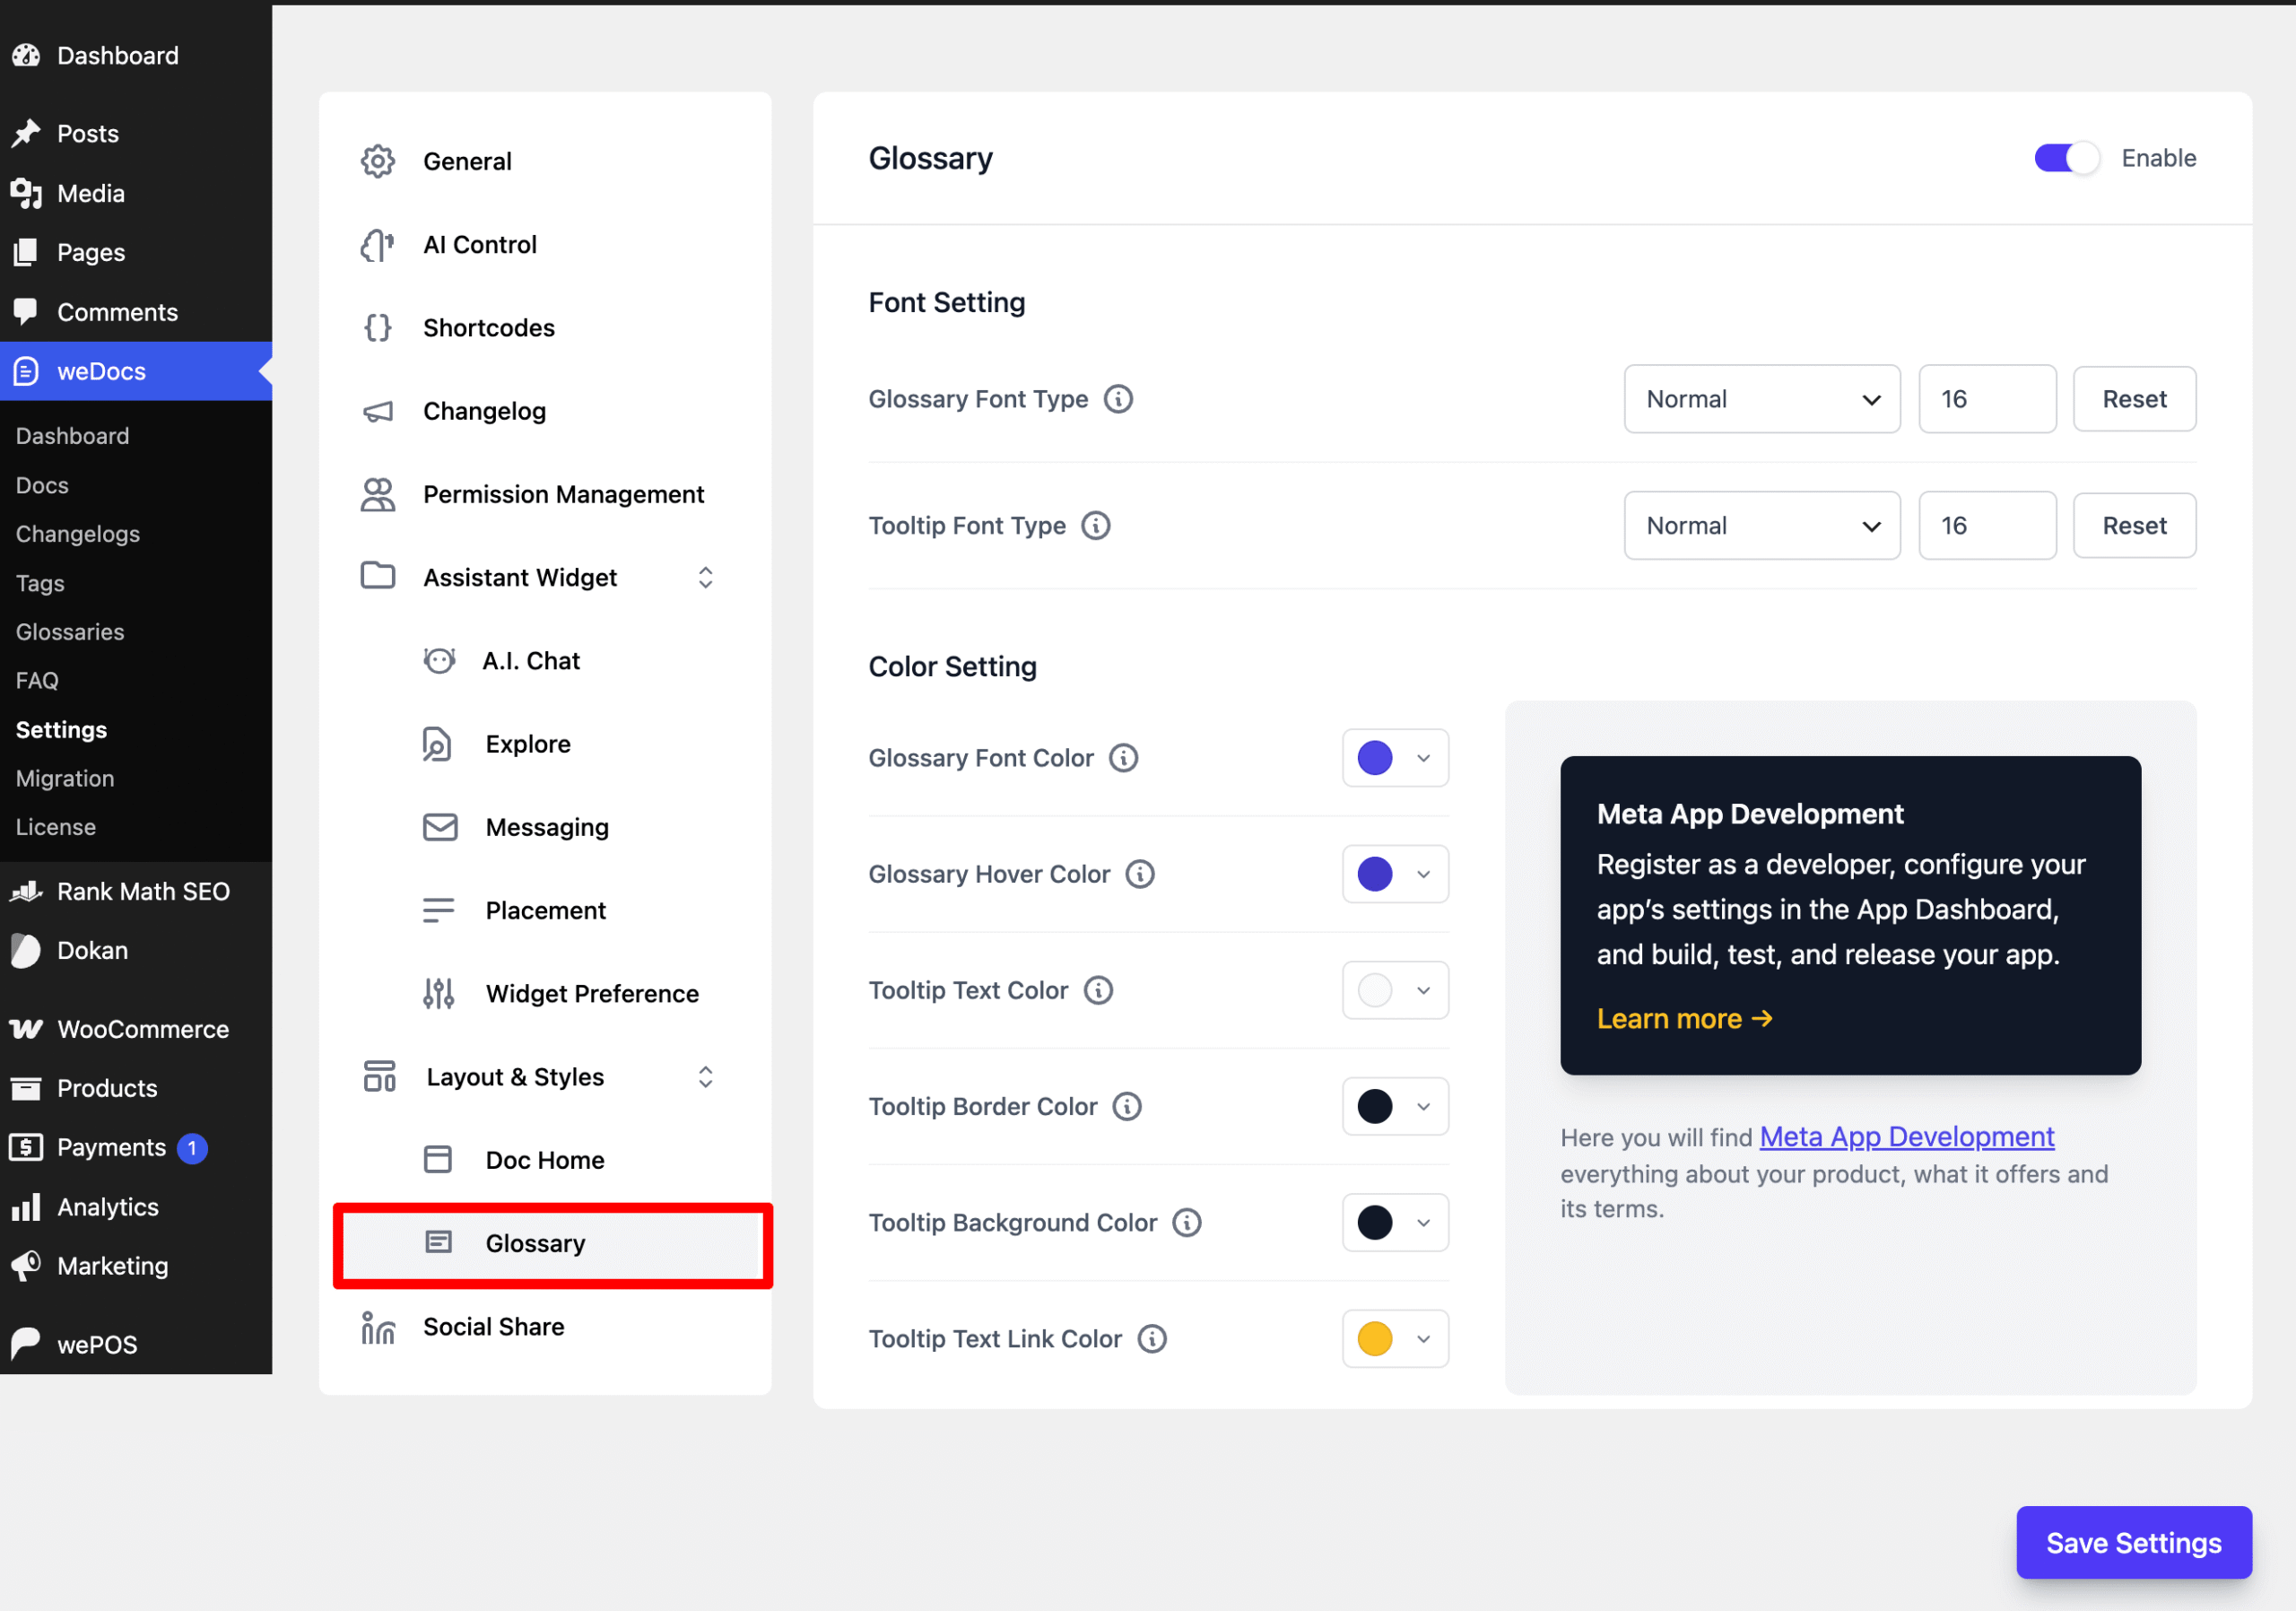
Go to weDocs > Settings and open Layout & Styles > Glossary. This panel controls how the term and its tooltip look on your site.
Font Setting covers two items.
- Glossary Font Type. The weight and size of the term where it sits inside your article text.
- Tooltip Font Type. The weight and size of the text inside the tooltip.
Each has a Reset button beside it that returns the value to the default.
Color Setting covers six.
- Glossary Font Color and Glossary Hover Color for the term inside your text.
- Tooltip Text Color, Tooltip Border Color, and Tooltip Background Color for the tooltip itself.
- Tooltip Text Link Color for the Learn More link at the bottom.
The panel carries its own Enable toggle at the top right, alongside the one in General settings. Click Save Settings when you are done.
Write Each Definition Once
The Glossary earns its place because the work does not repeat. Most teams handle unfamiliar terms by explaining them again in every article, which bloats the writing and still leaves gaps whenever somebody forgets. Defining a term once and letting weDocs surface it everywhere removes both problems.
Start small. Add the five or six words your support team explains most often, publish, then watch the article count on each row. Terms appearing across many articles are the ones saving you the most questions, and terms sitting at zero are telling you the word is not actually used in your documentation.
Keep the definitions short. A tooltip that fills half the screen makes readers close it, and at that point you have interrupted them instead of helping. One or two sentences, with the Learn More link carrying anyone who wants the full story.