Like any other plugin in the WordPress repository, you can install weDocs on your WordPress site. You can install this documentation plugin in two ways.
- Install directly from the WordPress dashboard
- Or download the plugin from the WordPress repository and install the plugin manually
Here in this documentation, we’re going to show all the ways you can install the plugin.
Method one: installing from the WordPress admin dashboard
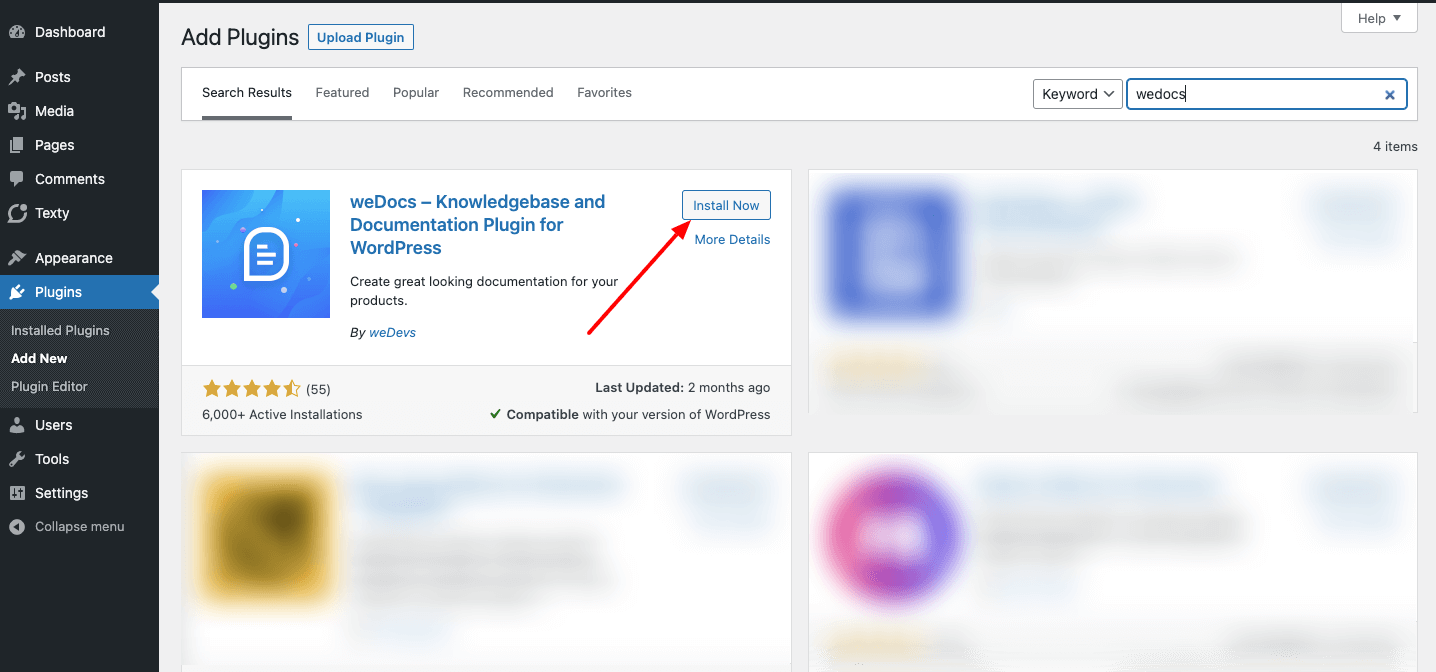
To install the plugin from the WordPress admin dashboard, navigate to WP Admin–> Plugins–> Add New.

Now, you need to type “weDocs” in the search box. Then click on the Install button.

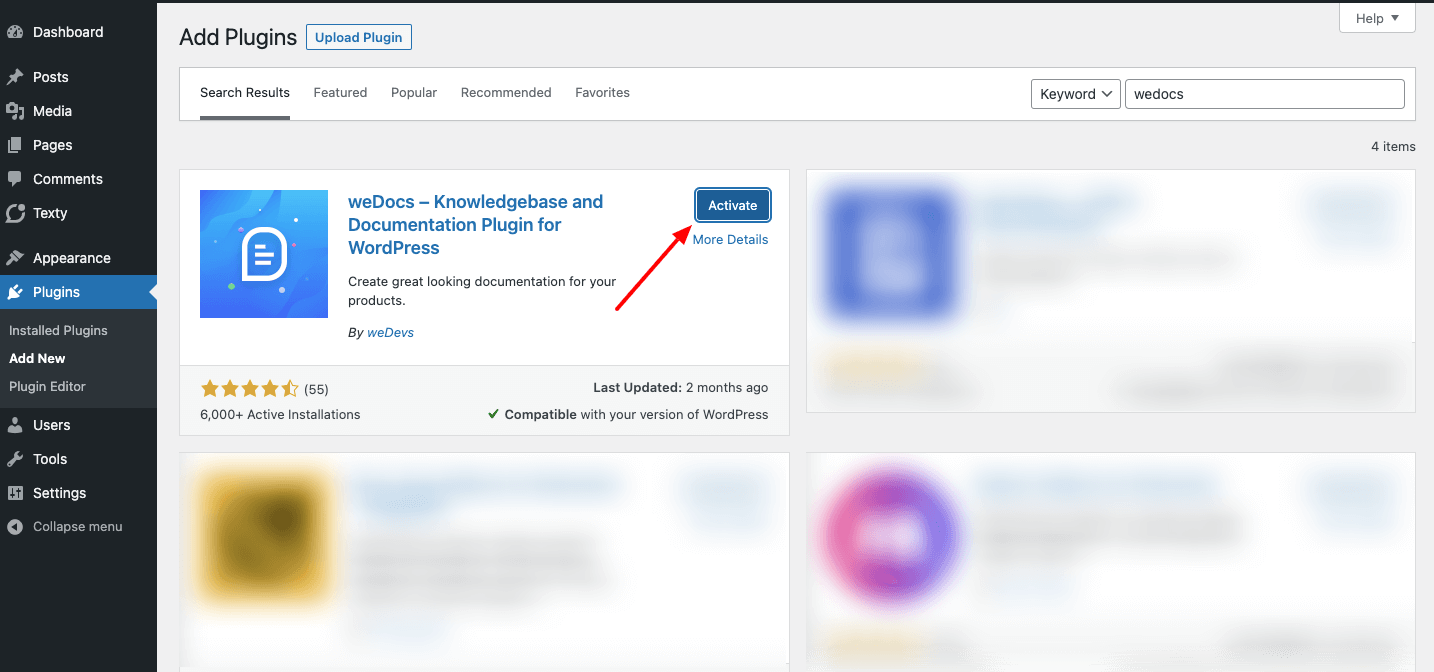
After installing the plugin you need to Activate the plugin.

After you finish with the installation, you can see the weDocs dashboard on your WordPress site.

Method two: installing from the WordPress repository
You can download the WordPress documentation plugin from the WordPress repository and upload the plugin manually. Without navigating to your WordPress dashboard, you can swiftly do that:
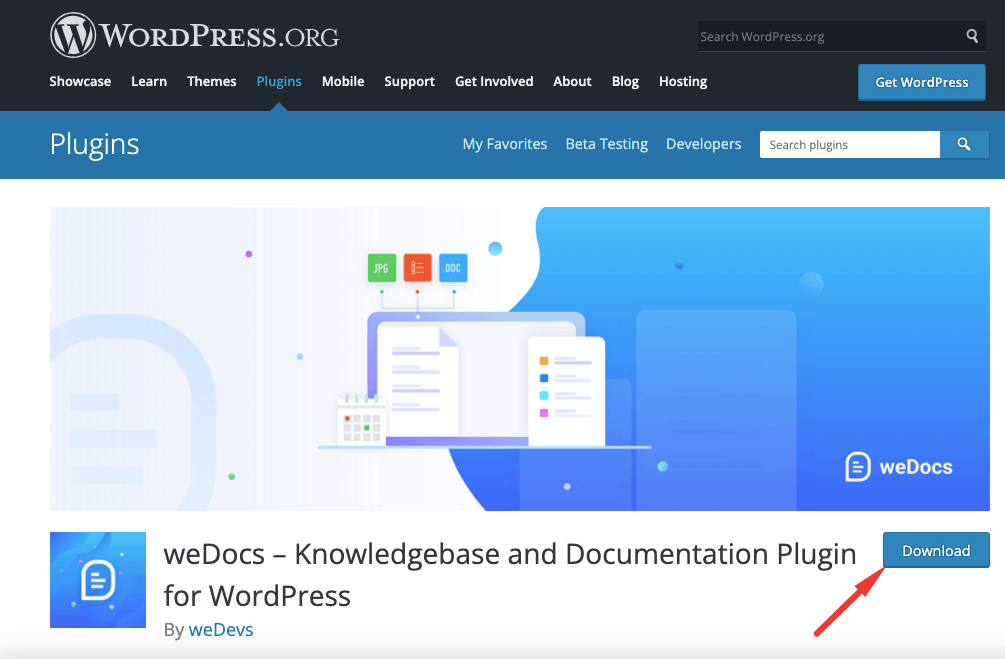
For that, visit Wordpress.org and type weDocs in the search box. Then download the plugin from there.

From WPHIve
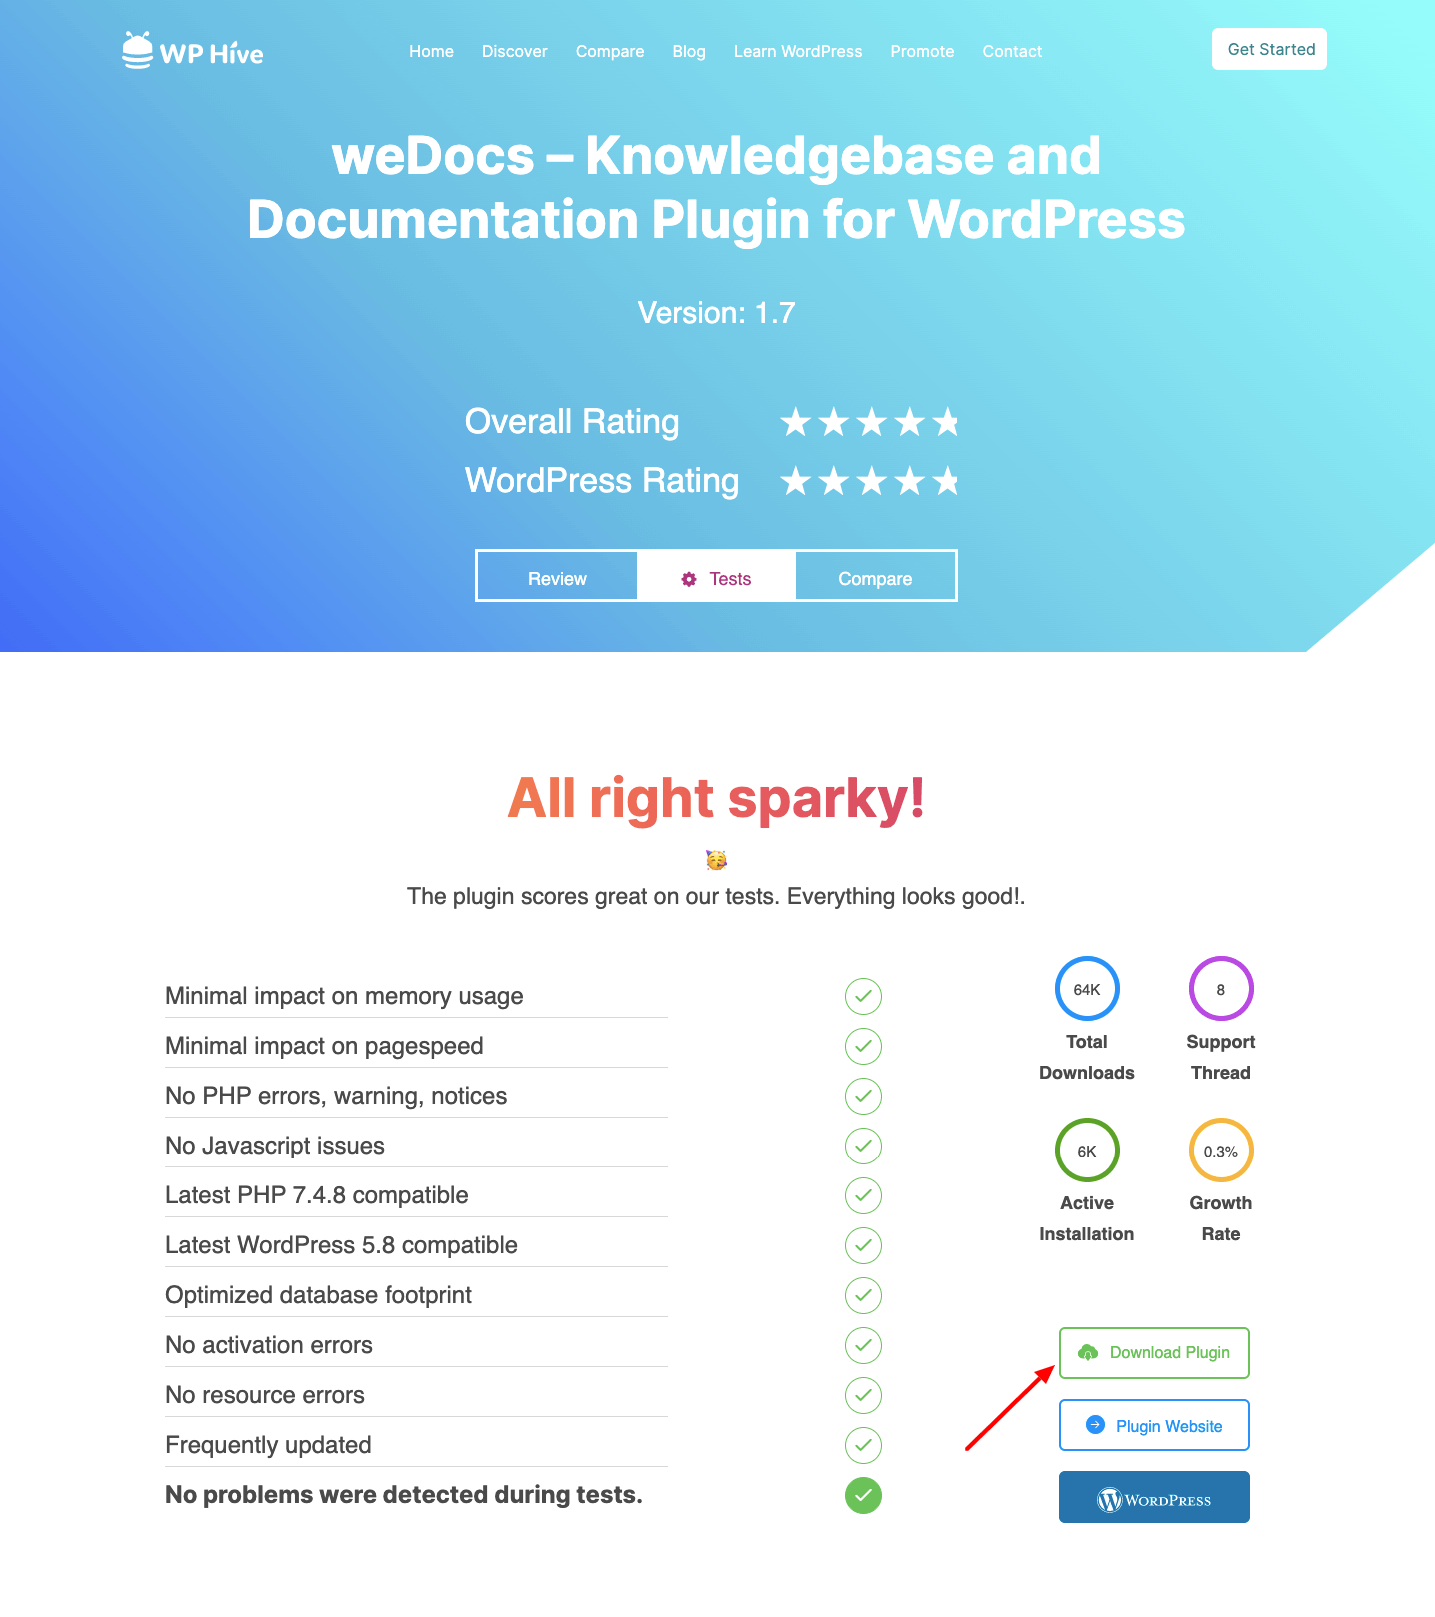
Or you can download the plugin from WPHive, a better WordPress repository where you can get a detailed analysis of the WordPress plugin.
Search for weDocs there and download the plugin from there.

Upload the plugin
After downloading the WordPress documentation plugin you need to upload the plugin on your WordPress dashboard.
To upload the plugin, go to WP Admin–> Plugins–> Add New. Click on the Upload button.

Now, click on the Choose file button that will open the file manager of your device.

Choose the plugin from your file manager and click on the Install Now button.

After finishing installing you can see the weDocs dashboard on your WordPress site.

This is how you can easily install the weDocs plugin.


