If you’re using weDocs together with Dokan, you can now mark specific documentation as Vendor Documentation.
This feature helps marketplace owners create documentation specifically for vendors, making it easier to organize onboarding guides, store management instructions, marketplace policies, payment information, and other vendor-related resources.
Once a document is marked as Vendor Documentation, it becomes part of your vendor knowledge base, allowing vendors to quickly find the information they need without browsing through customer-facing or general documentation.
In this guide, you’ll learn how to mark a document as Vendor Documentation and manage vendor-specific knowledge effectively using weDocs and Dokan.
Here is how to set it up.
Note: Make sure you have Dokan installed in your WordPress site and configured. You will only need the Dokan free version to use this feature.
Also, you can mark only one documentation as vendor doc in the free version, but in the pro version you can mark as many documentaion as vendor doc as you want.
Setup: Dokan
For the dokan side, you only need to enable the option “Show Docs in Vendor Dashboard” from the Dokan–> Settings–> General Settings,
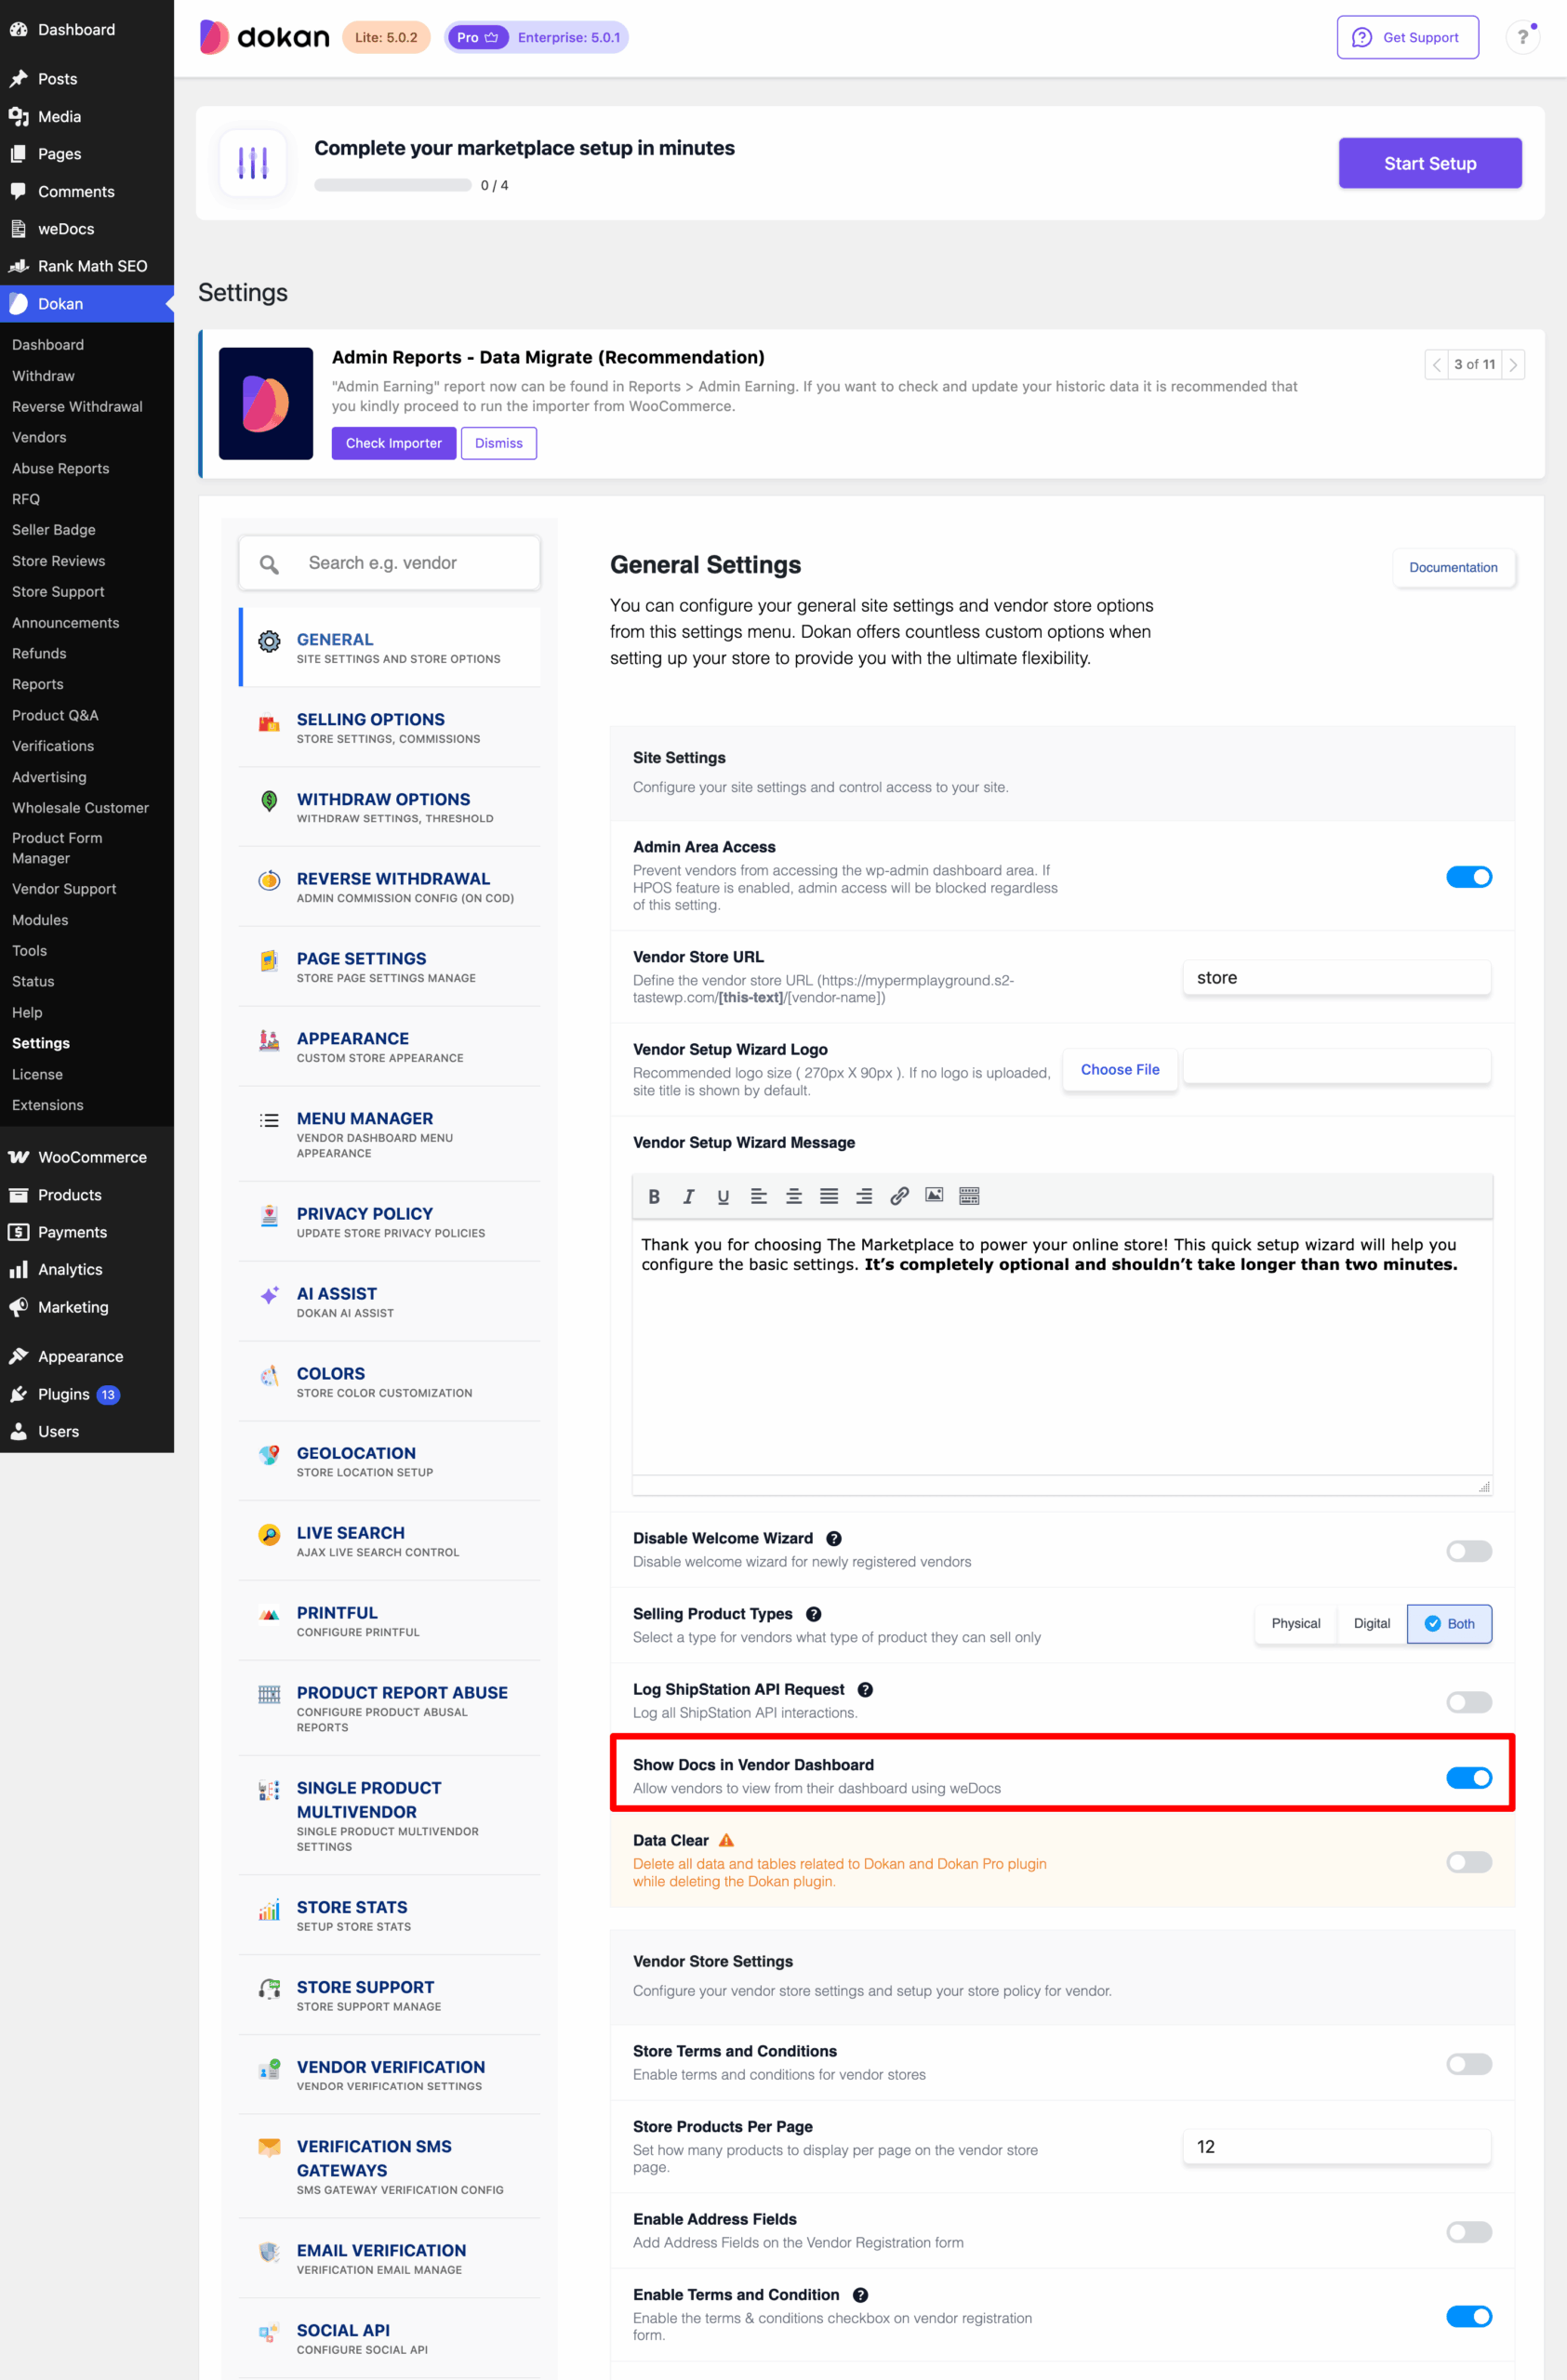
You are done from Dokan side.
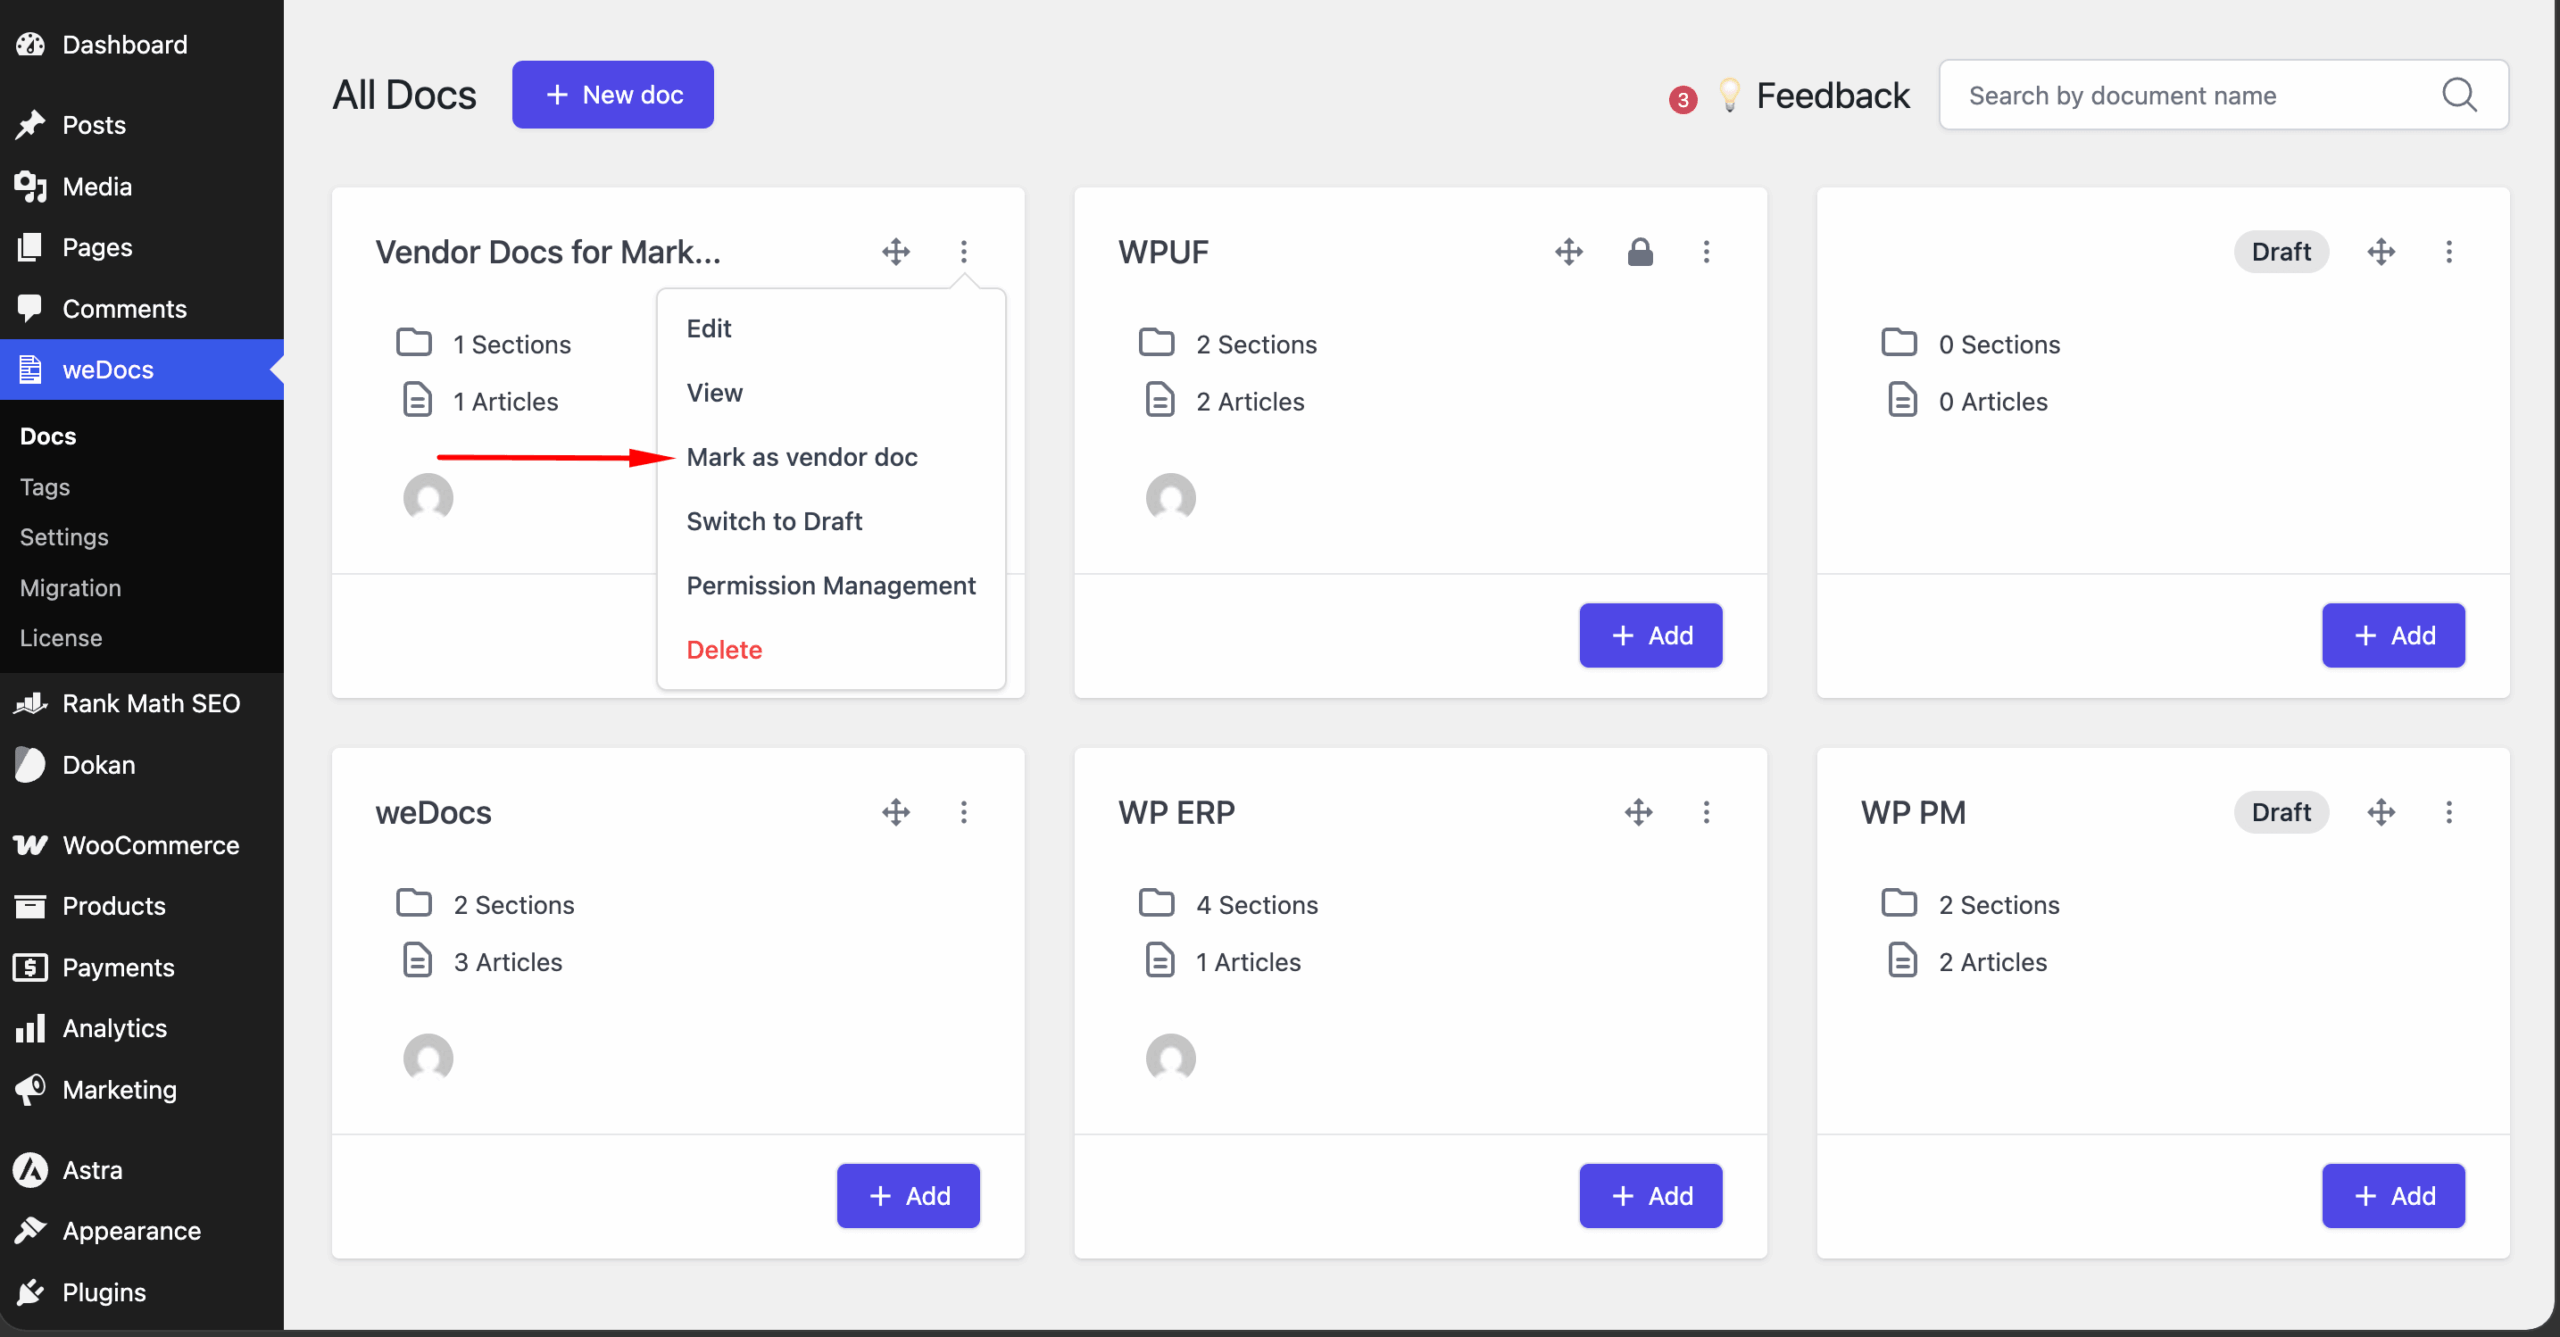
Setup: weDocs
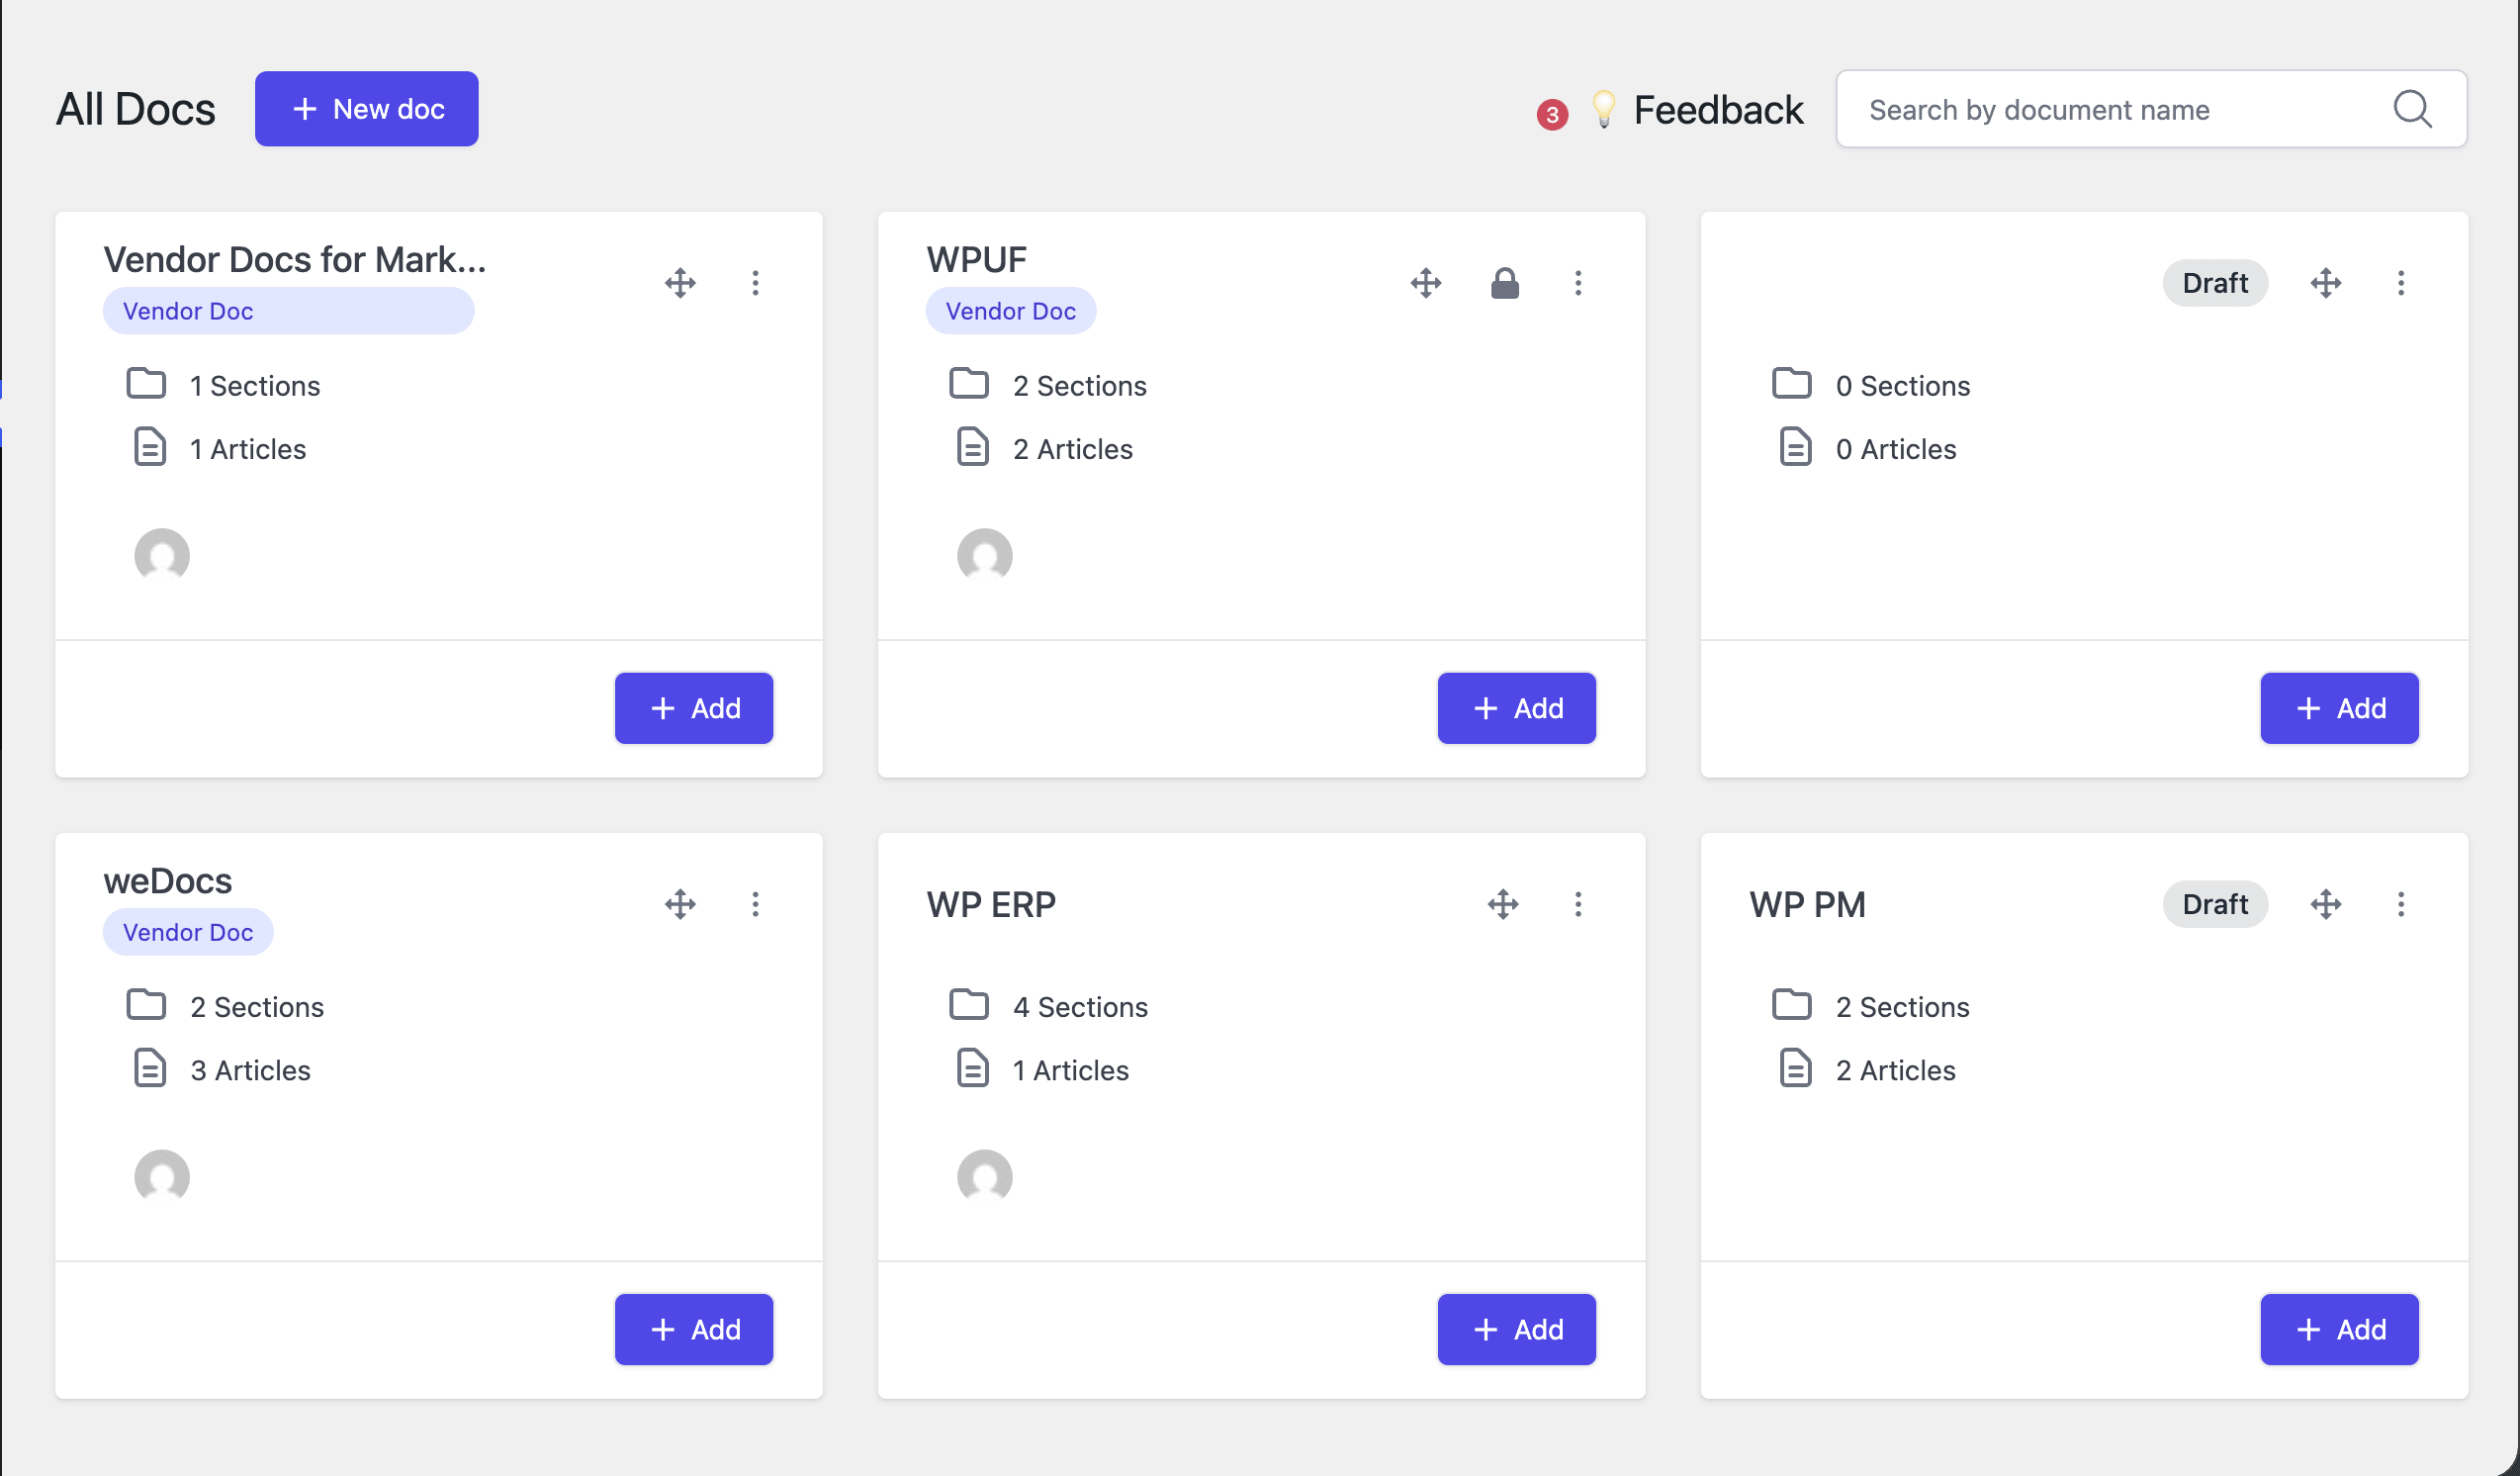
Now, from the weDocs settings, go to weDocs–> Docs and select the doc you want to mark as vendor doc. Click on the “Three Dot” button and find the “Mark as Vendor Doc” option-
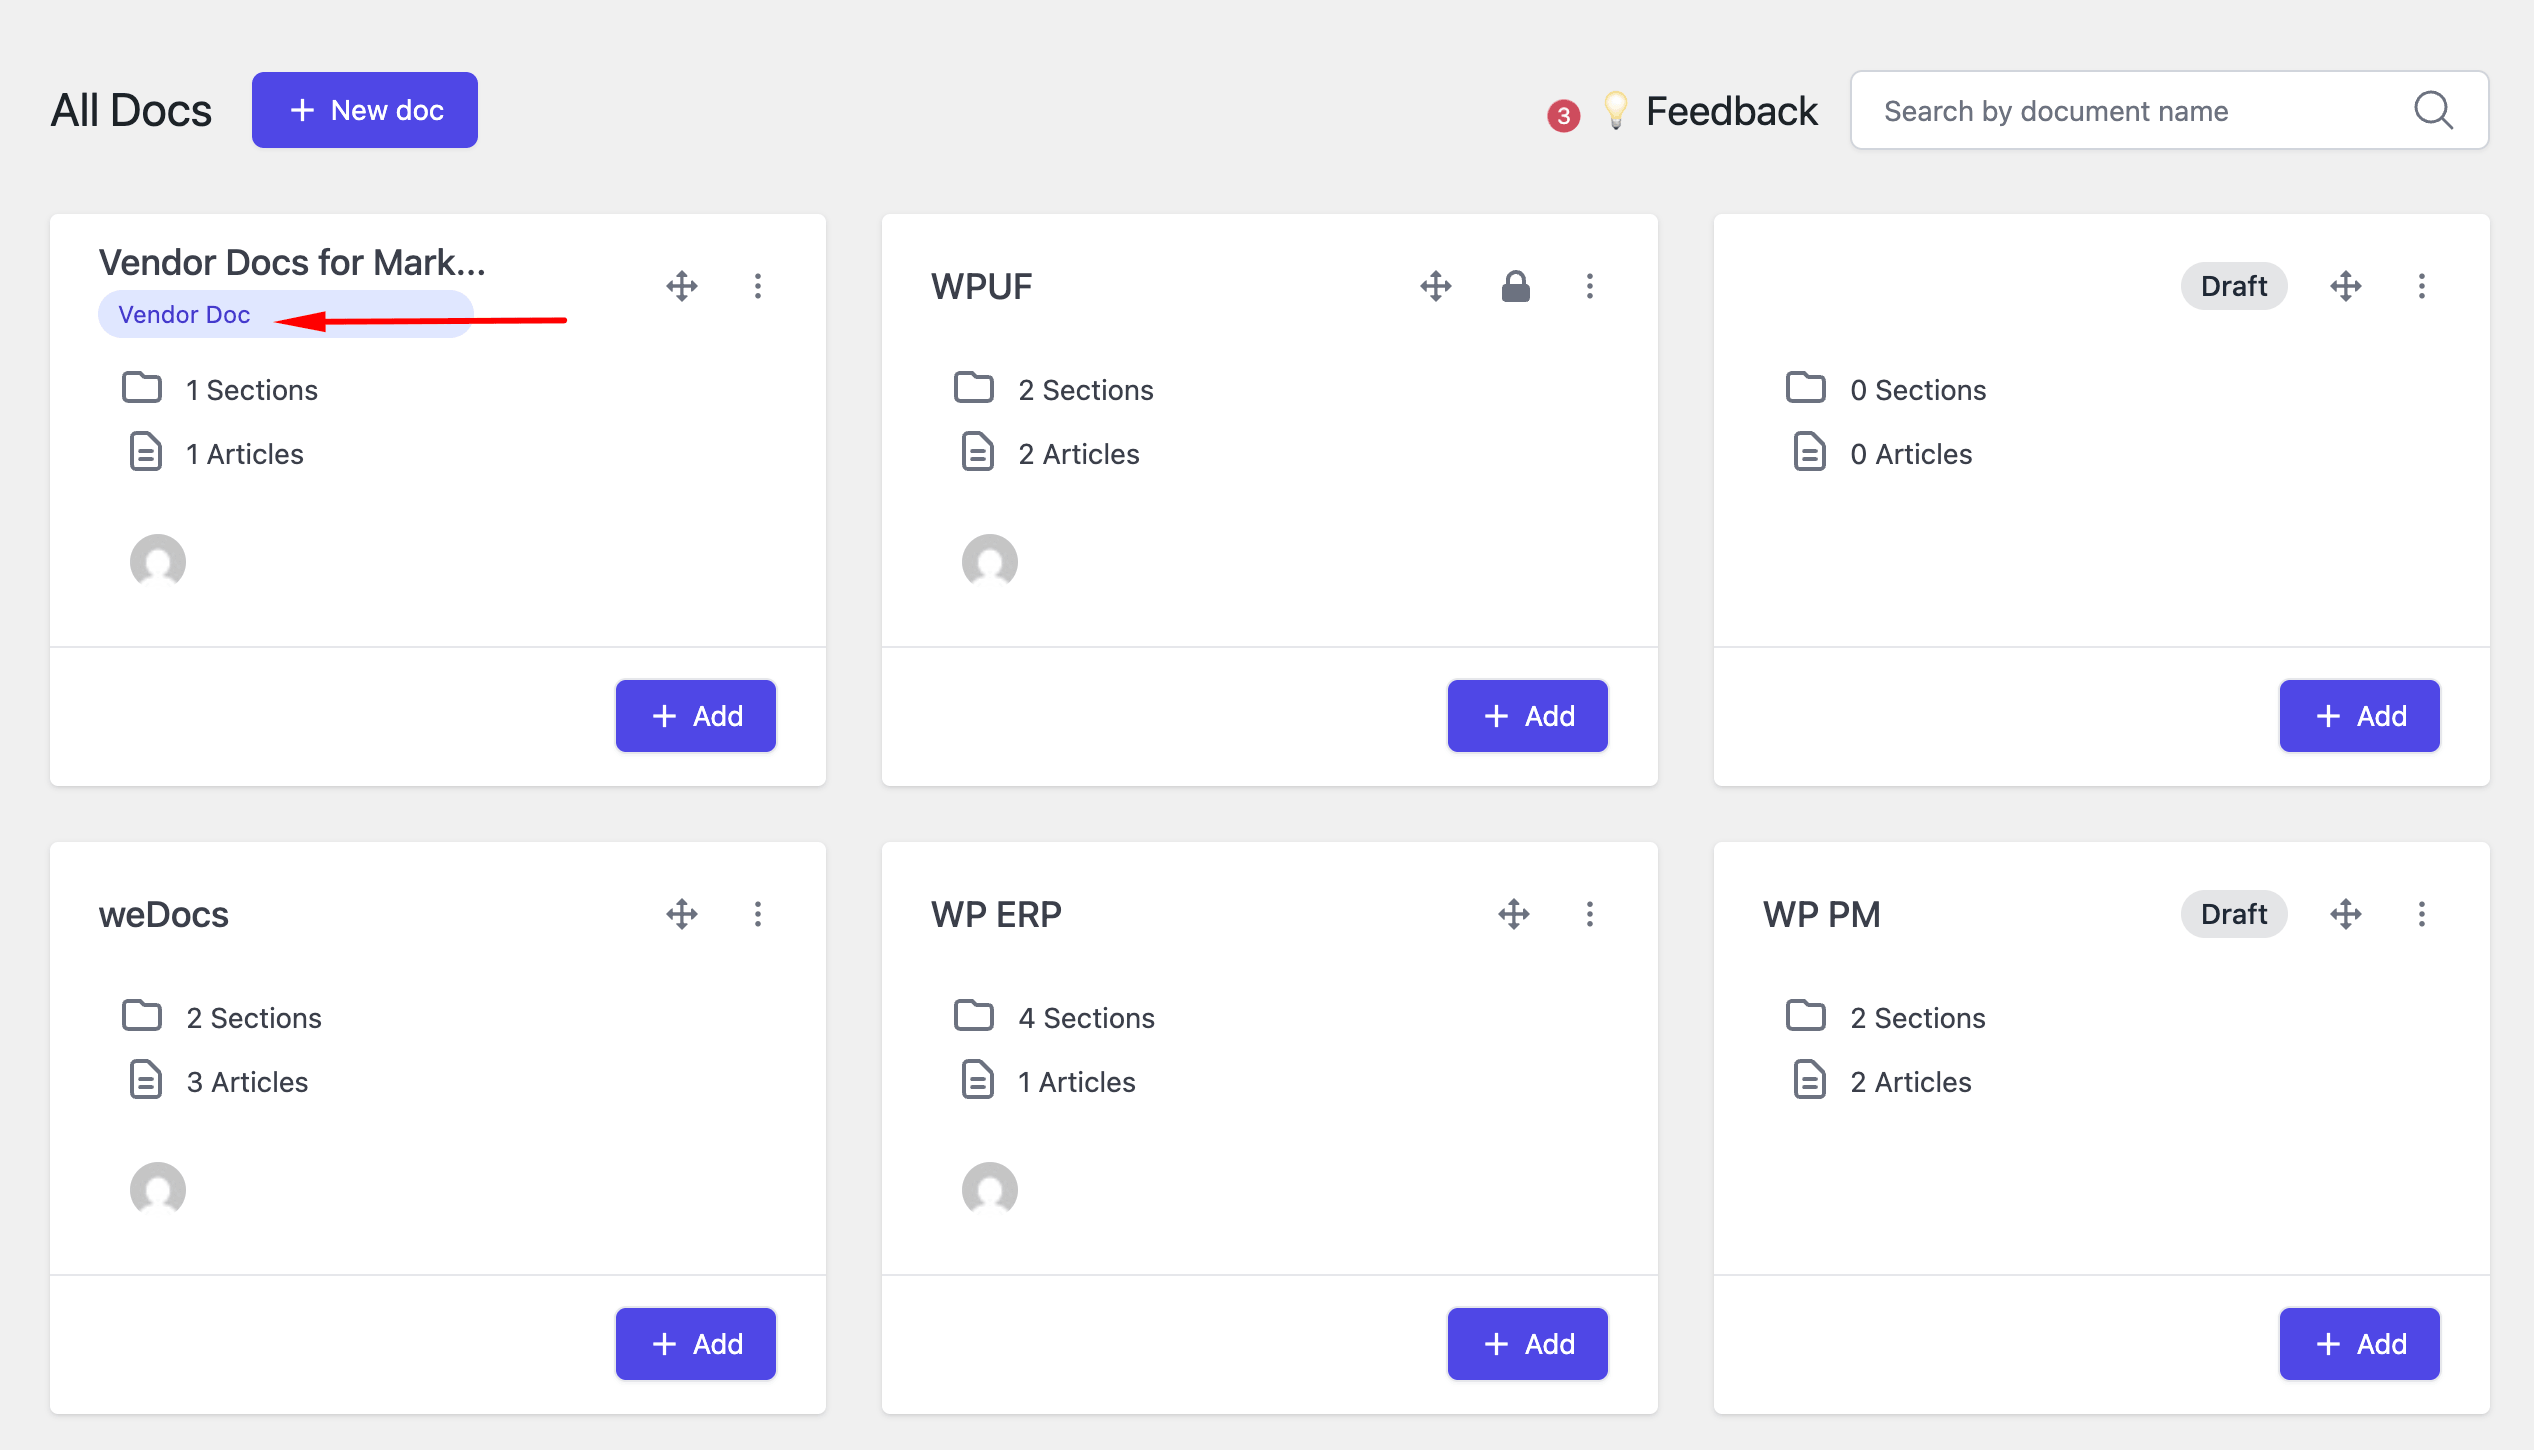
Then you will see the tag Vendor Doc underneath the doc-
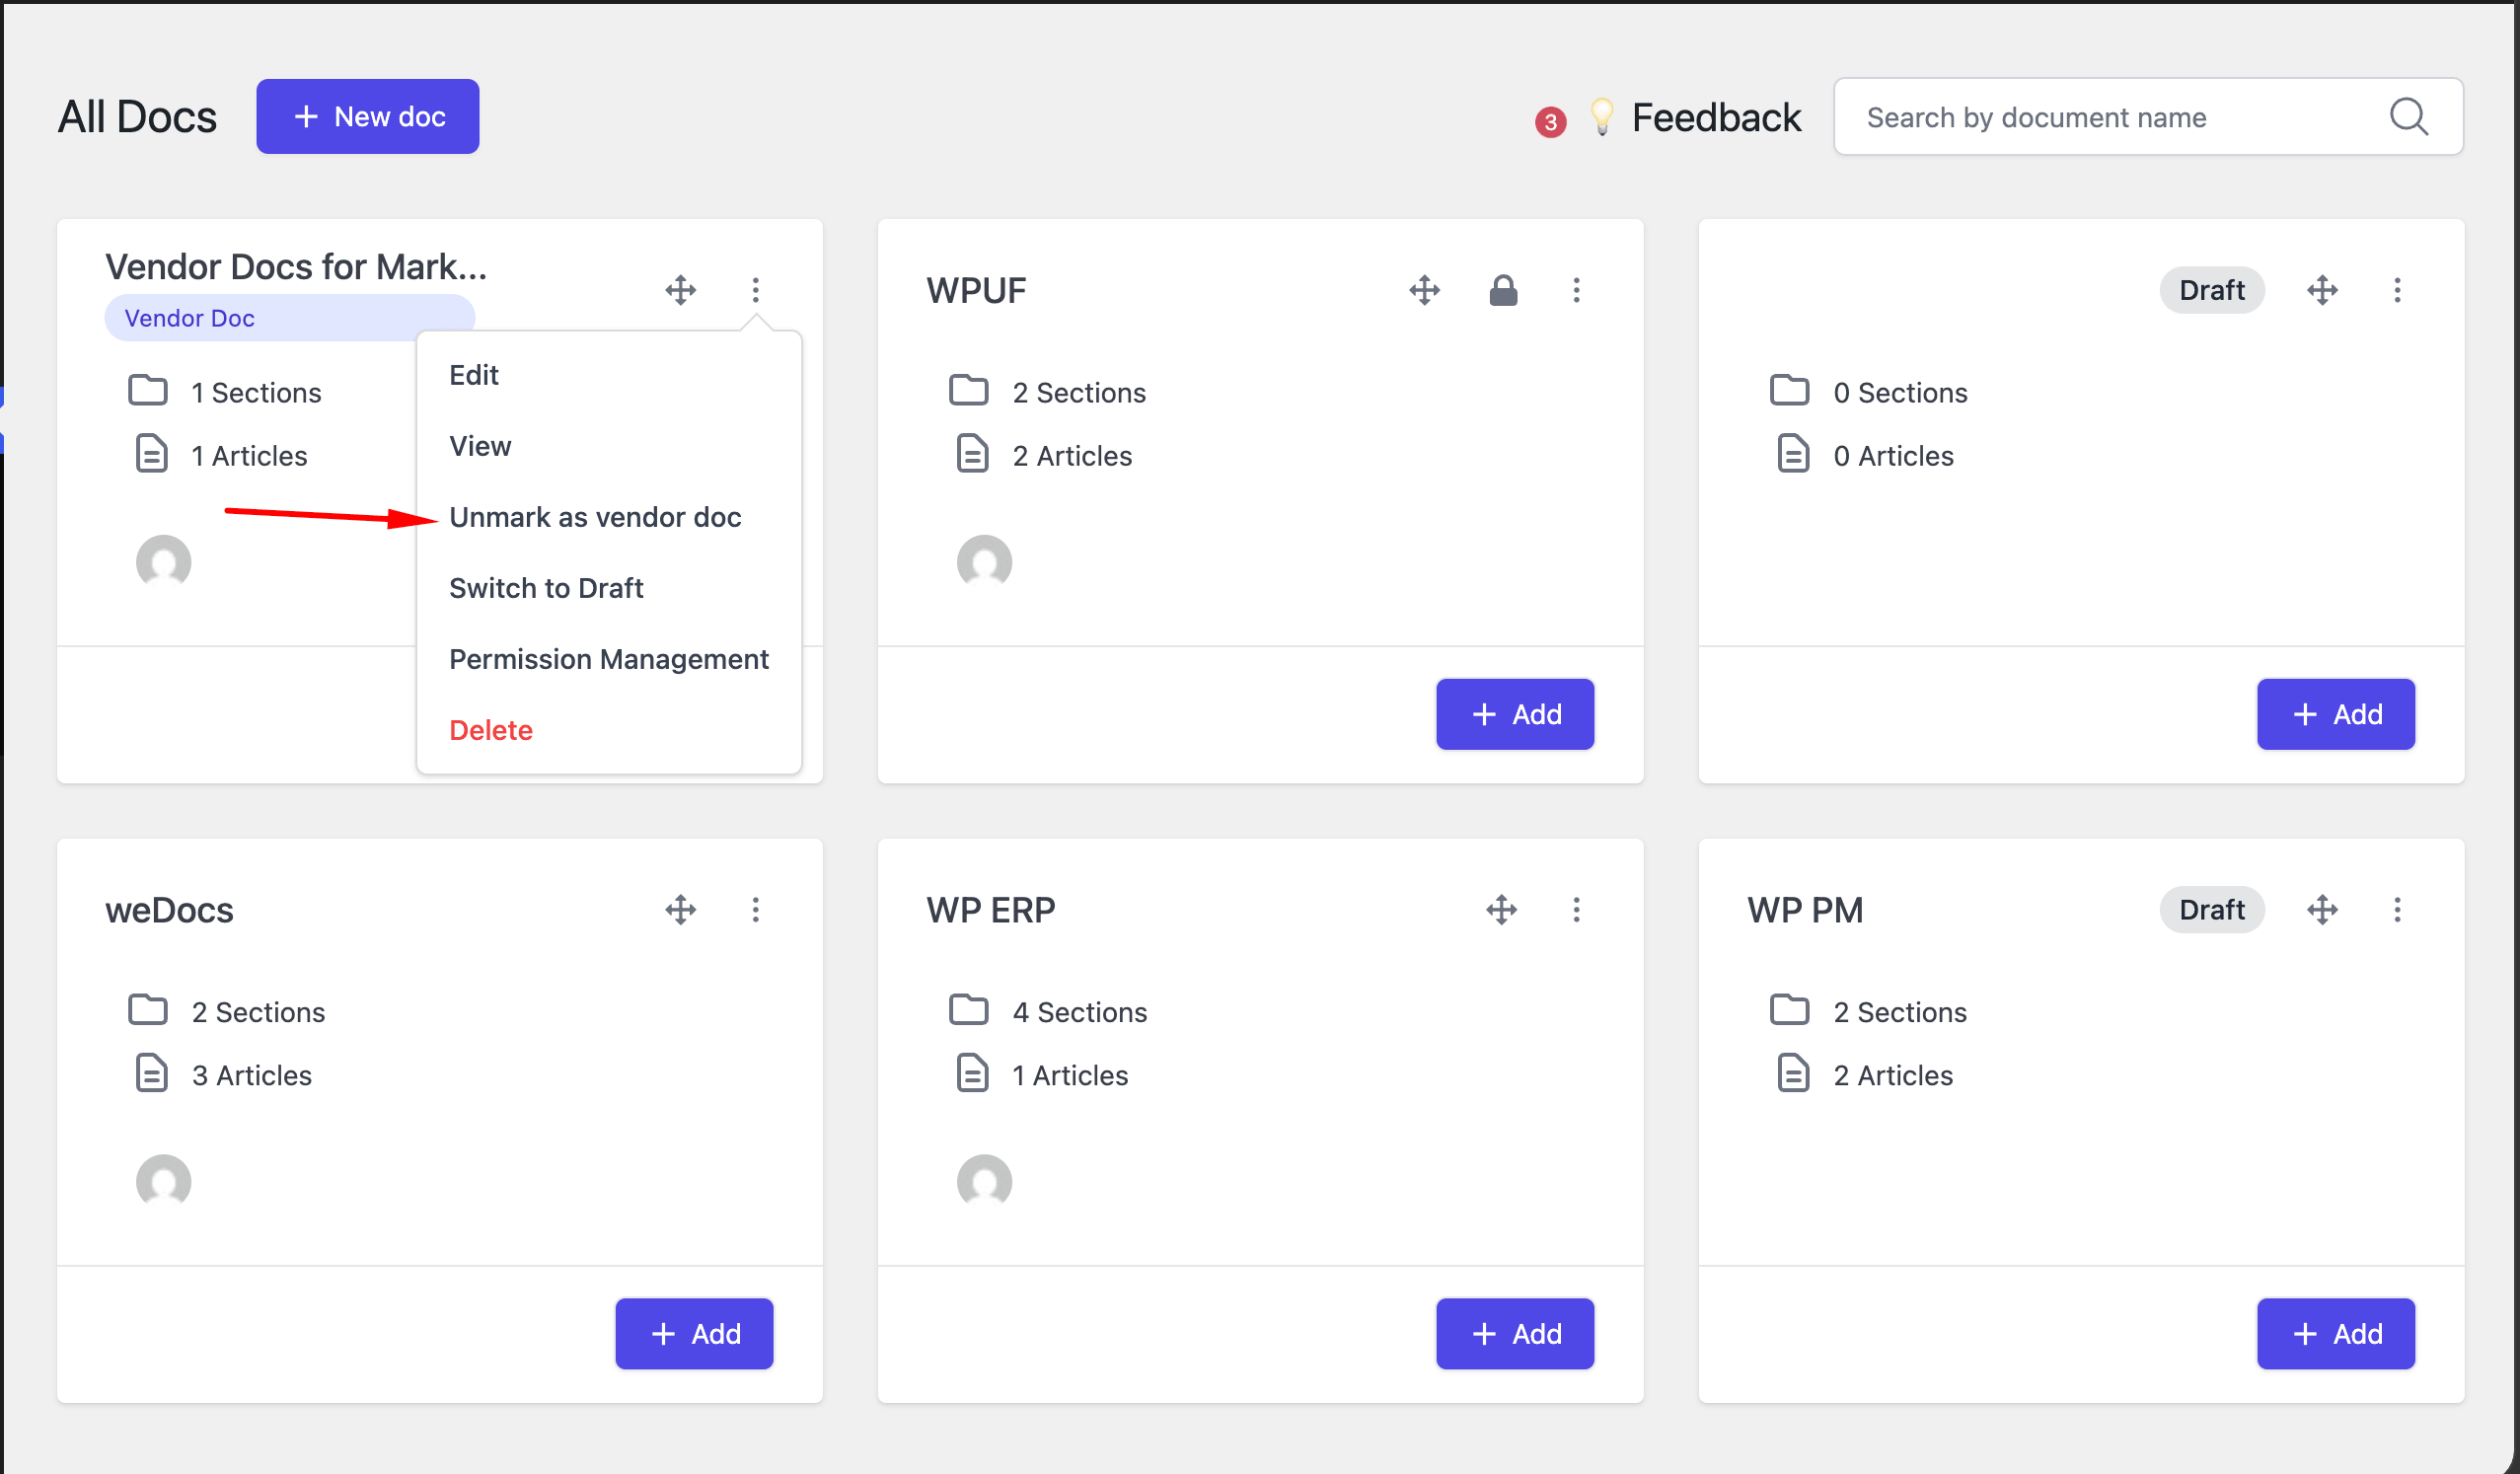
You can also unmark if you want-
Also, if you have the weDocs pro version, you can mark multiple documents as vendor doc.
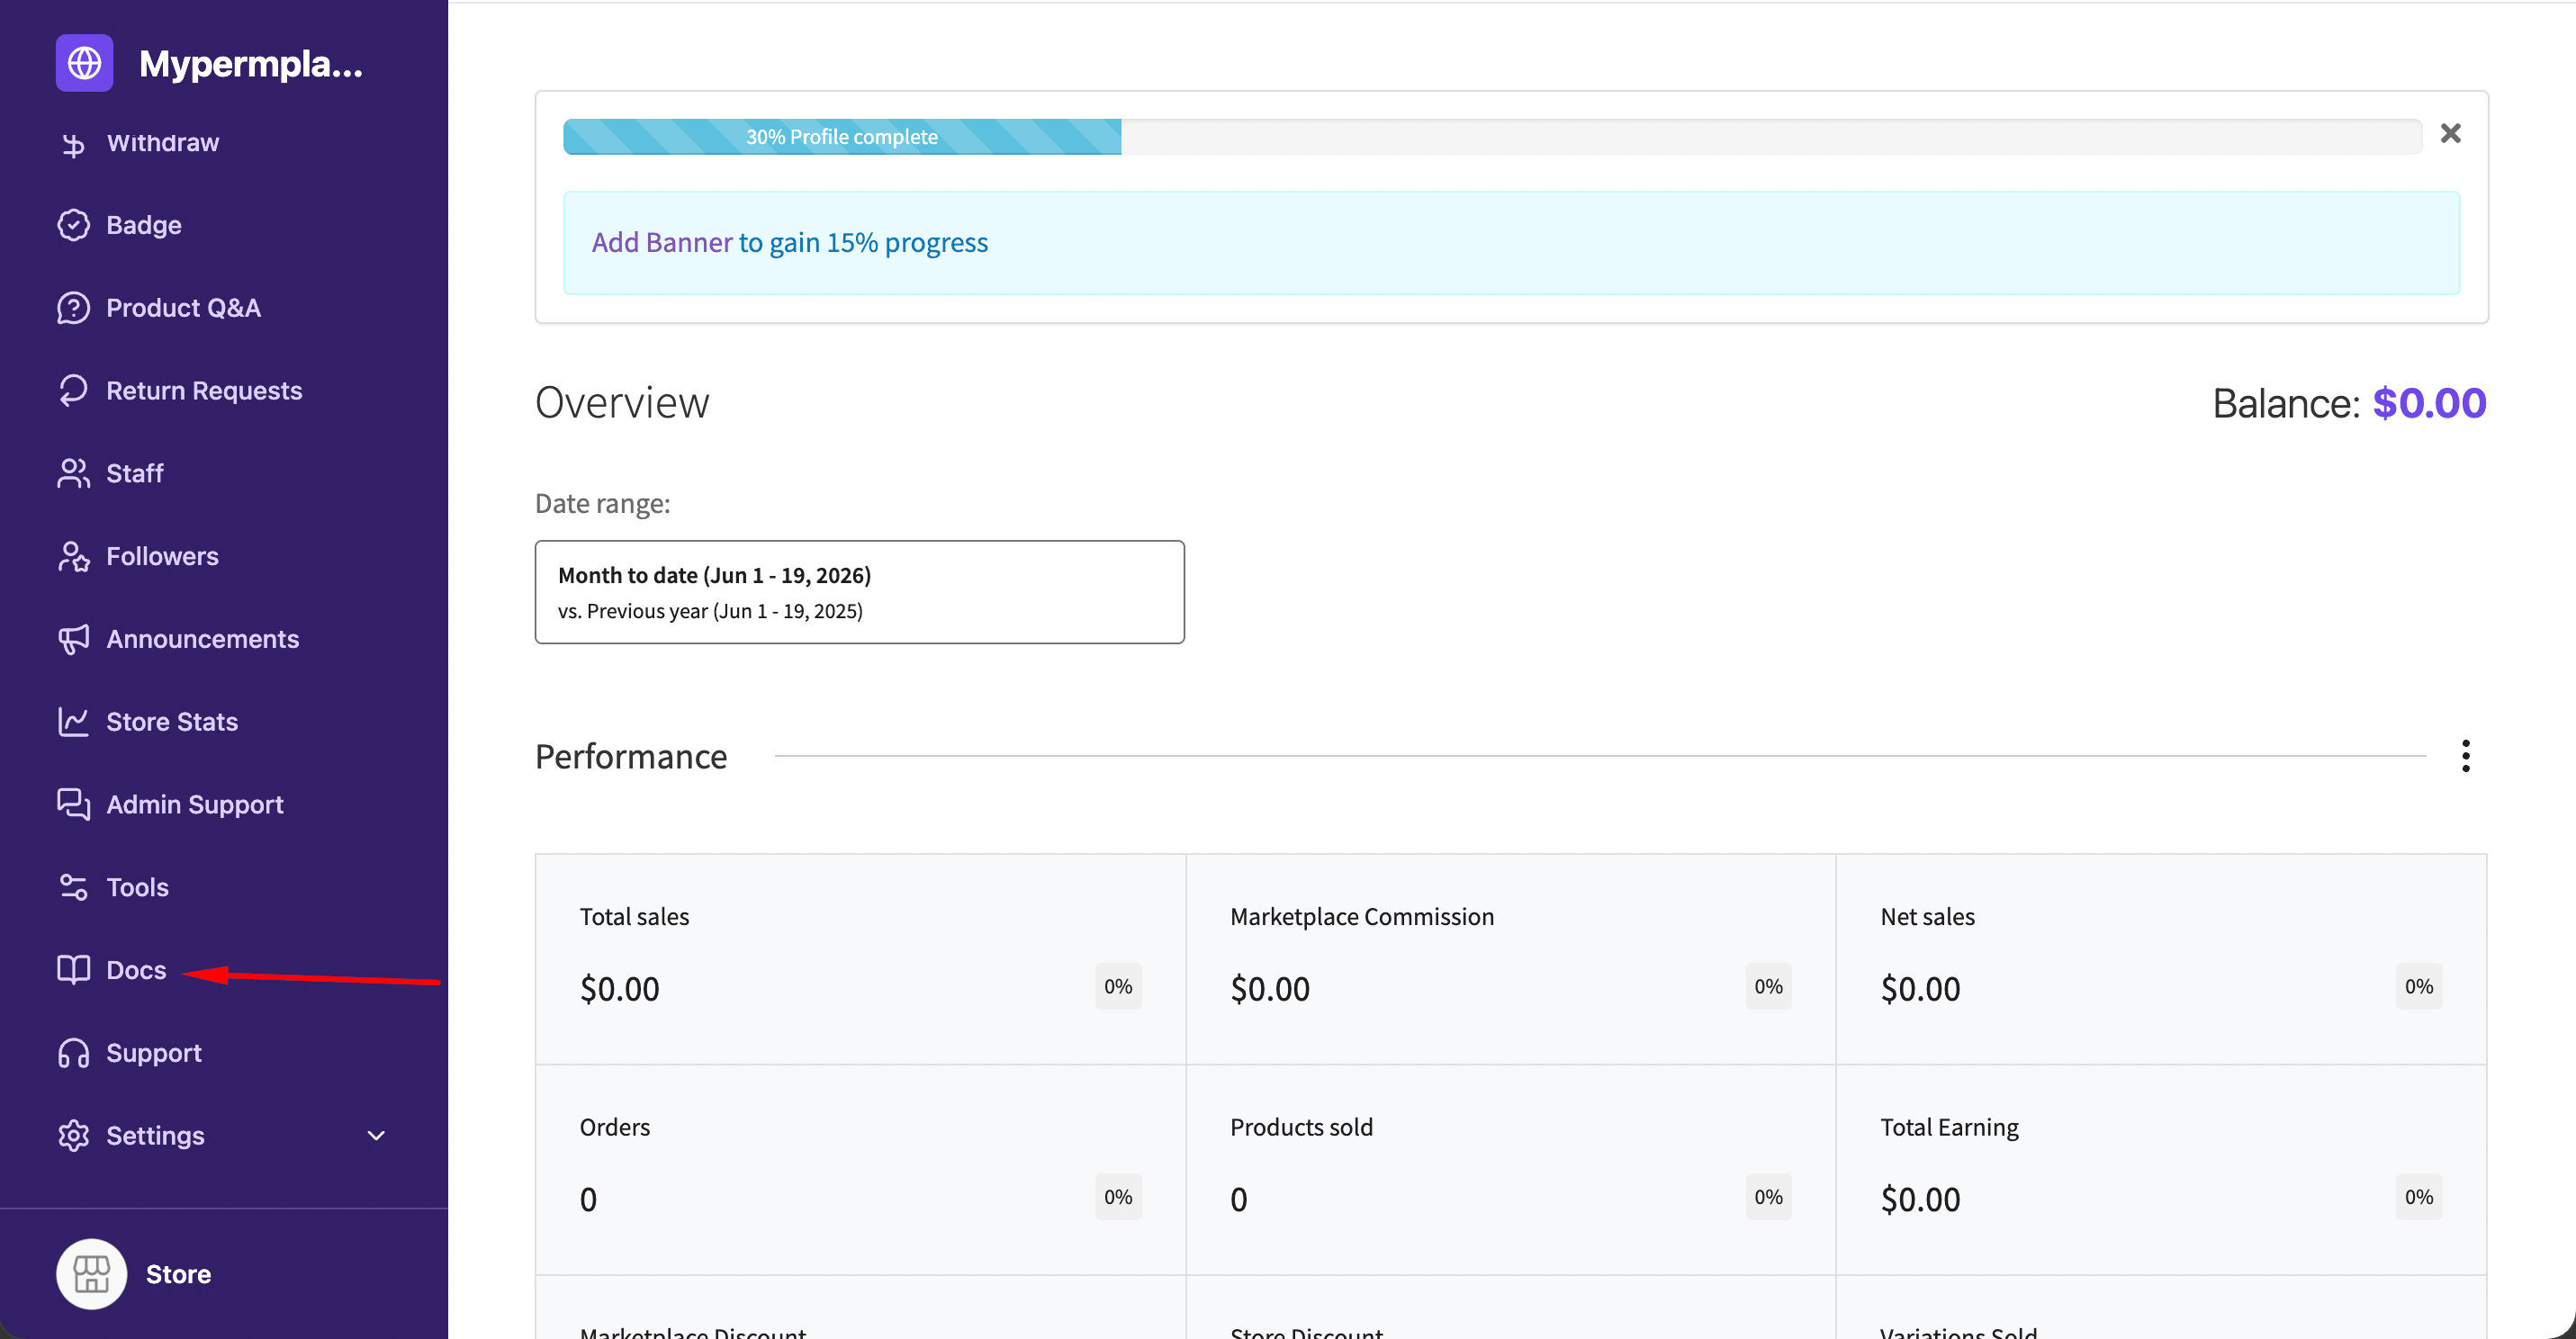
Now, go to the vendor dashboard and find the “Docs” option from the menu-
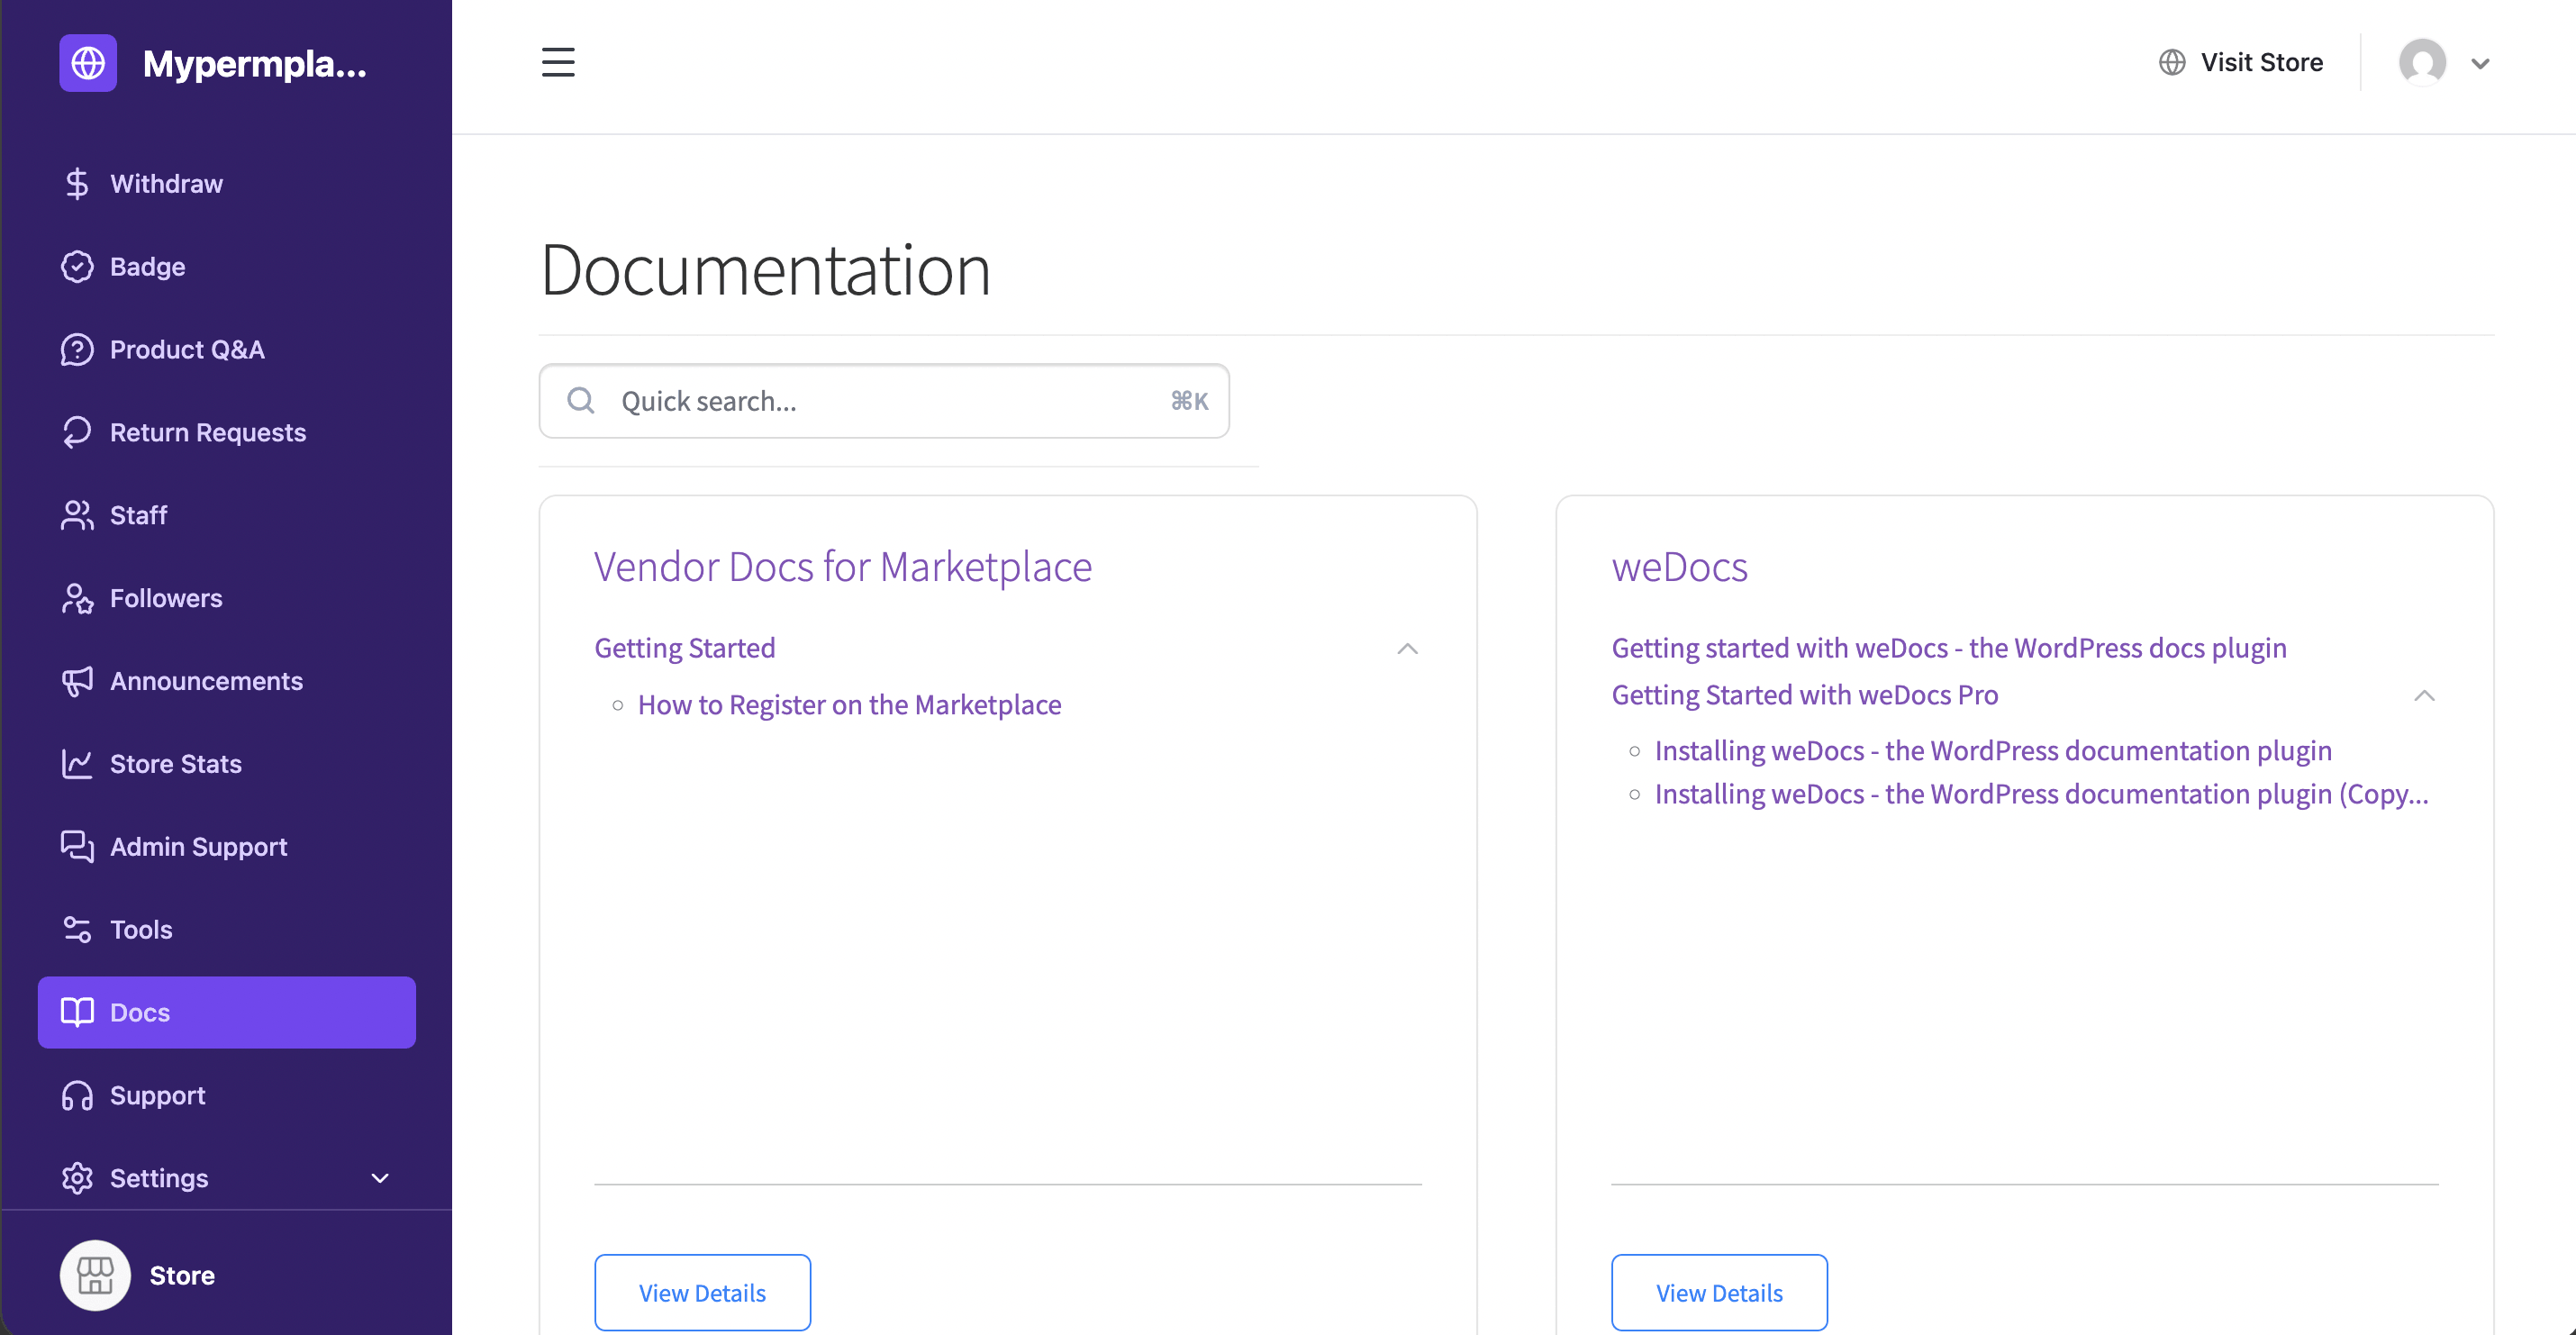
Vendor will see the docs from their vendor dashboard-
This is how you can manage your vendor docs in Dokan using the support of weDocs.