

Your documentation lives in WordPress. Your AI assistant lives somewhere else. Getting one to work on the other usually means copying content back and forth by hand, which is slow and goes stale the moment anything changes.
The MCP feature in weDocs removes that step. It turns your site into a server that AI assistants such as Claude and ChatGPT can connect to over the Model Context Protocol, so they read and write your documentation directly. Access runs through a connection token or a one-time sign-in, and every action is performed as the person who granted it, so an assistant can never do more than that account already could.
Set Up MCP in weDocs
Turn the feature on, pick how your assistant signs in, then connect the client. The whole process takes a few minutes.
Step 1:Turn On MCP Access
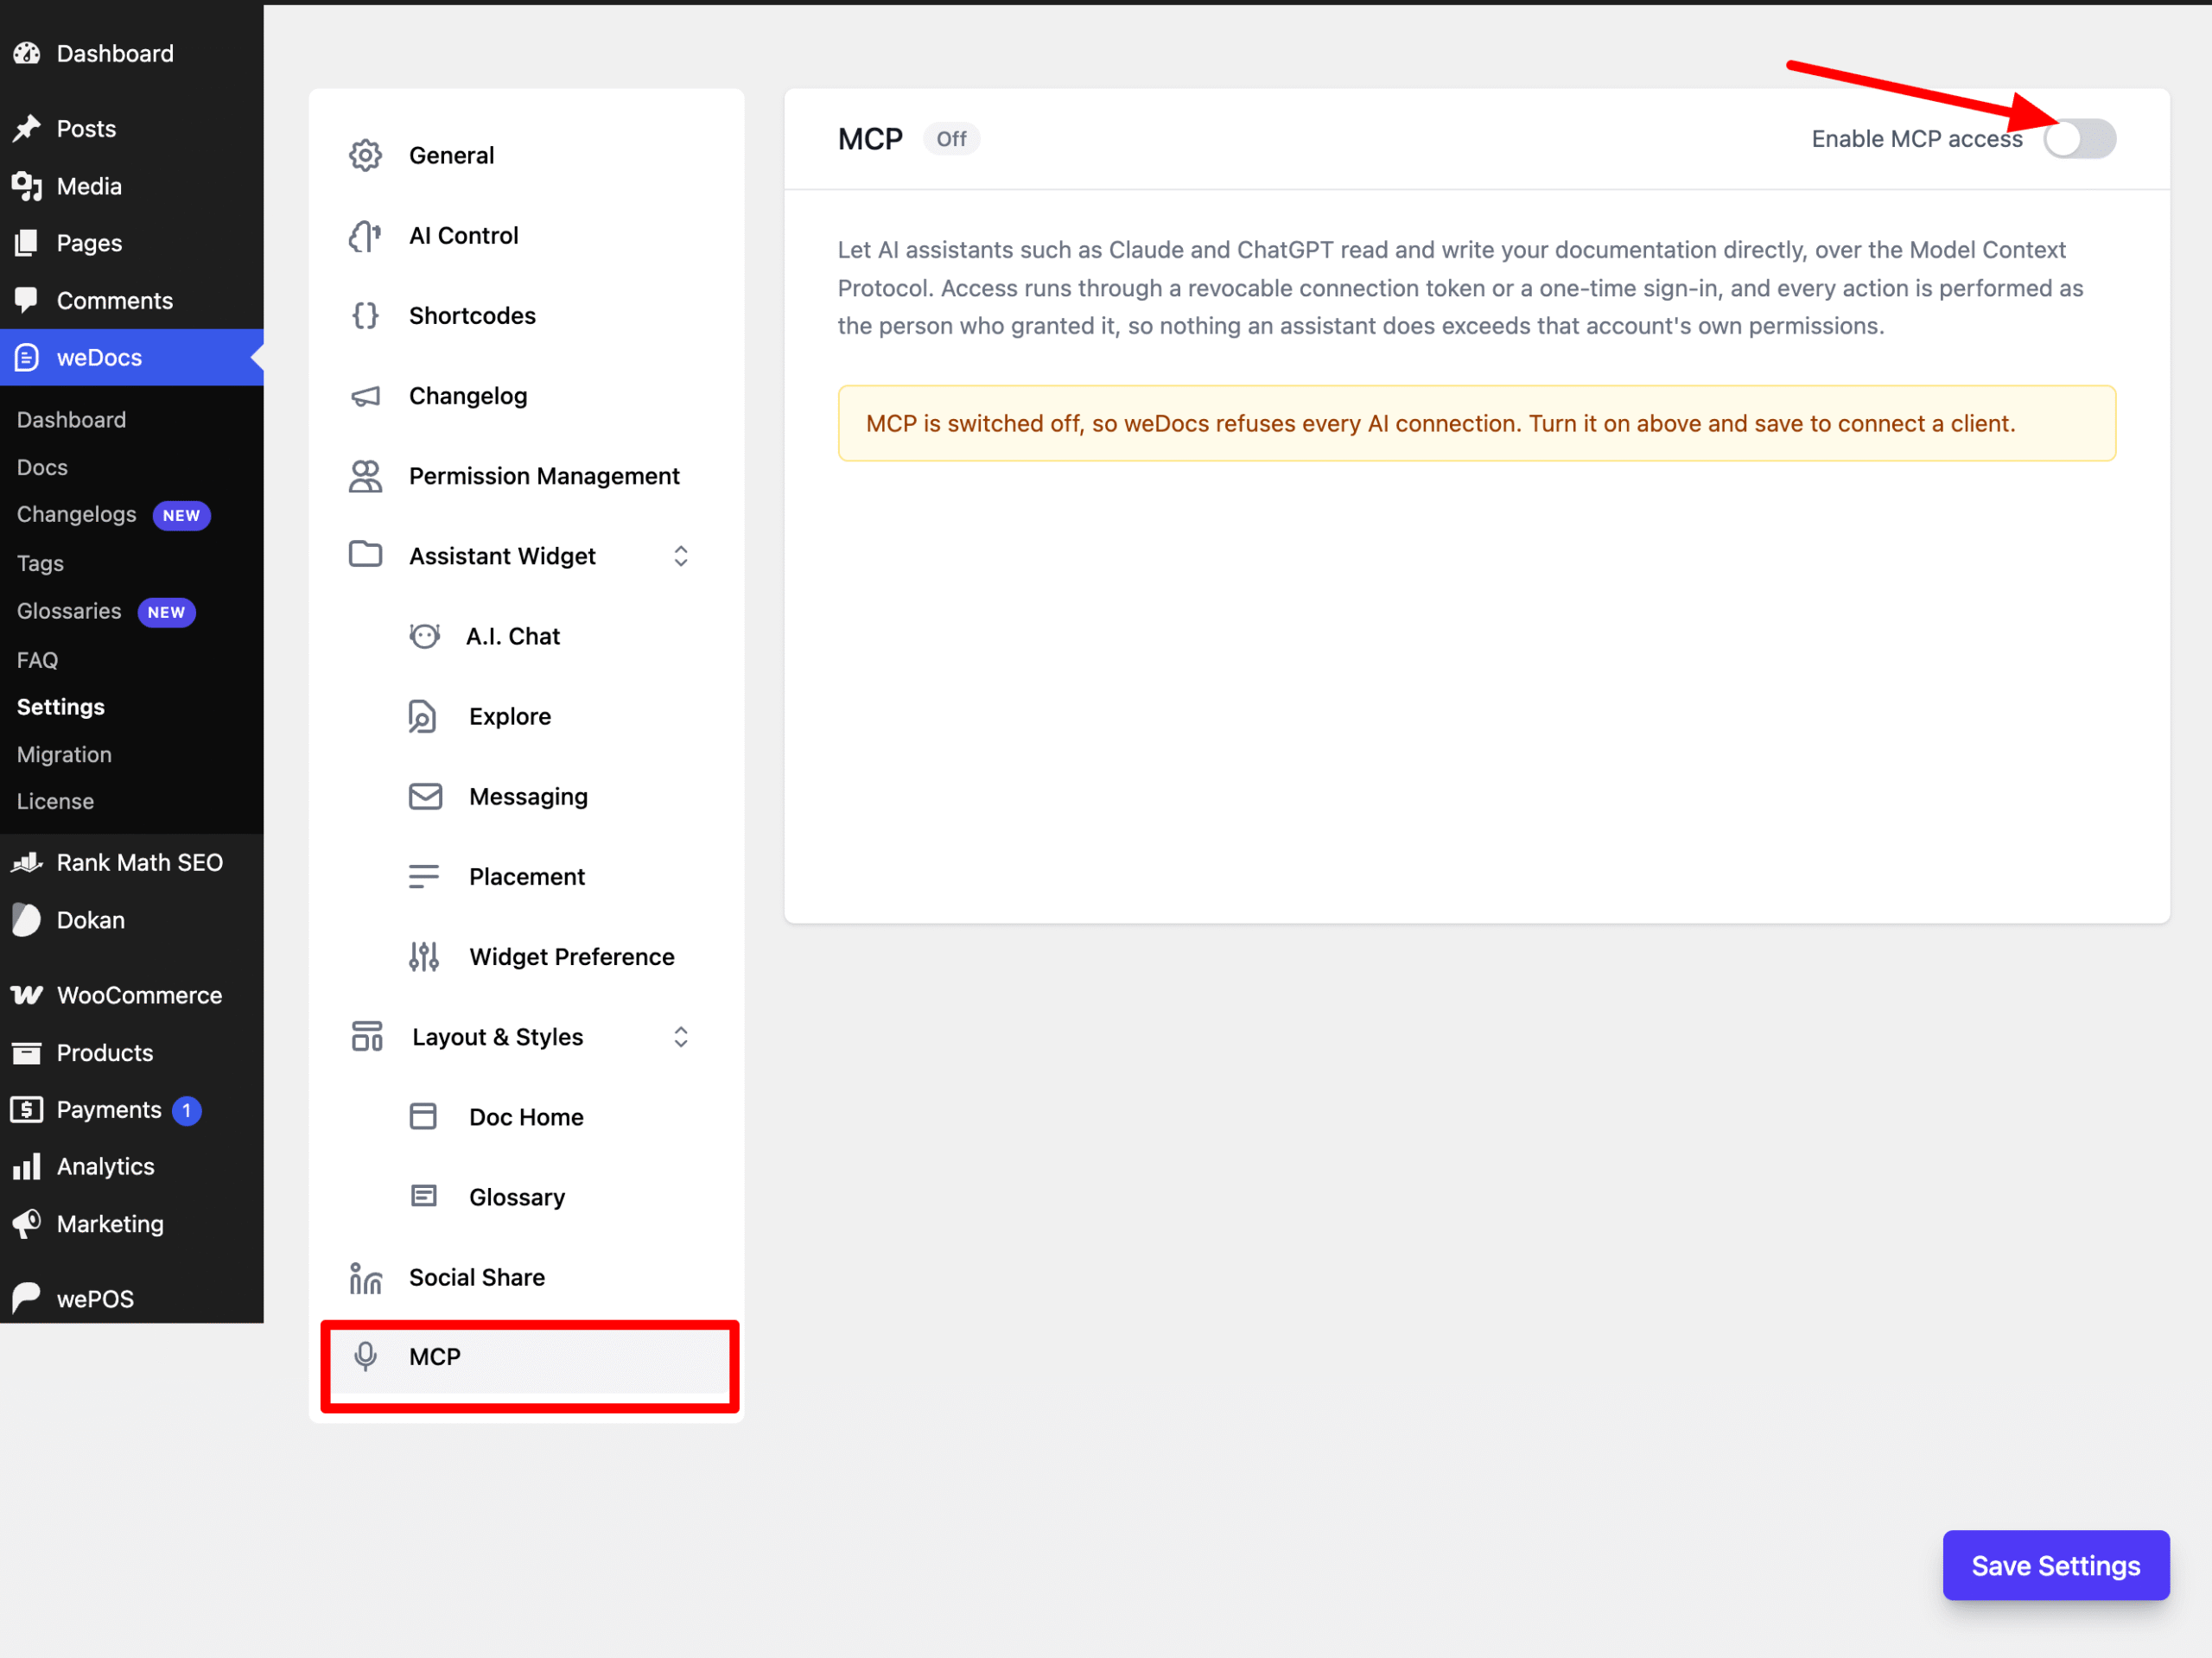
From your WordPress dashboard, go to weDocs > Settings and open the MCP tab in the settings sidebar.
Before you switch anything on, the page shows an MCP badge reading Off and a notice explaining that weDocs refuses every AI connection while the feature is disabled.
Switch Enable MCP access on at the top right, then click Save Settings.
Step 2: Check the Server and Pick a Sign-In Method
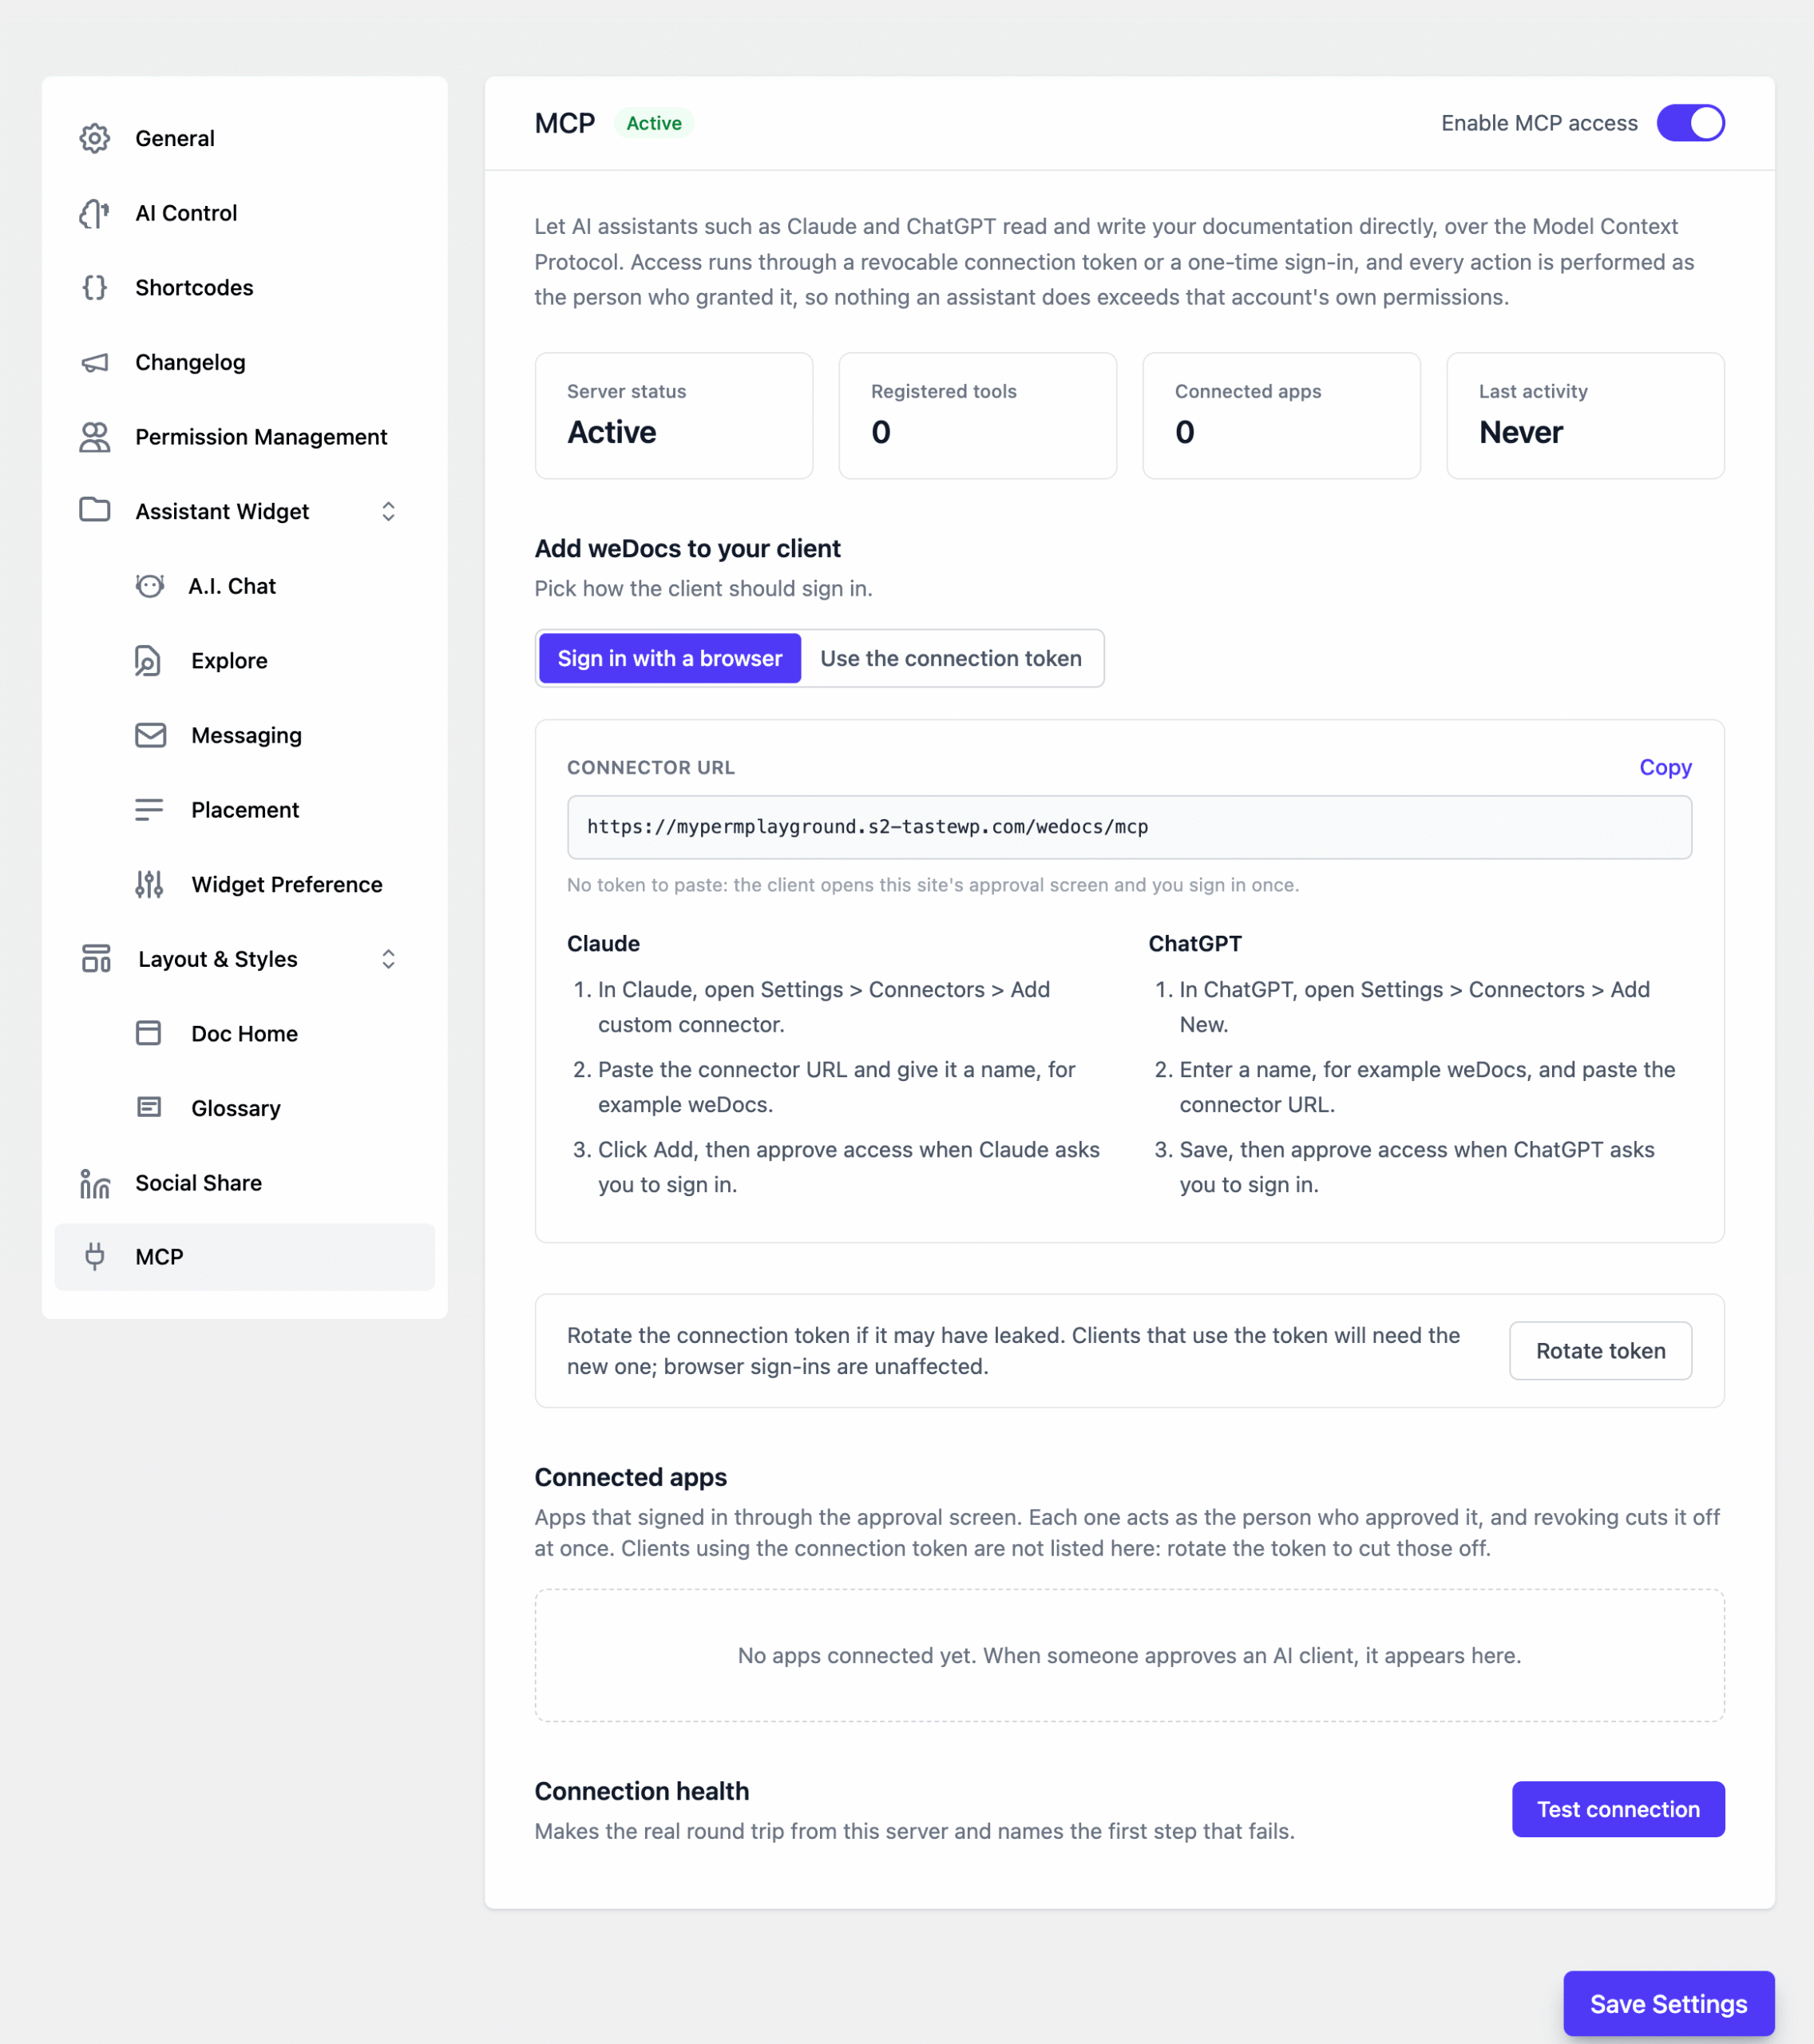
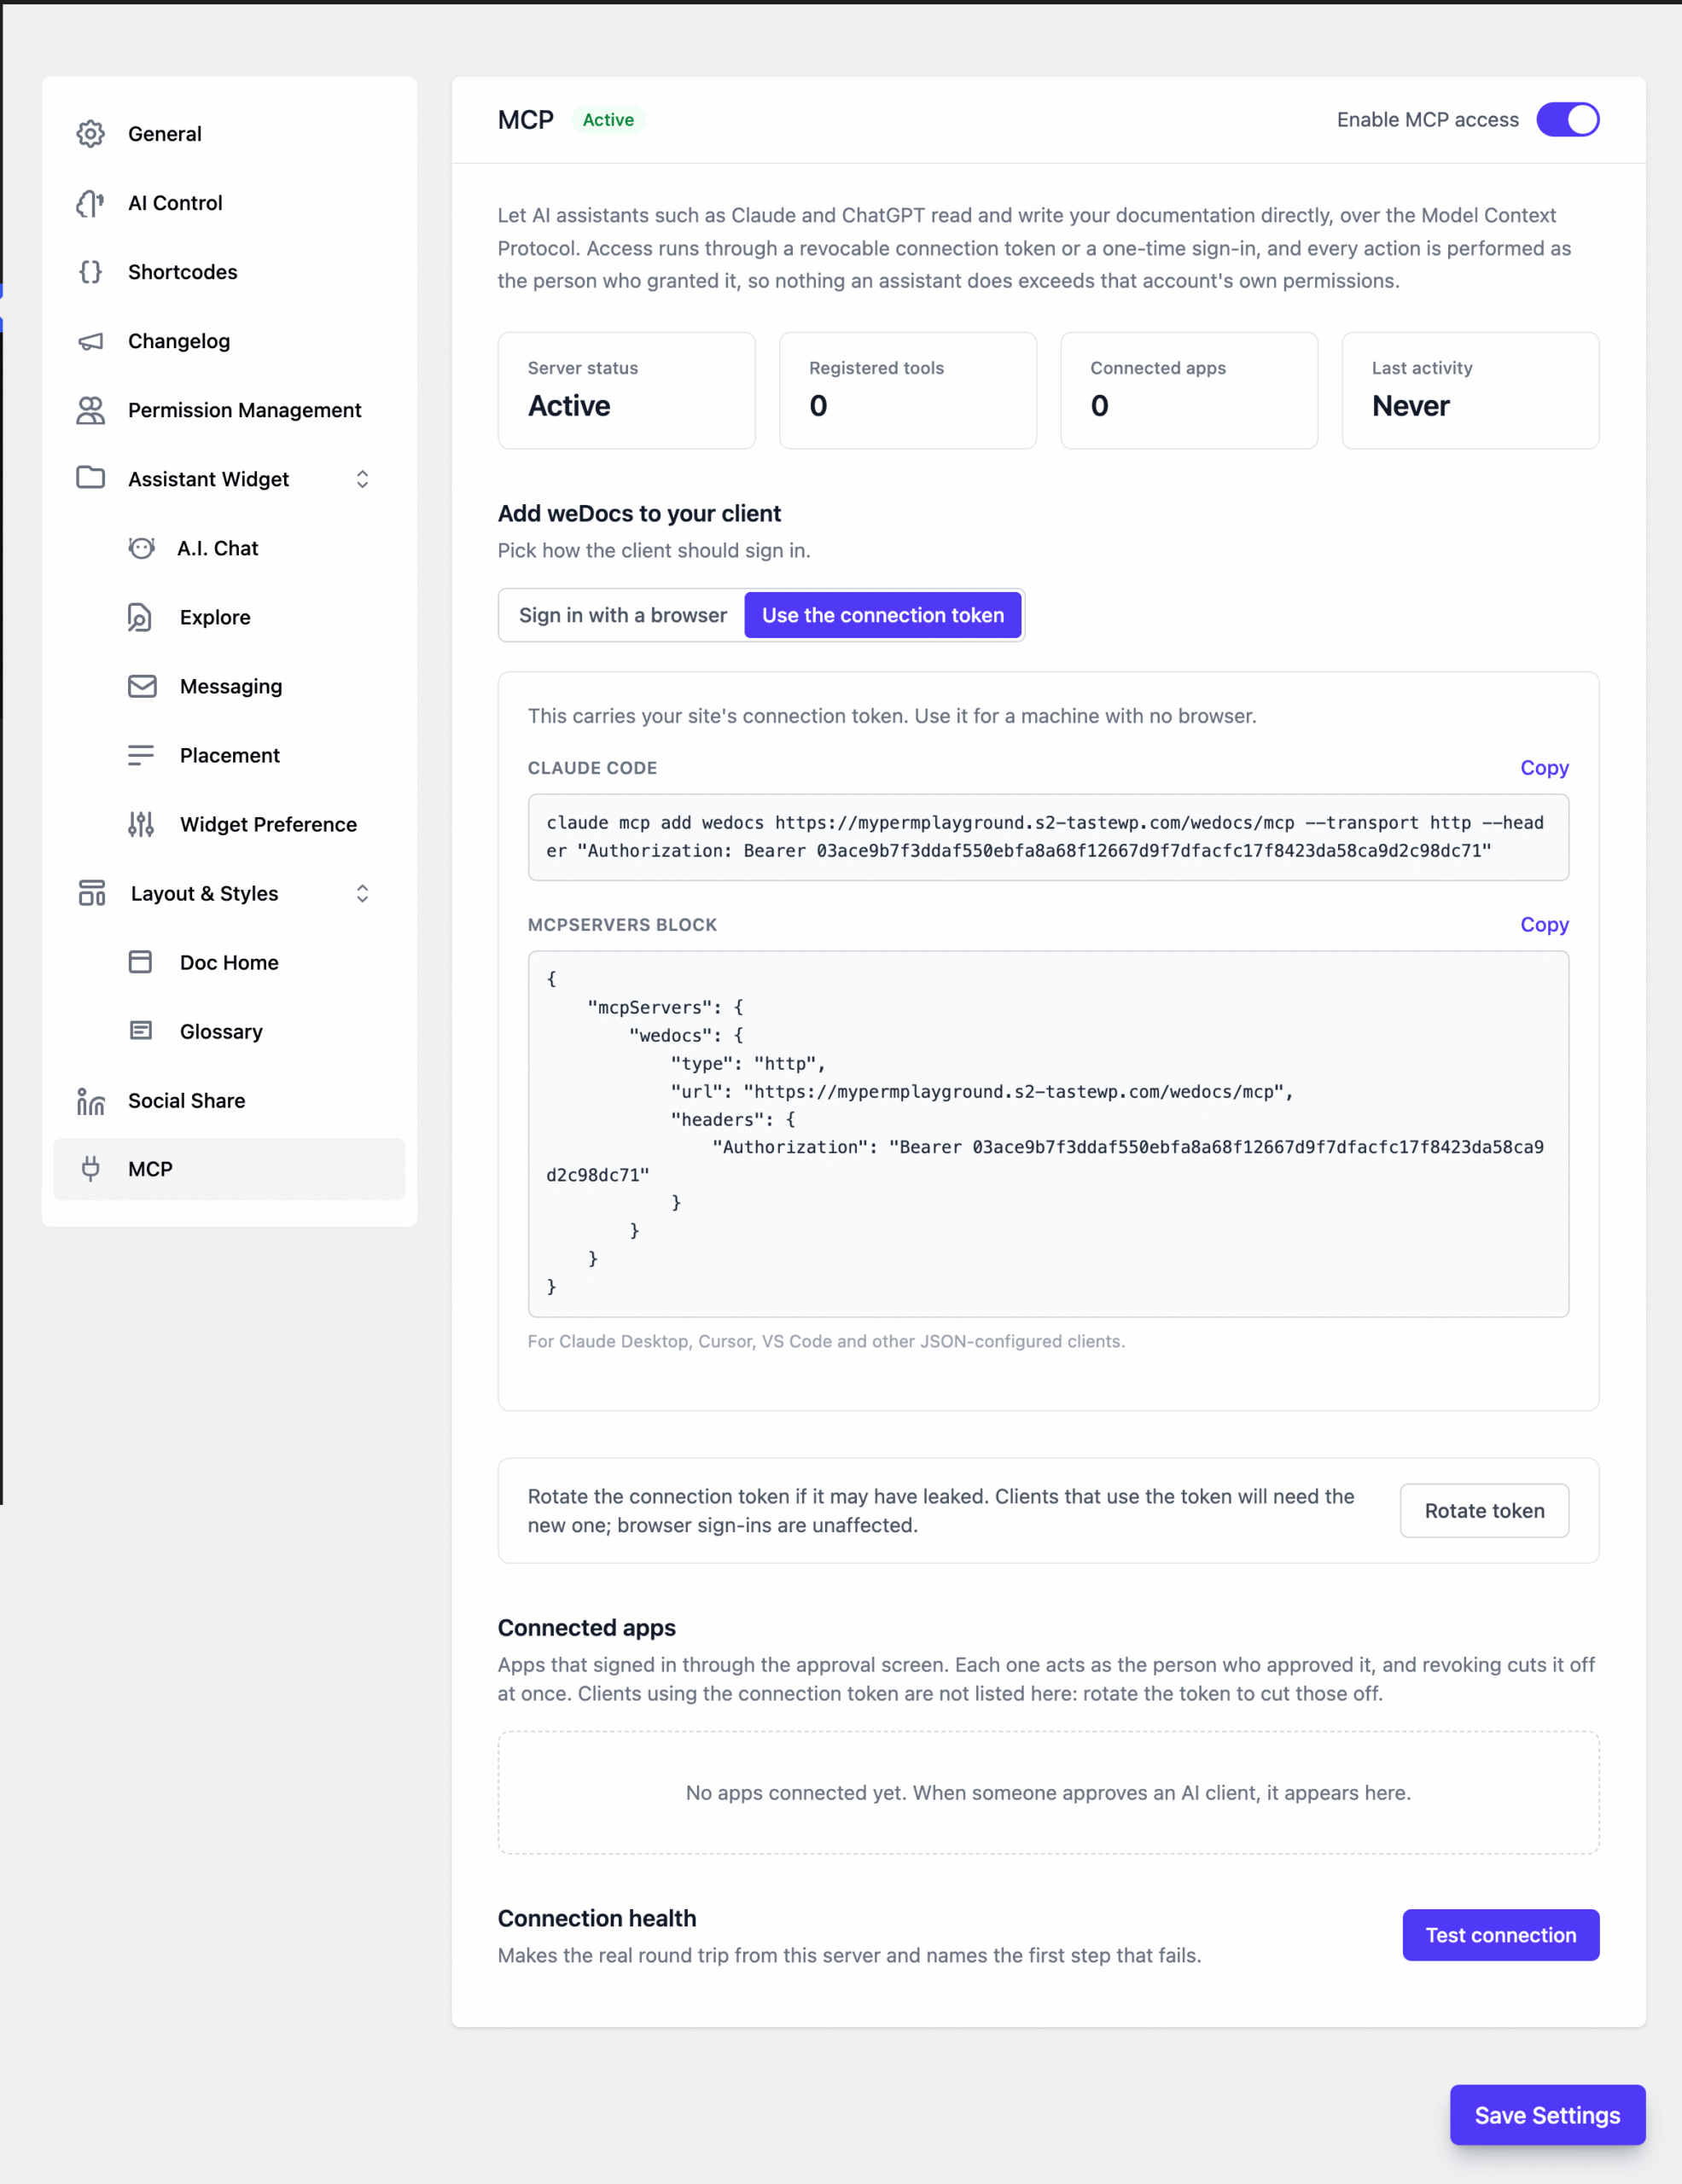
The badge now reads Active, and four cards appear across the top of the page.
- Server status. Whether weDocs is accepting connections.
- Registered tools. How many tools the server exposes to a connected client.
- Connected apps. How many AI clients have been approved.
- Last activity. When a client last used the connection.
Below them sits Add weDocs to your client with two options. Choose the one that matches where your assistant runs.
- Sign in with a browser. The client opens your site’s approval screen and you sign in once. Nothing gets pasted, and no token is exposed. Use this for Claude and ChatGPT in a browser.
- Use the connection token. The client authenticates with a token instead. Use this on a machine with no browser, or for a client configured through a file.
Step 3: Connect Claude with a Browser Sign-In
Keep Sign in with a browser selected and click Copy beside the connector URL.
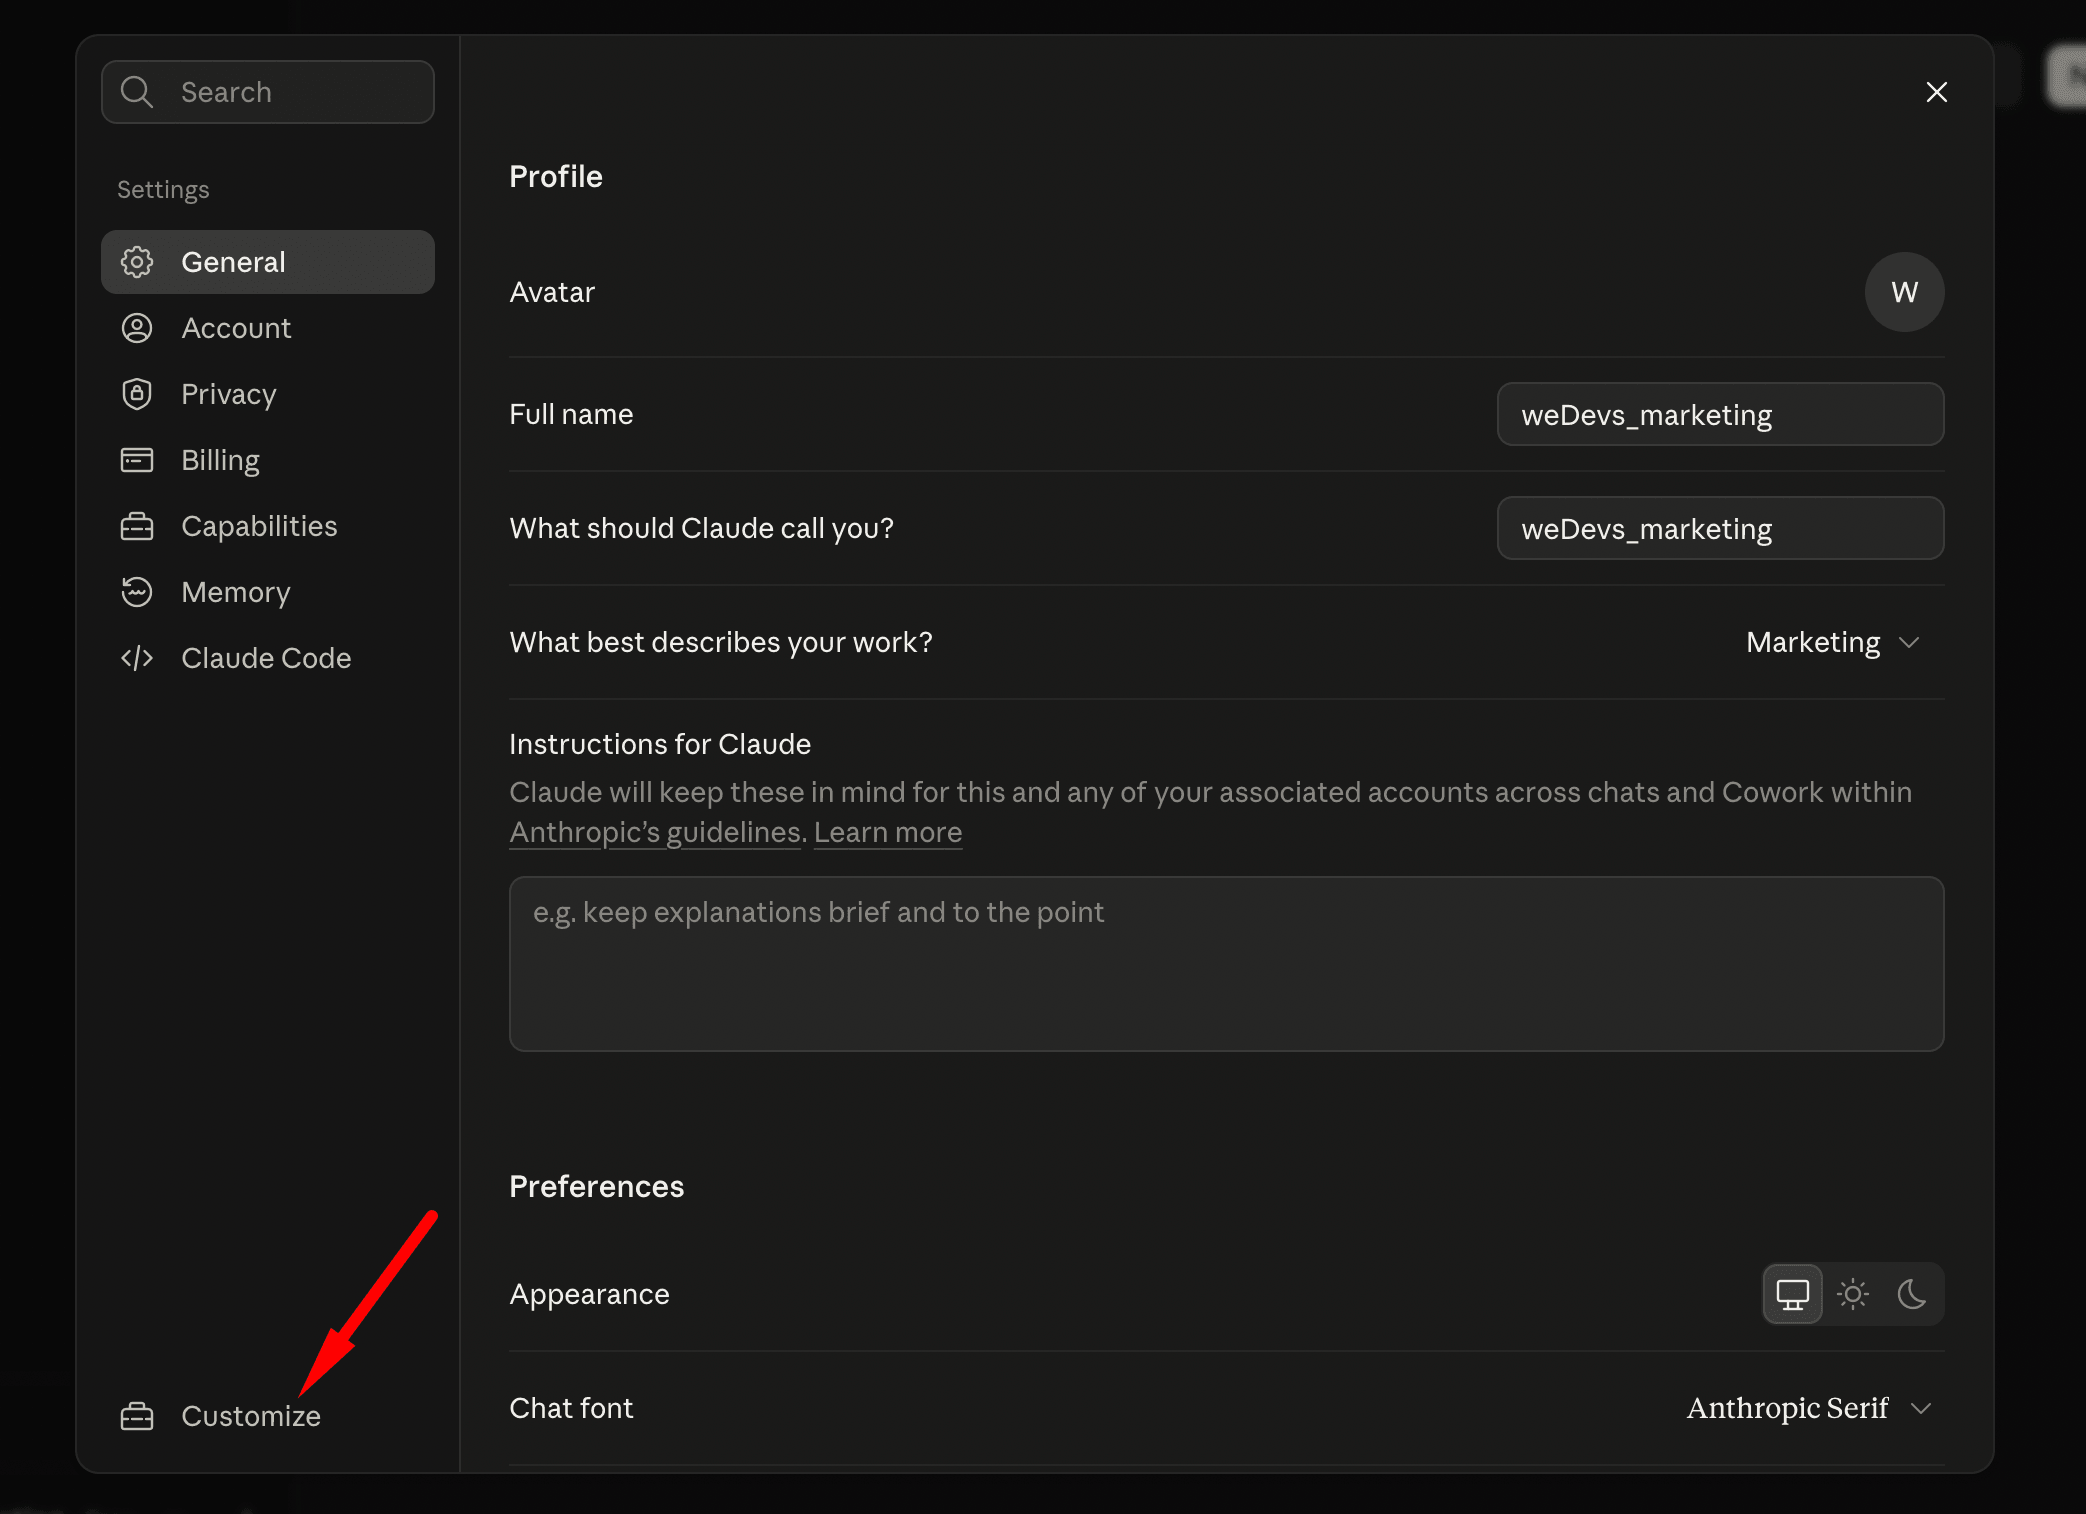
In Claude, open Settings and click Customize at the bottom of the left sidebar.
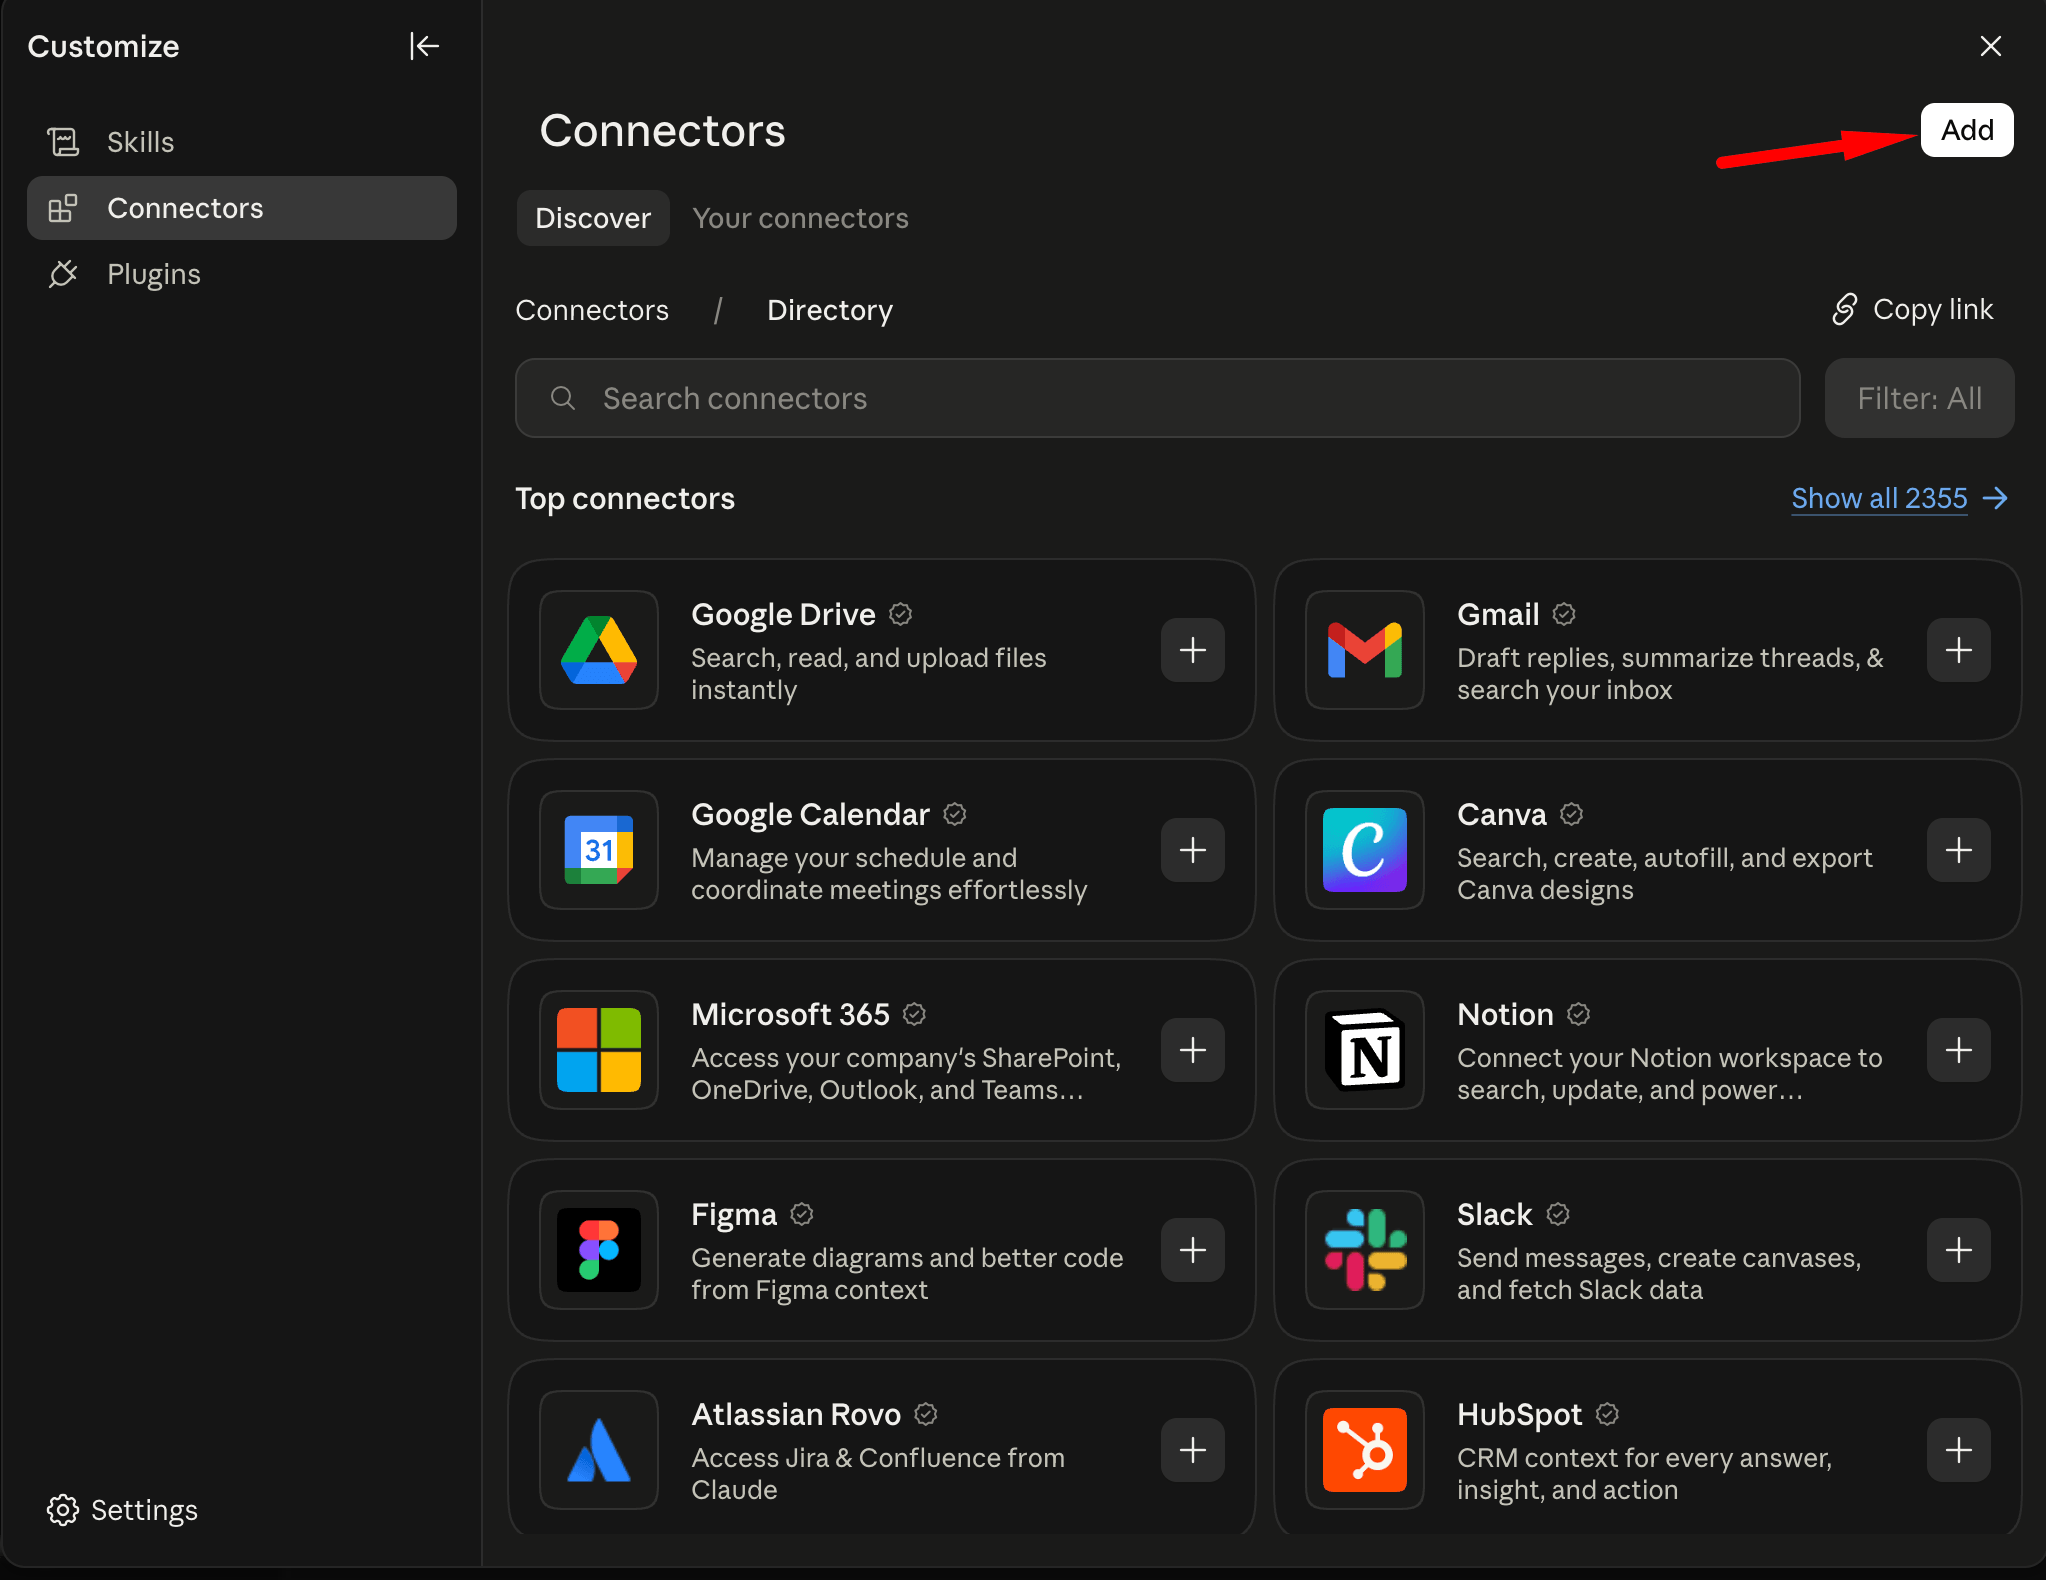
Open the Connectors tab and click Add at the top right of the panel.
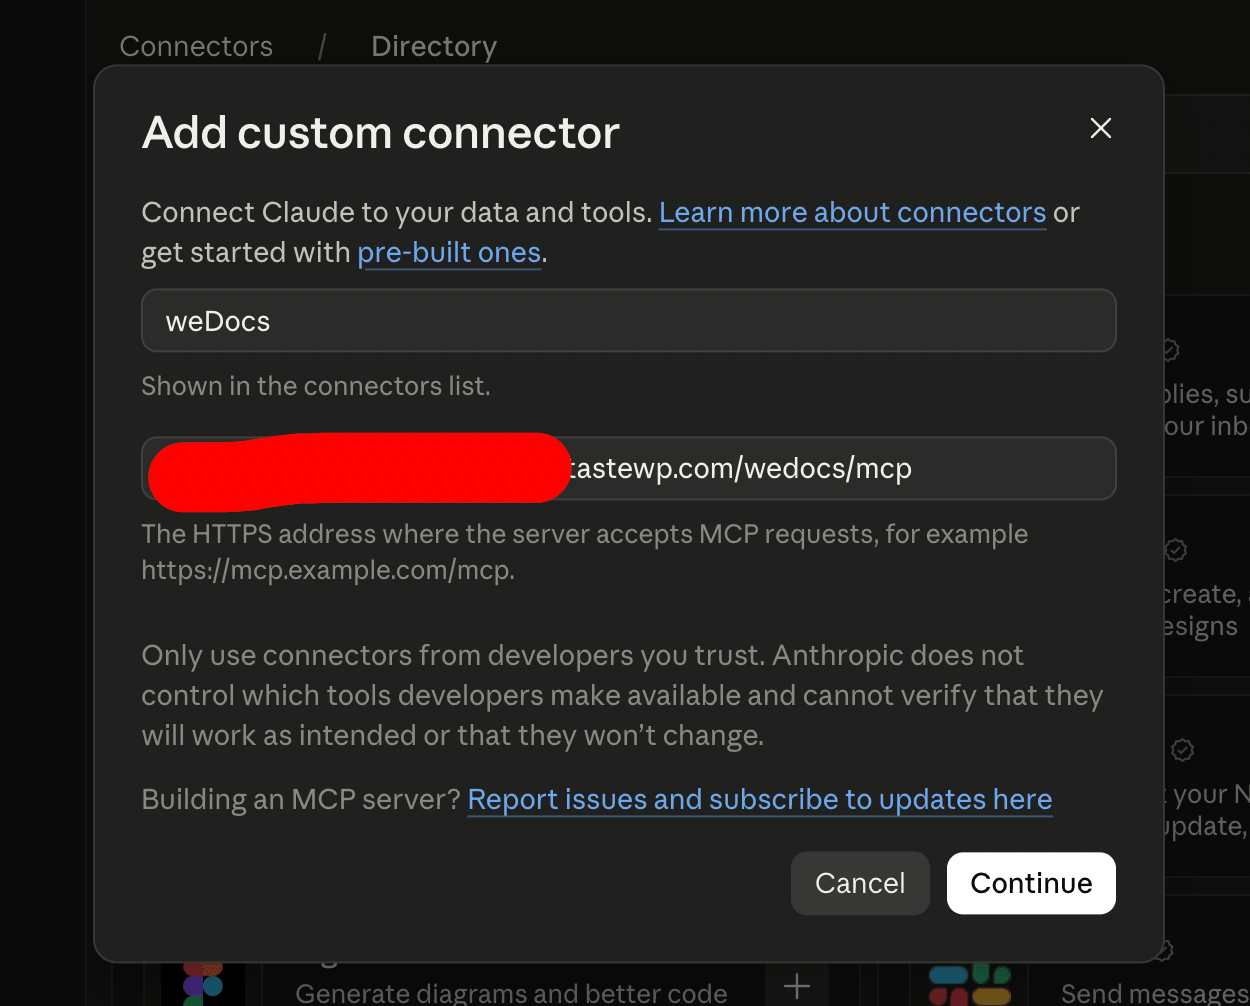
The Add custom connector window opens. Type a name that will show in your connectors list, for example weDocs, then paste the connector URL you copied into the address field.
Click Continue, then approve access when Claude asks you to sign in.
The connection is now live. ChatGPT follows the same shape. Open its Connectors settings, add a new connector, enter a name, paste the same connector URL, save, then approve access when prompted.
Step 4: Connect a Client with the Connection Token
Select Use the connection token instead when the client has no browser to sign in with. weDocs gives you two ready-made snippets.
- Claude Code. A single command carrying the URL, the transport, and an authorization header. Copy it and run it in your terminal.
- mcpServers block. A JSON block for Claude Desktop, Cursor, VS Code, and any other client configured through a file. Copy it into that client’s MCP configuration.
Both snippets already contain your site’s token, so treat them like a password. Anyone holding one can act on your documentation with the permissions of the account that generated it.
Step 5: Test the Connection
Scroll to Connection health at the bottom of the page and click Test connection.
This makes a real round trip from the server rather than checking a setting, and it names the first step that fails. Run it whenever a client reports a problem, because it tells you straight away whether the fault sits with weDocs or with the client.
Step 6: Manage and Revoke Access
Two areas control who keeps access.
Connected apps lists every client that signed in through the approval screen. Each one acts as the person who approved it, and revoking one cuts it off immediately. Clients using the connection token do not appear in this list.
Rotate token issues a new connection token. Use it if a token may have leaked. Every client using the old token stops working until you give it the new one, while browser sign-ins keep working untouched.
So the two methods are revoked in two different places. Revoke a browser client under Connected apps. Cut off a token client by rotating the token.
Give Your Assistant the Source, Not a Copy
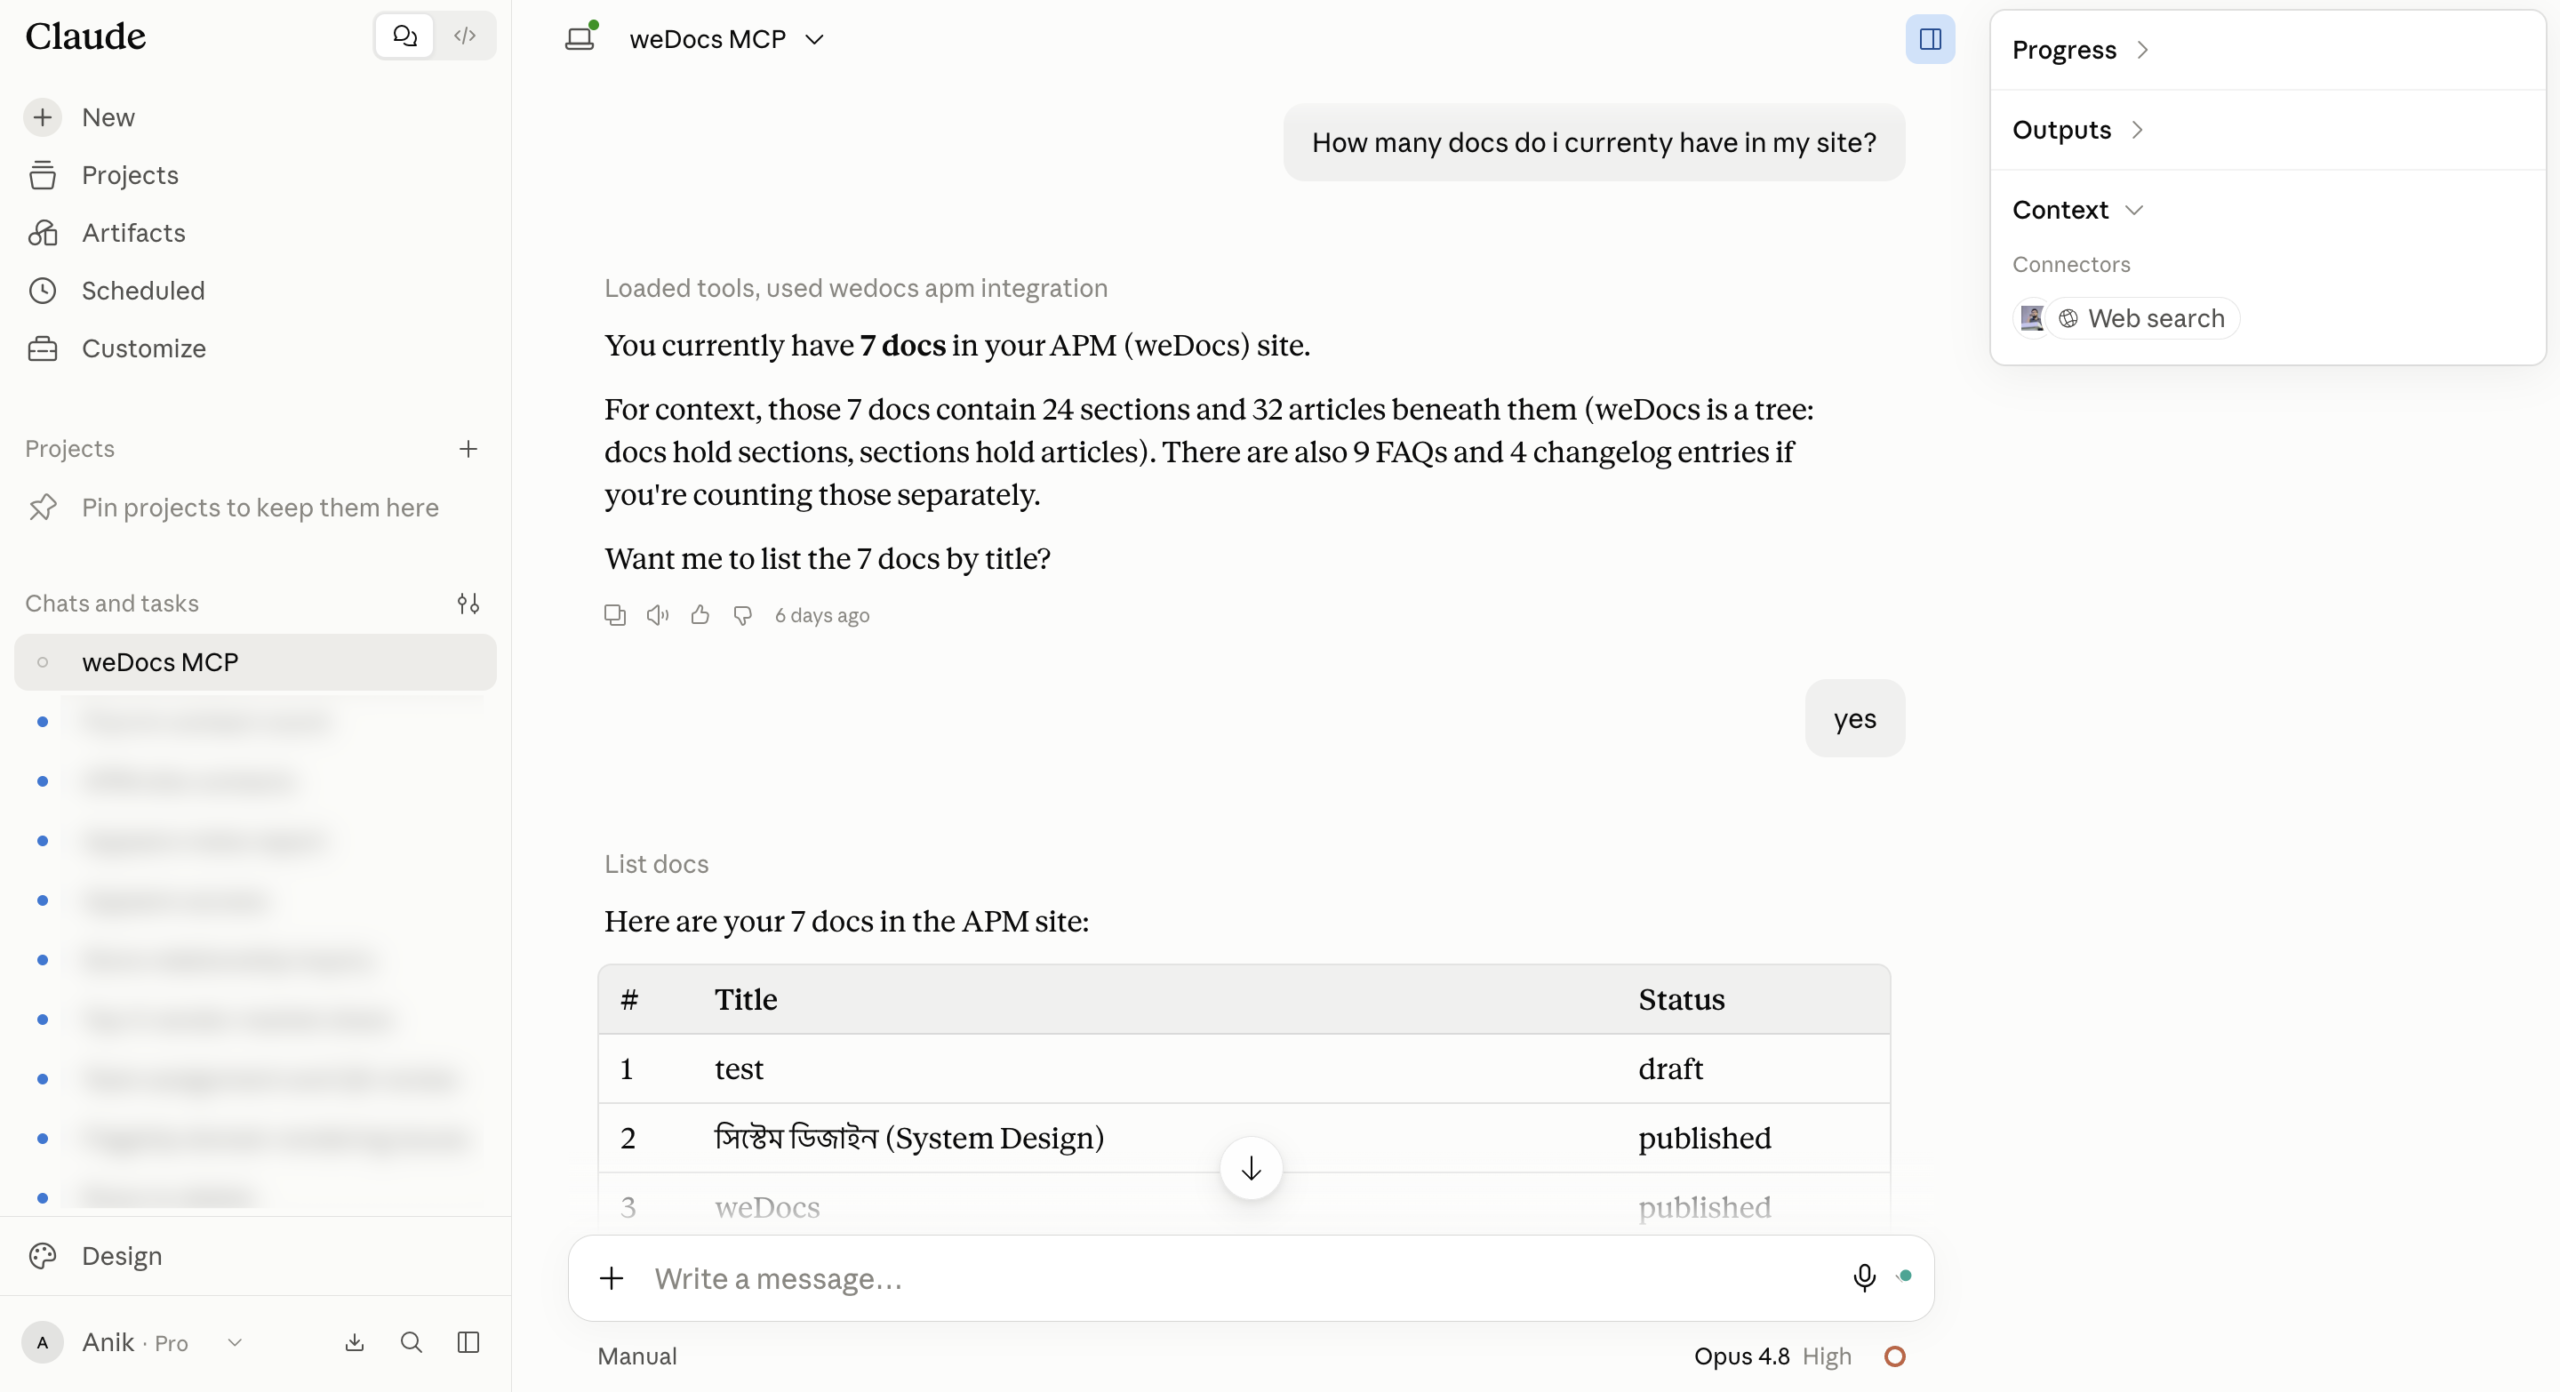
Pasting documentation into a chat window gives an assistant a snapshot that is wrong by next week. Connecting over MCP gives it the live source, so what it reads is what your readers see.
Start with a browser sign-in, since it involves no token to store or leak, and keep the connection token for machines that cannot open a browser. Run Test connection once after setup so you know the round trip works before you rely on it.
Check the Connected apps list from time to time. Every entry there can act with the permissions of whoever approved it, so anything you no longer recognise is worth revoking.